Introduction
Creating Assets on the platform is a quick and easy process. the steps involved are similar to those outlined in the article Creating and Editing Single Items on the platform.
There is other information you can add when creating an Asset, which may be useful for displaying and reporting on. The items should be created before the Asset, if needs be. This information includes:
1. Cost Centers,
2. Asset Groups,
3. Categories and
Creating Assets
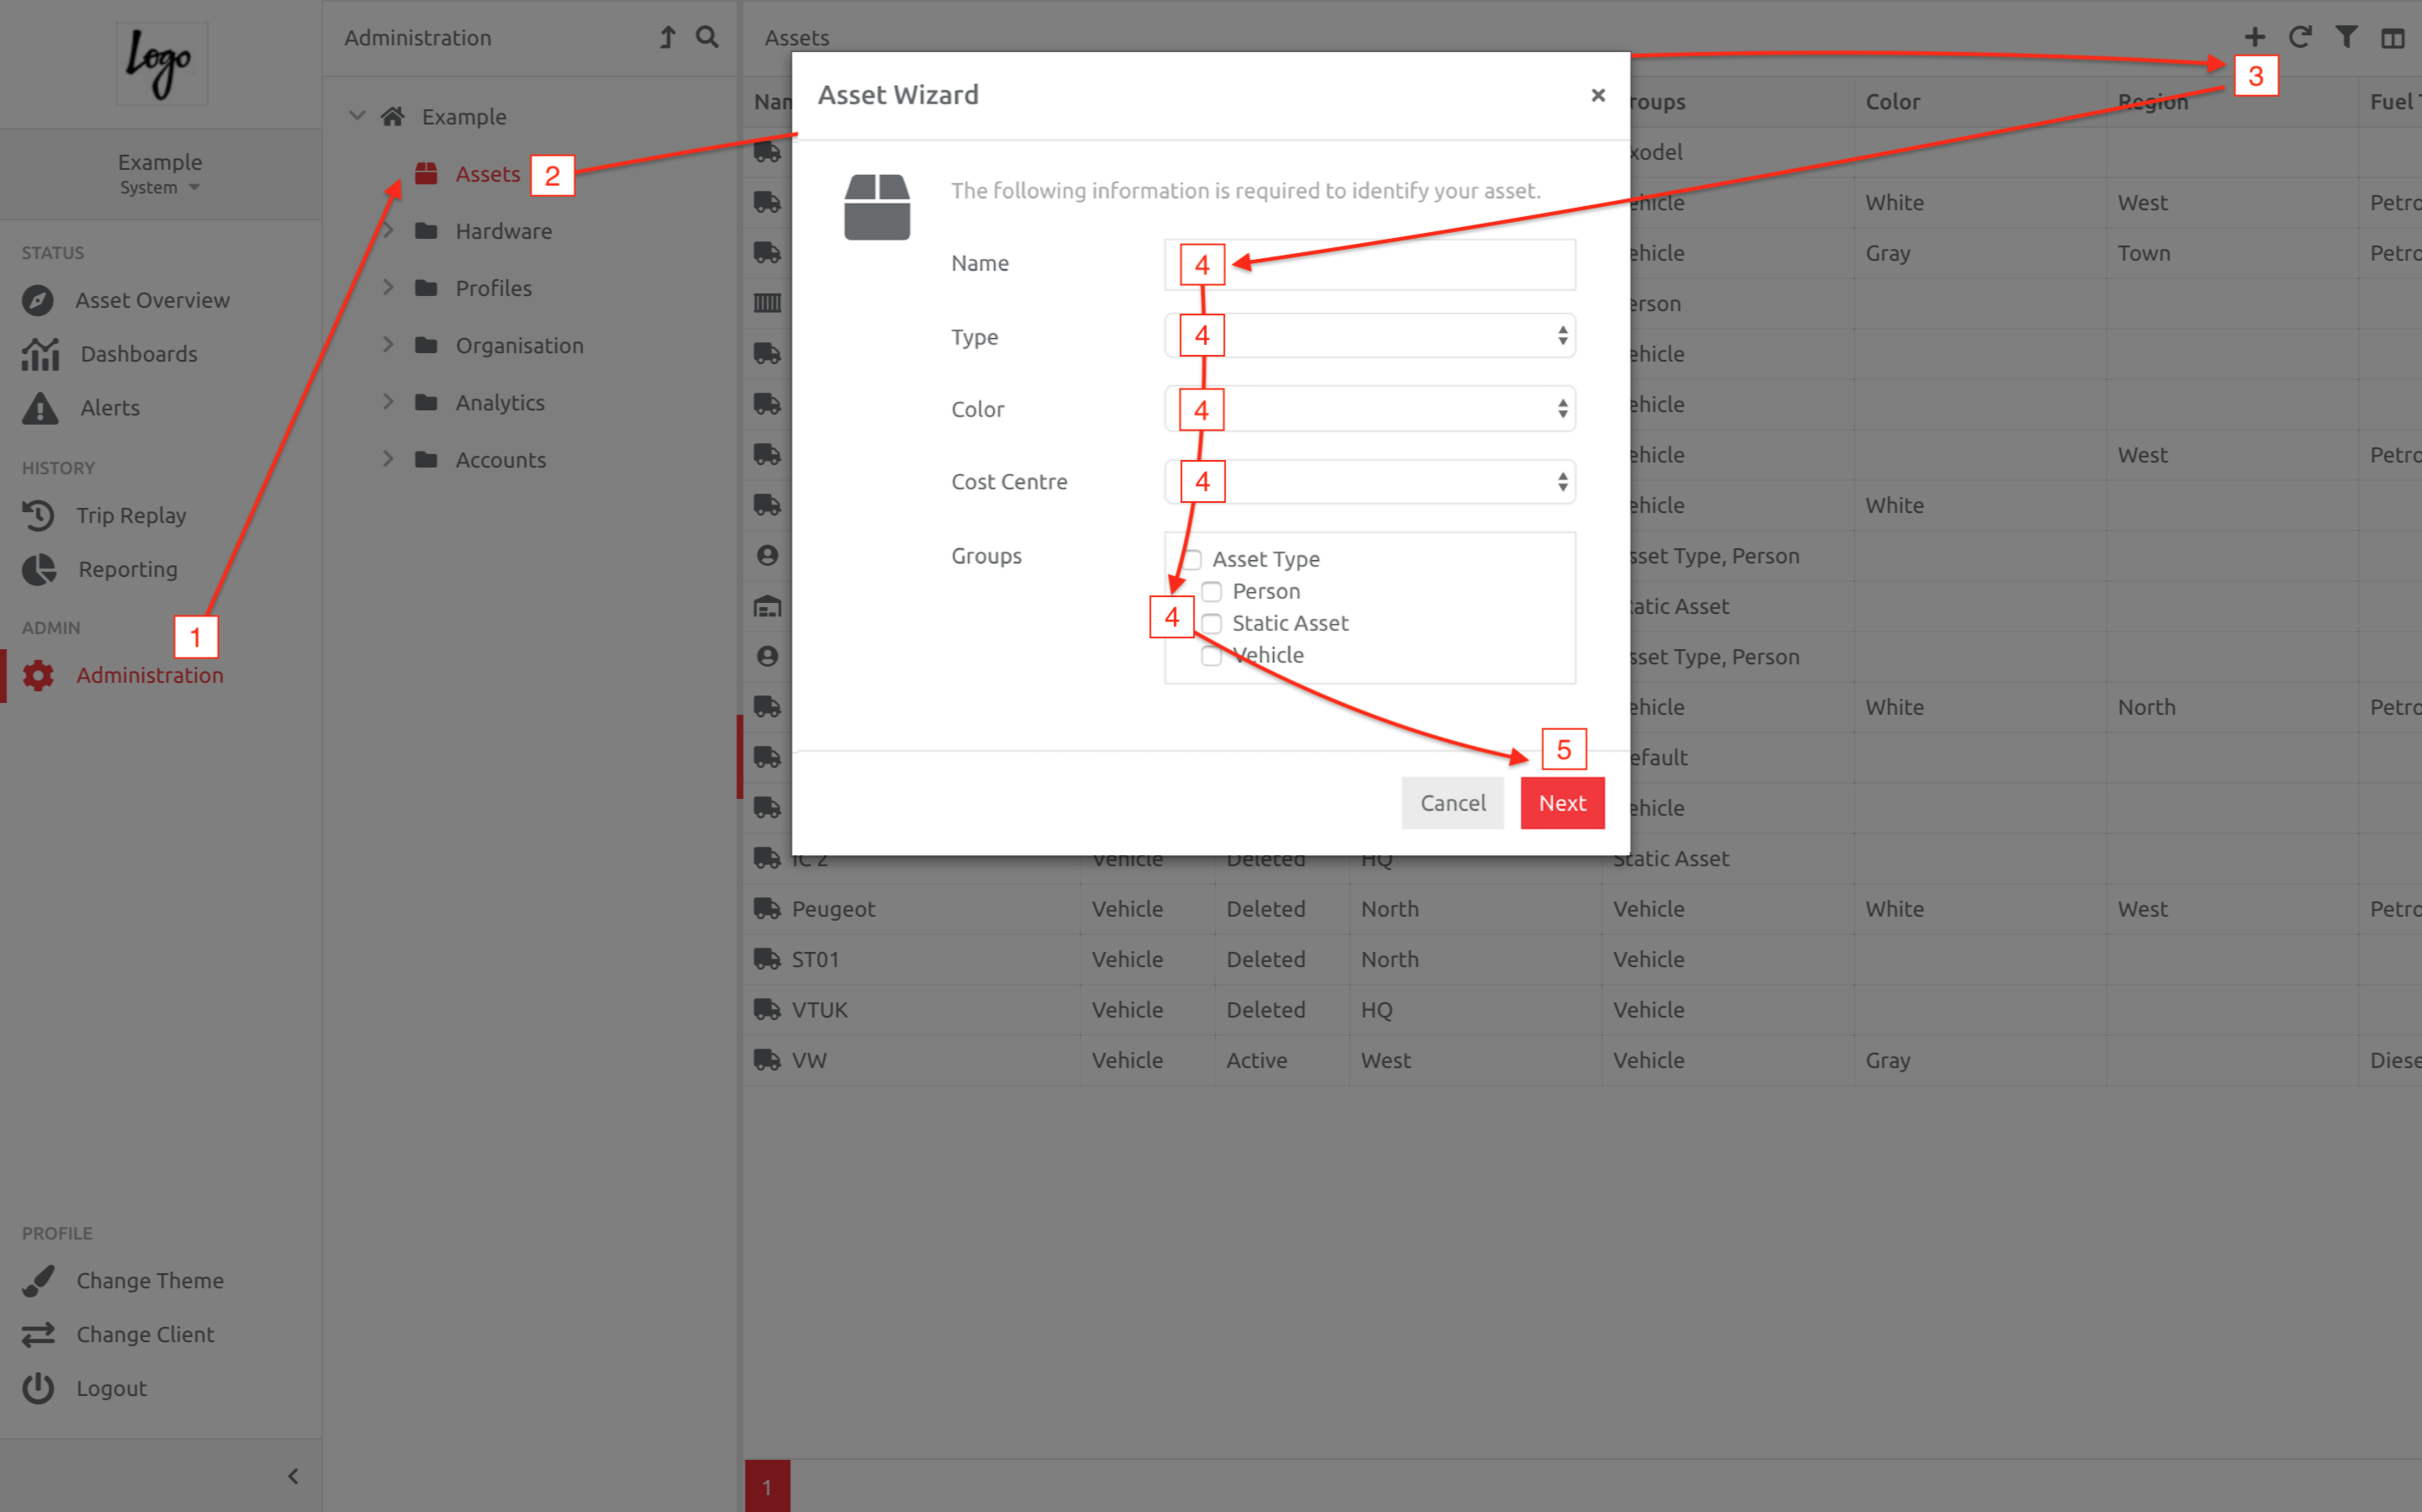
To create Assets:
1. Go to Administration,
2. Choose the Assets section under the Client,
3. Click the Plus button,
4. Enter the information in the Wizard,
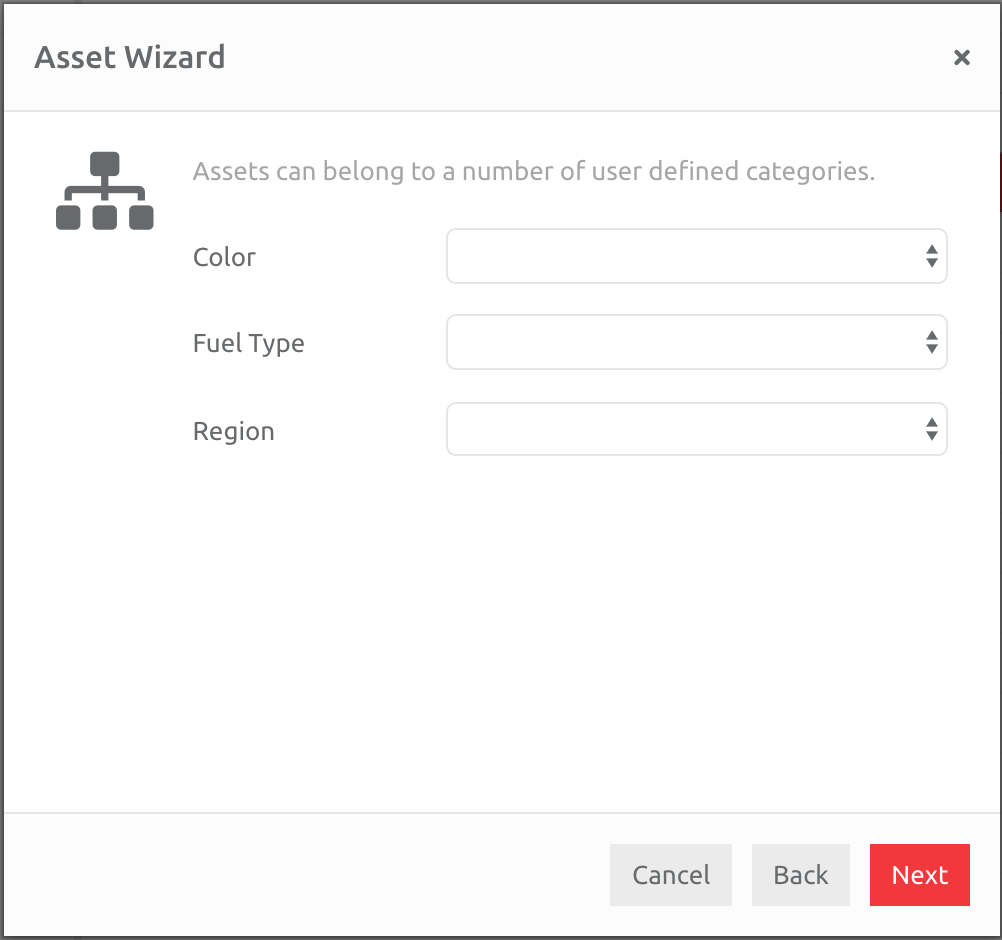
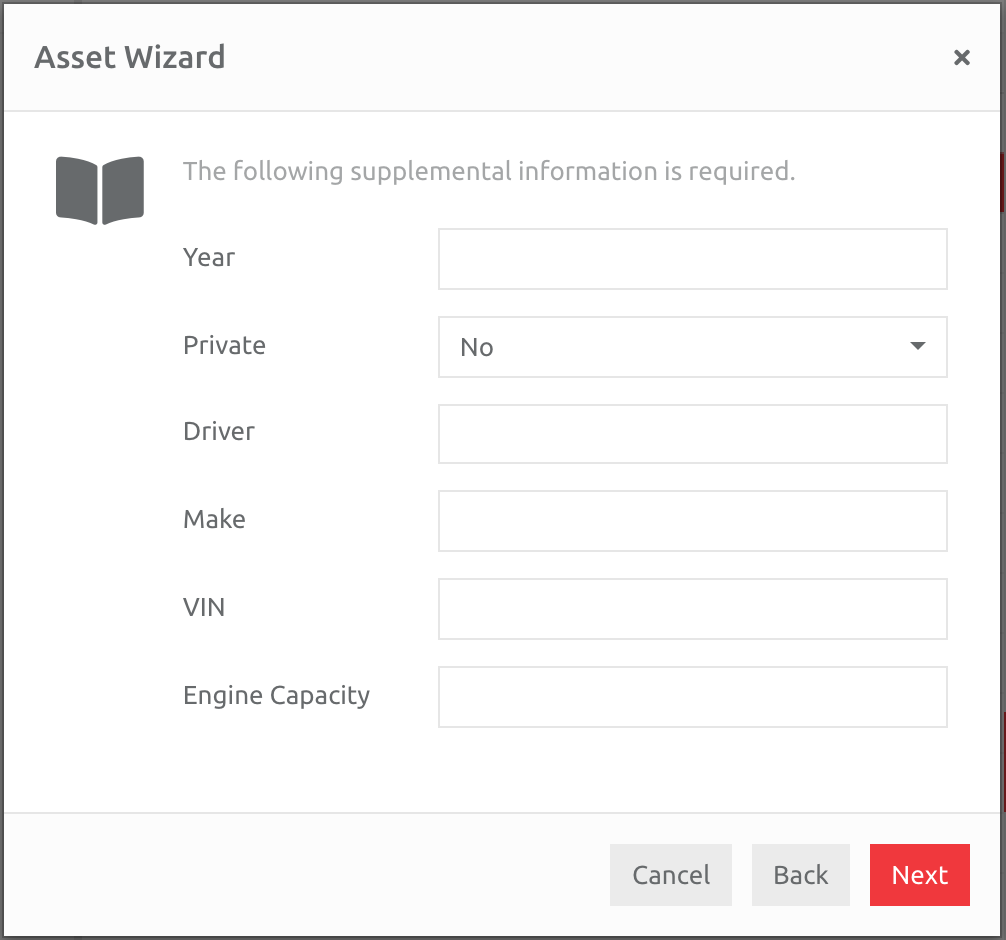
5. Click Next. Enter the information in the wizard, as requested, for Asset Categories and Custom Fields.
Asset Categories
Custom Fields
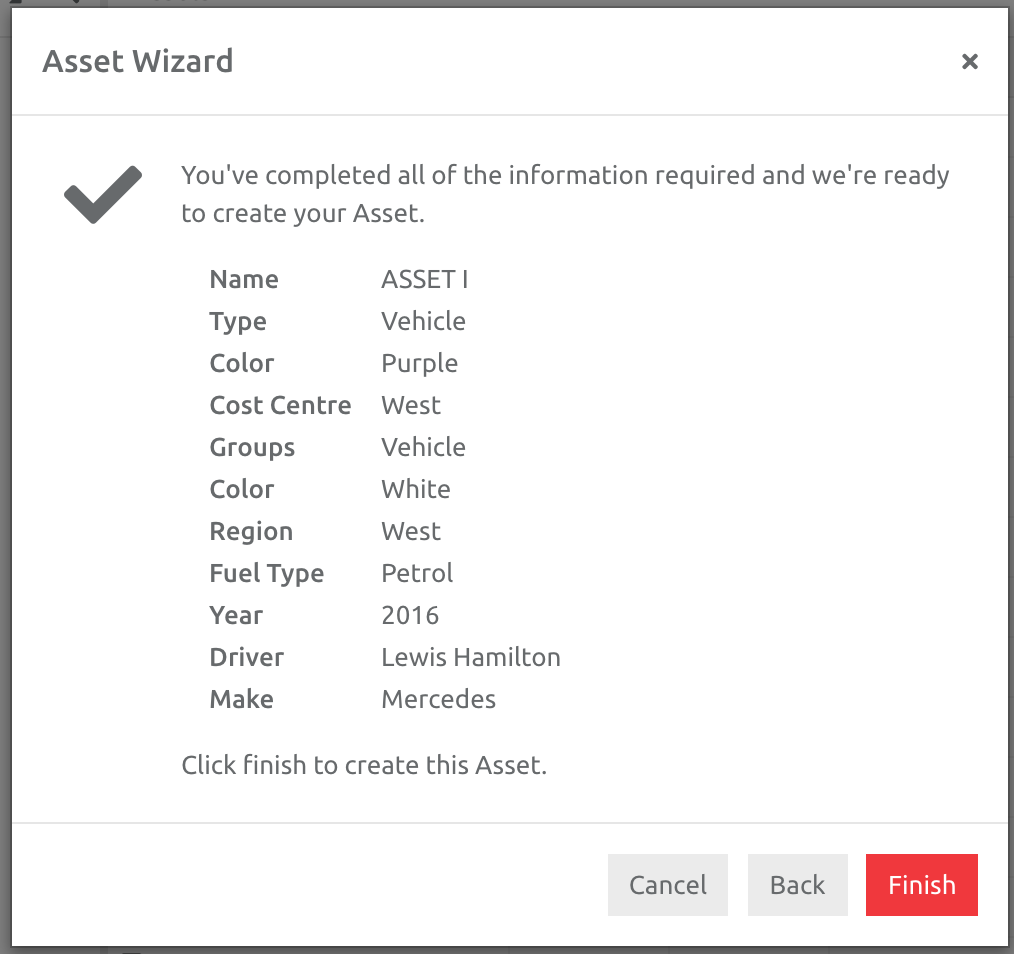
Once completed, a summary of the information entered will appear on the screen. Make sure it is correct before choosing Finish. Otherwise go Back and edit the information as required.
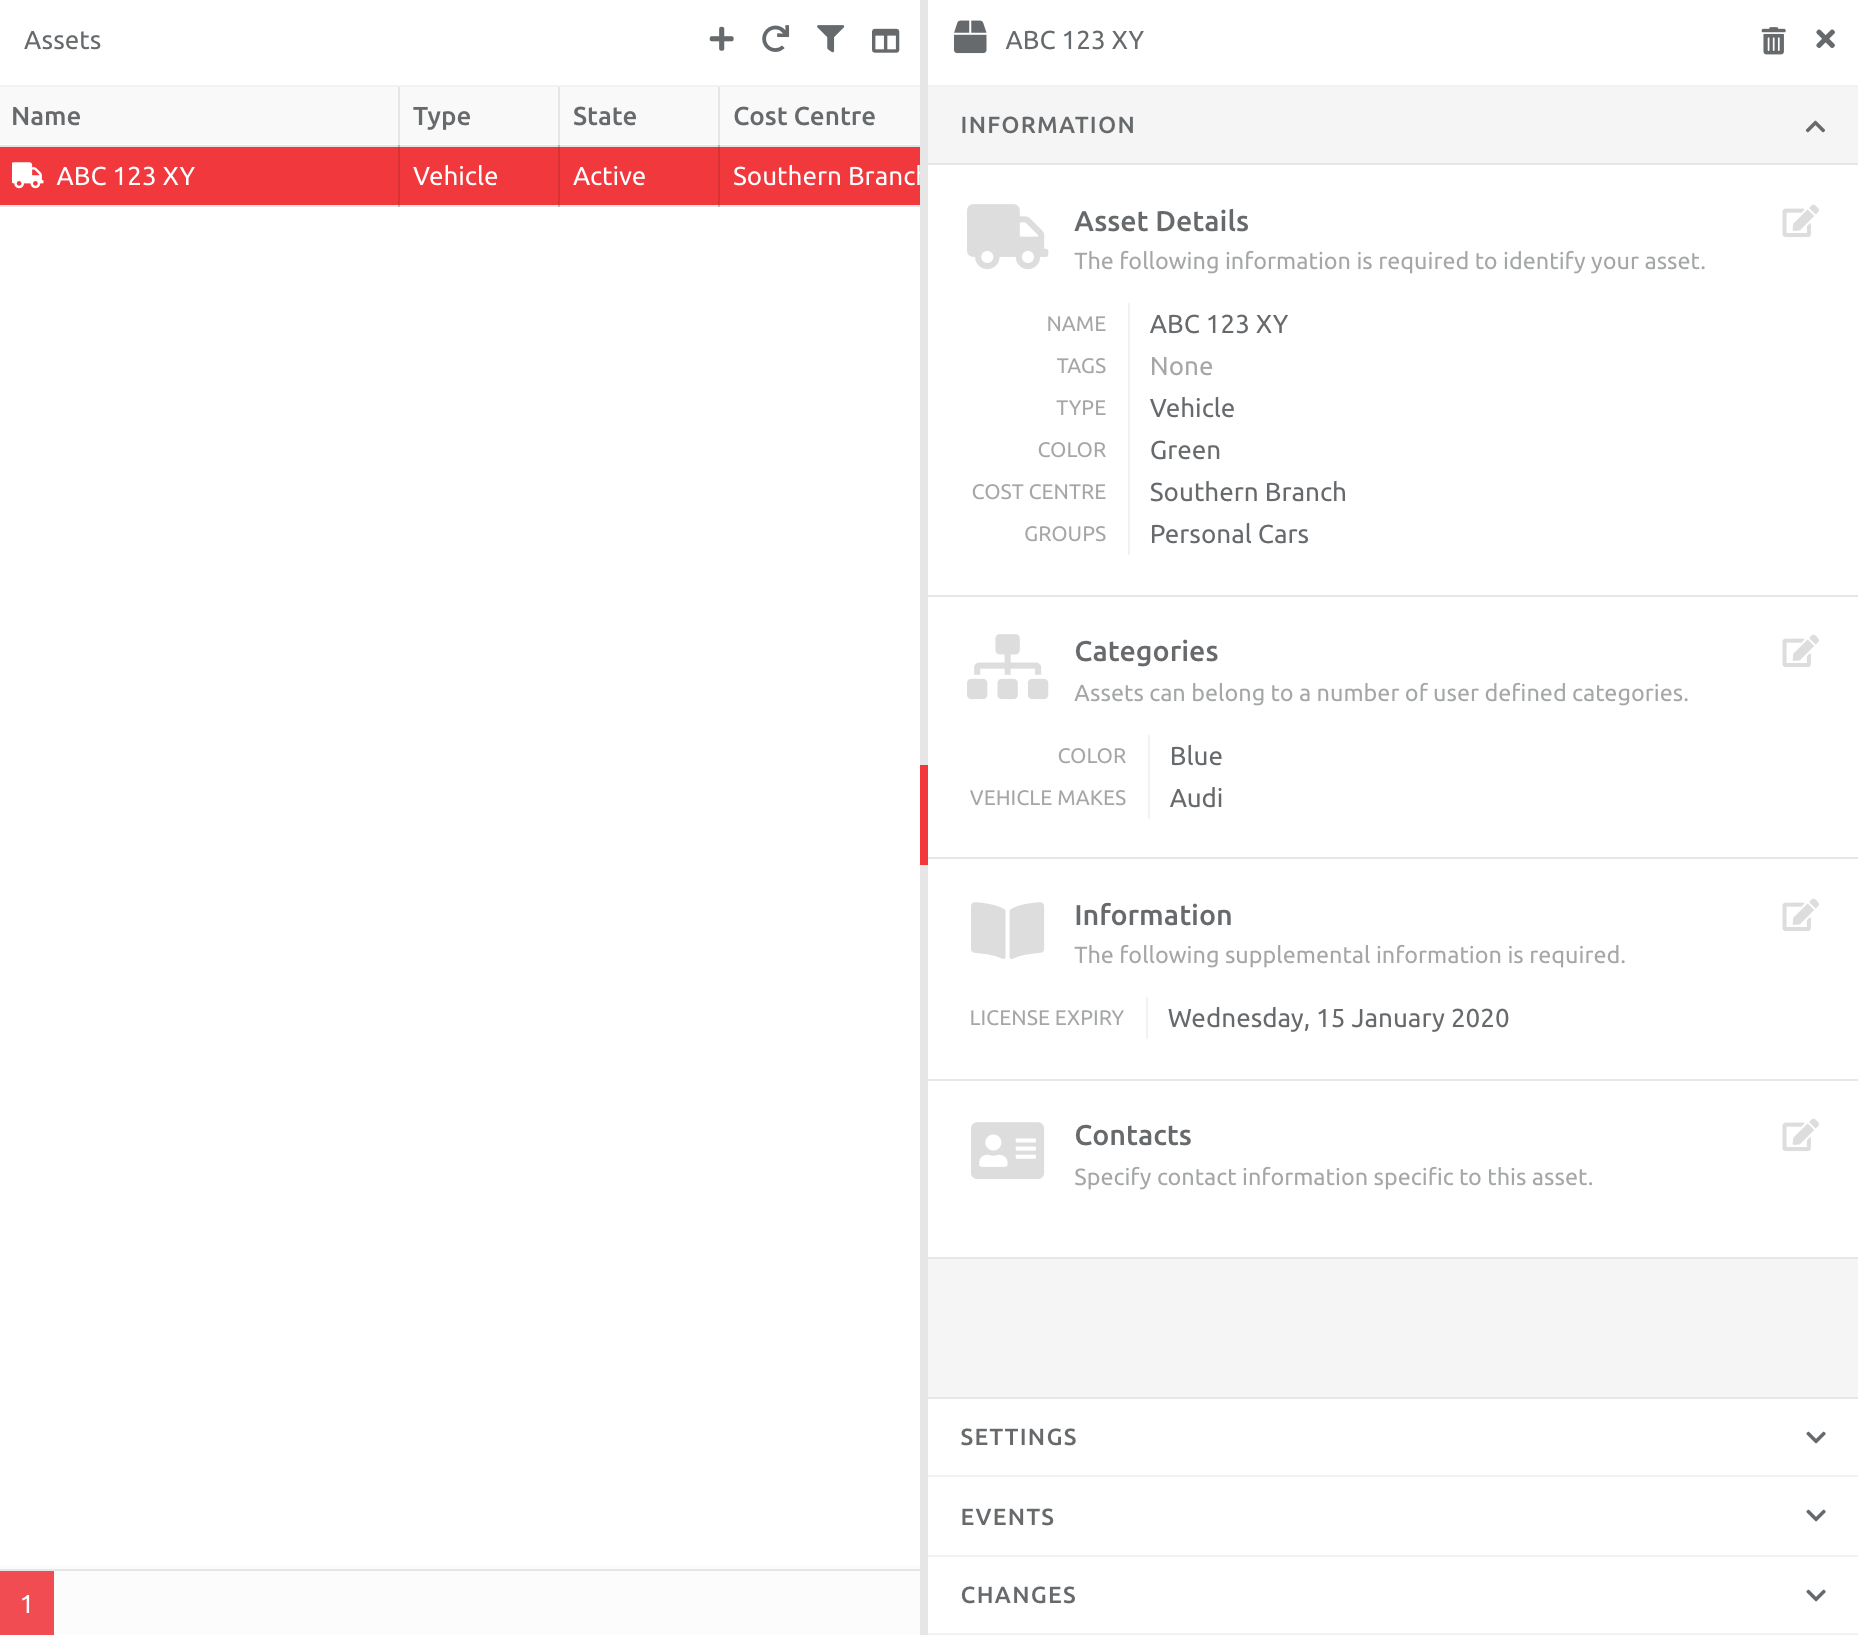
The Asset will appear in the list and it's Information will be displayed:
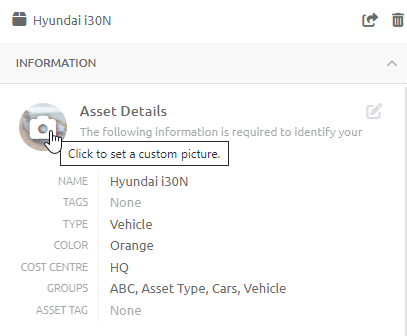
Changing the Asset Icon (Image)
The Asset Icon can be changed to an image of choice:
- Navigate to Administration and click on the Asset Folder
- Select an Asset and navigate to INFORMATION
- Click on the Asset Icon, and the option to add an alternative image will be provided
- Upload an image, and follow the prompts and directions
- Click on OK
- The new image will be added to the Asset
You can now edit the Information, Settings (Profiles and Sharing) and Events on the Asset, either as a singular item, or in bulk (see this article).
Editing the Assets from the Overview Screen
You and your Users are also able to edit Asset Names and Color of an Asset on the Overview page. Only Users at Client level with a User Role allowing them to edit (Create) an Asset will be able to do so on the Overview screen.
To see how this function works, follow this link: Editing Asset Information
Comments
0 comments
Please sign in to leave a comment.