Introduction
Zones are polygons (or polylines) that define a specific geographic location on the map. When Assets enter or exit Zones, Events are created that can be used to trigger Alerts. A zone can have a proximity warning, which is a circular area around the zone. Events are also created for an Asset entering and exiting the proximity of a zone, which can also be used to create Alerts.
Zones can also be used to set speed limits for certain geographic areas.
There are three types of zones in the platform, as described below:
| Zone Type |
Color |
Overview |
| Location |
Blue |
The name of the Location appears in the telemetry, and overwrites the address where the Asset is. |
| No Go |
Red |
The normal street address appears in the telemetry. |
| Keep In |
Green |
The normal street address appears in the telemetry. |
Users are able to view the Zones in a Client, whether in Zone Groups or not, and create new Zones from the Administration section.
Create a Zone
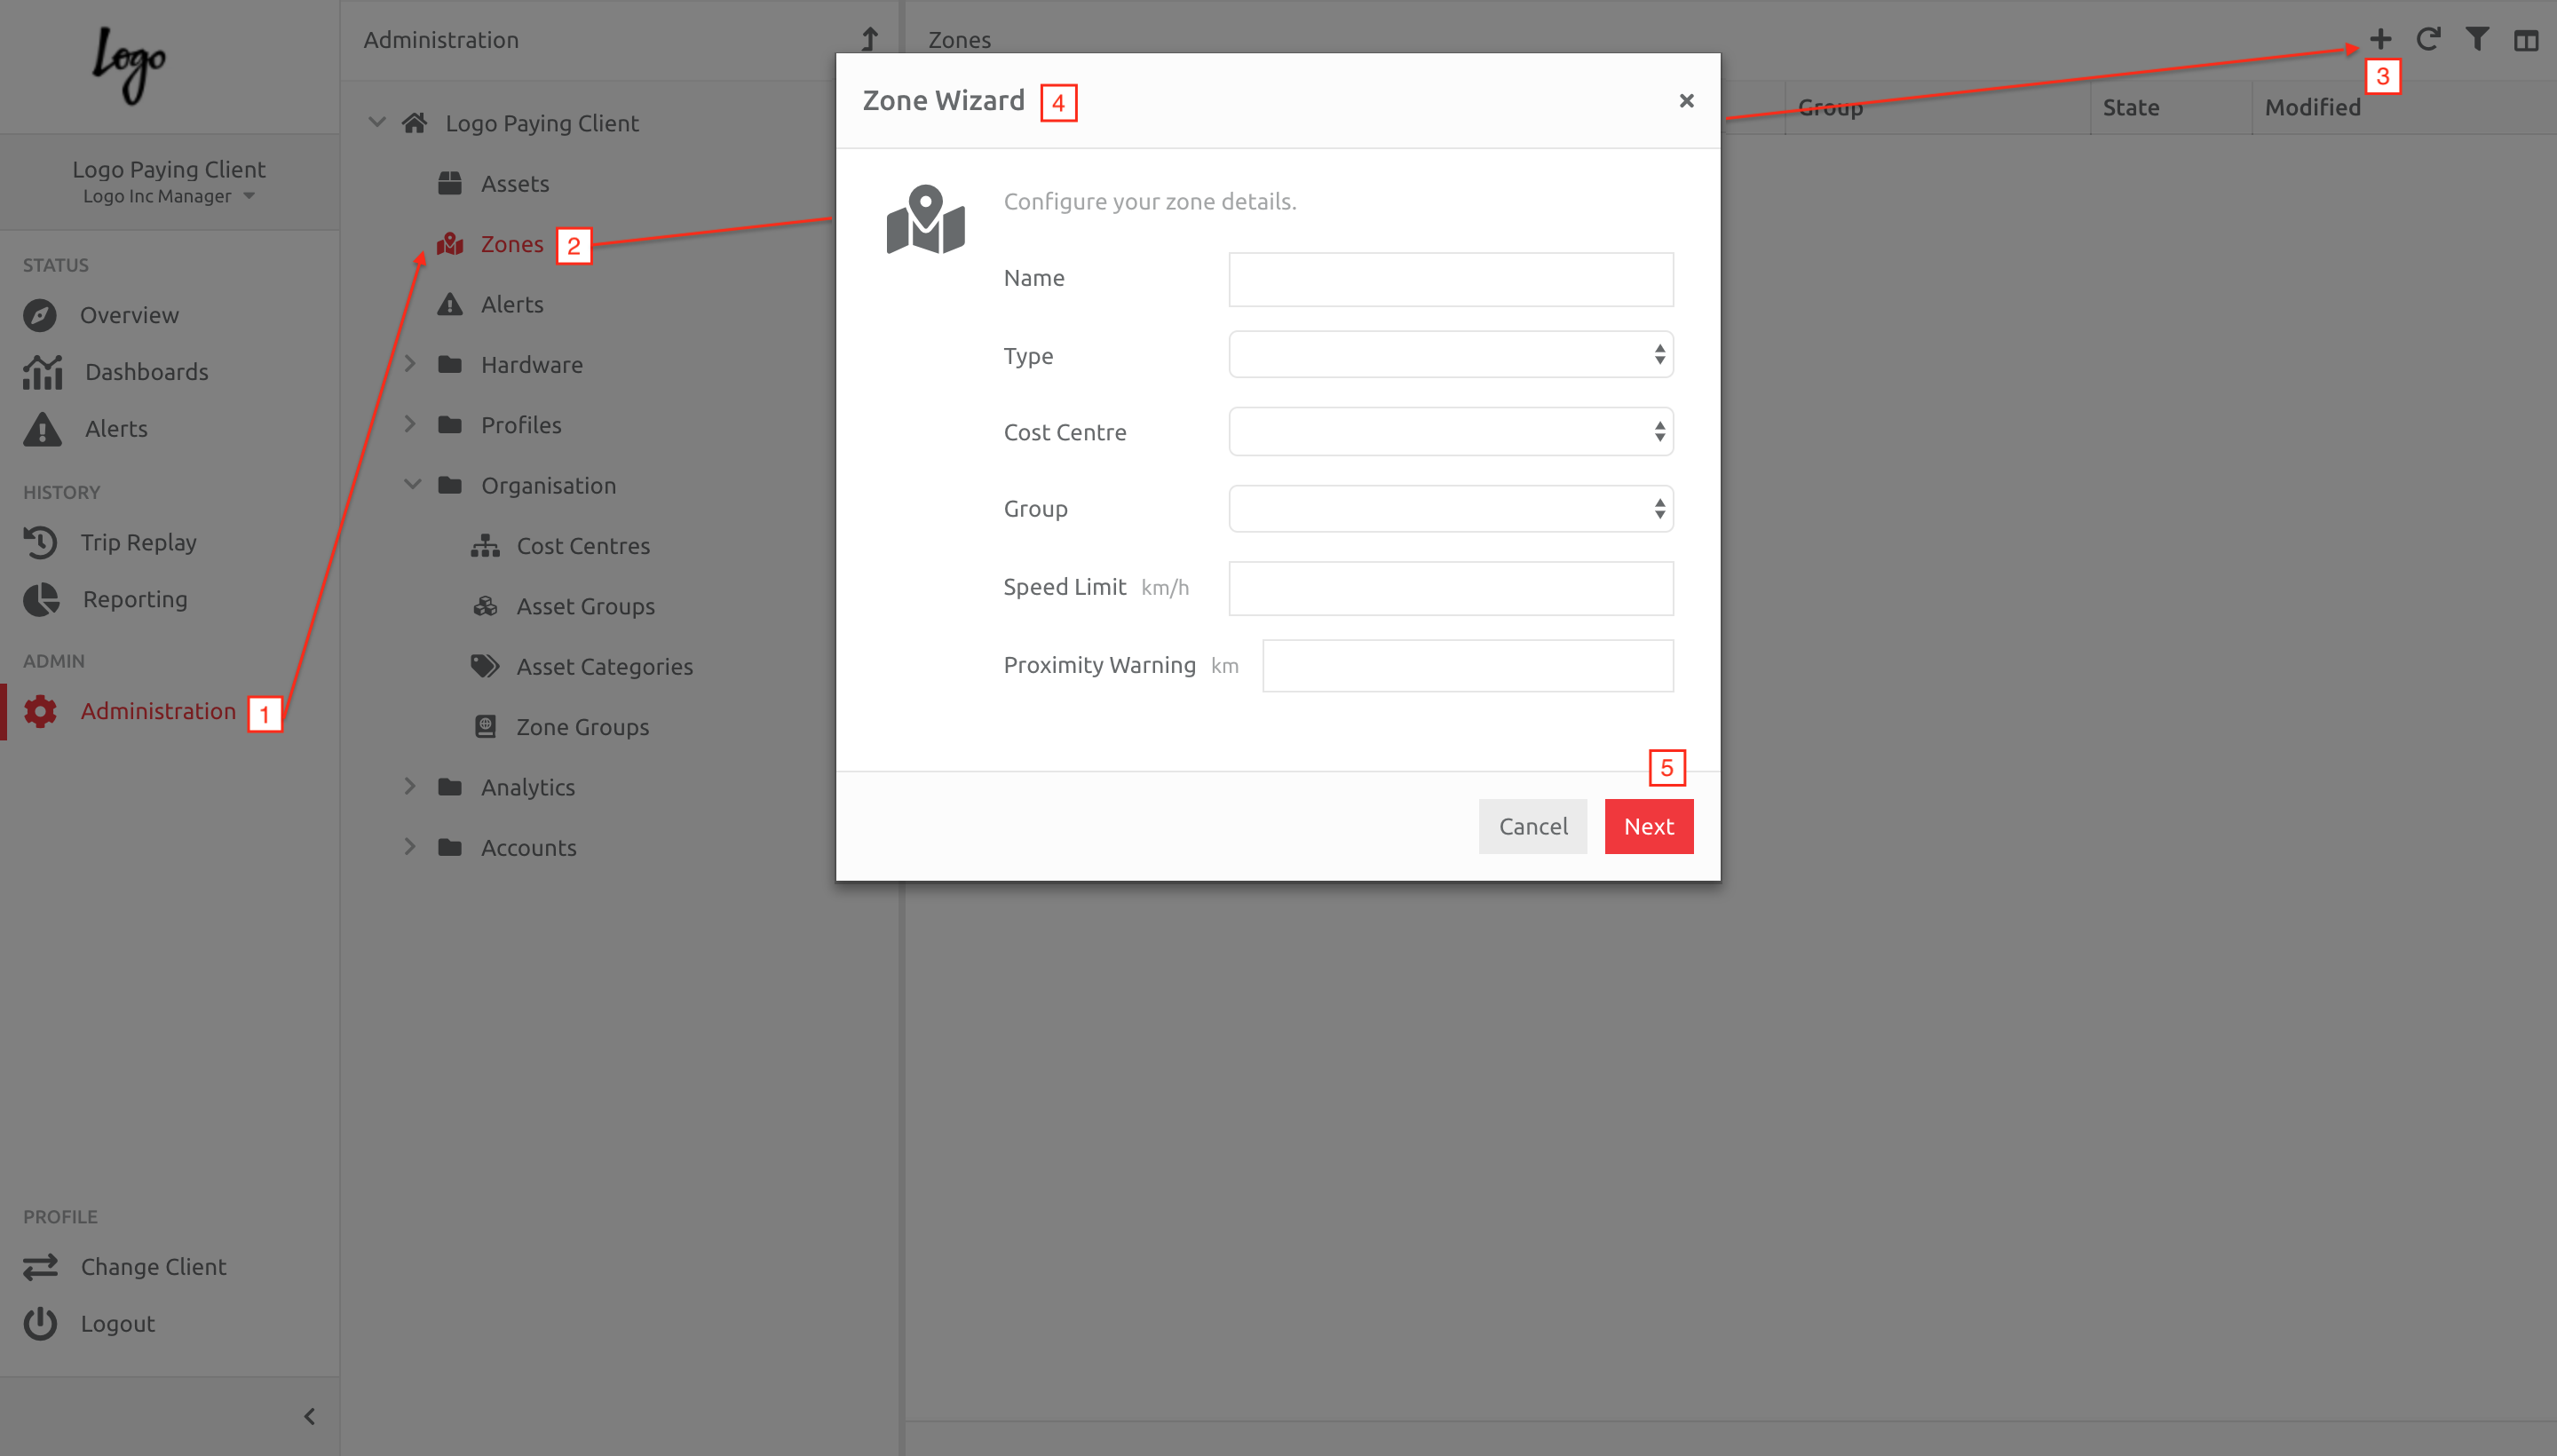
1. Navigate to Administration,
2. Choose Zones under the Client in question,
3. Click the Plus button,
4. Enter the information in the Wizard, including whether a speed limit and proximity warning are needed,
5. Then click Next.
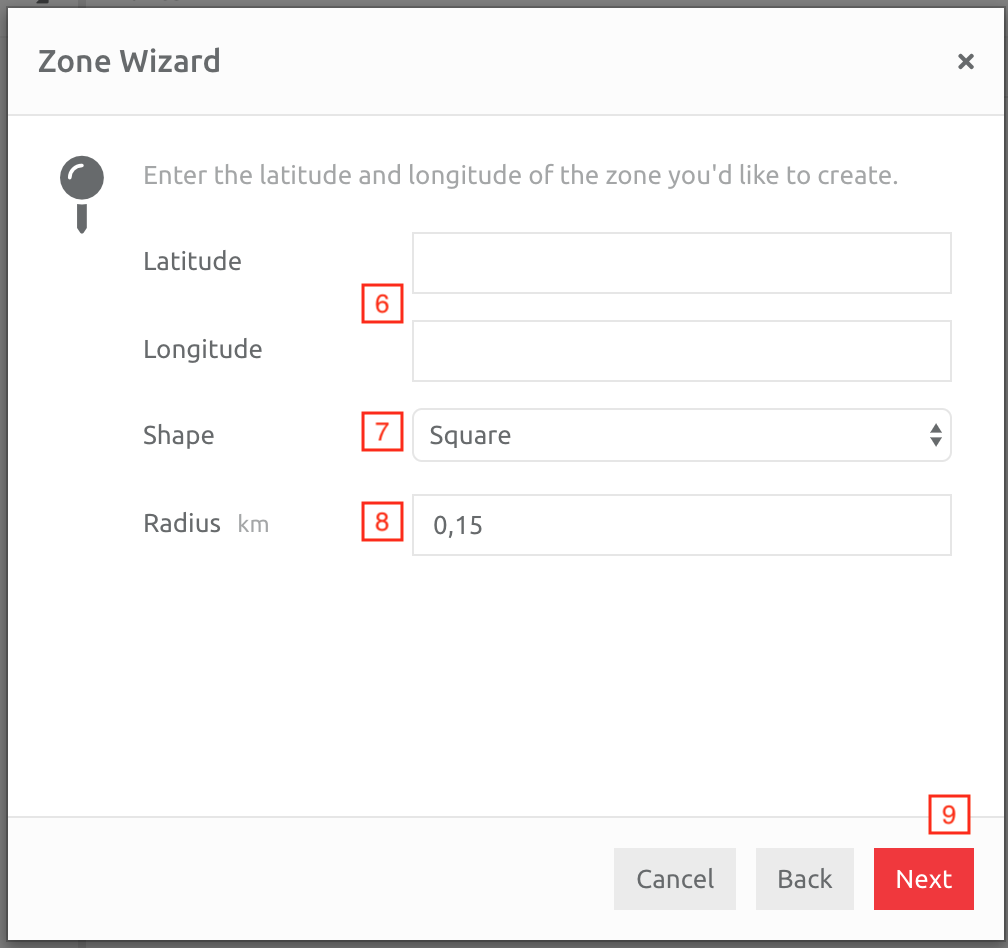
6. Enter the GPS coordinates in decimals,
7. Choose a Shape from the drop down list,
8. Specify the Radius of the Zone,
9. Click Next.
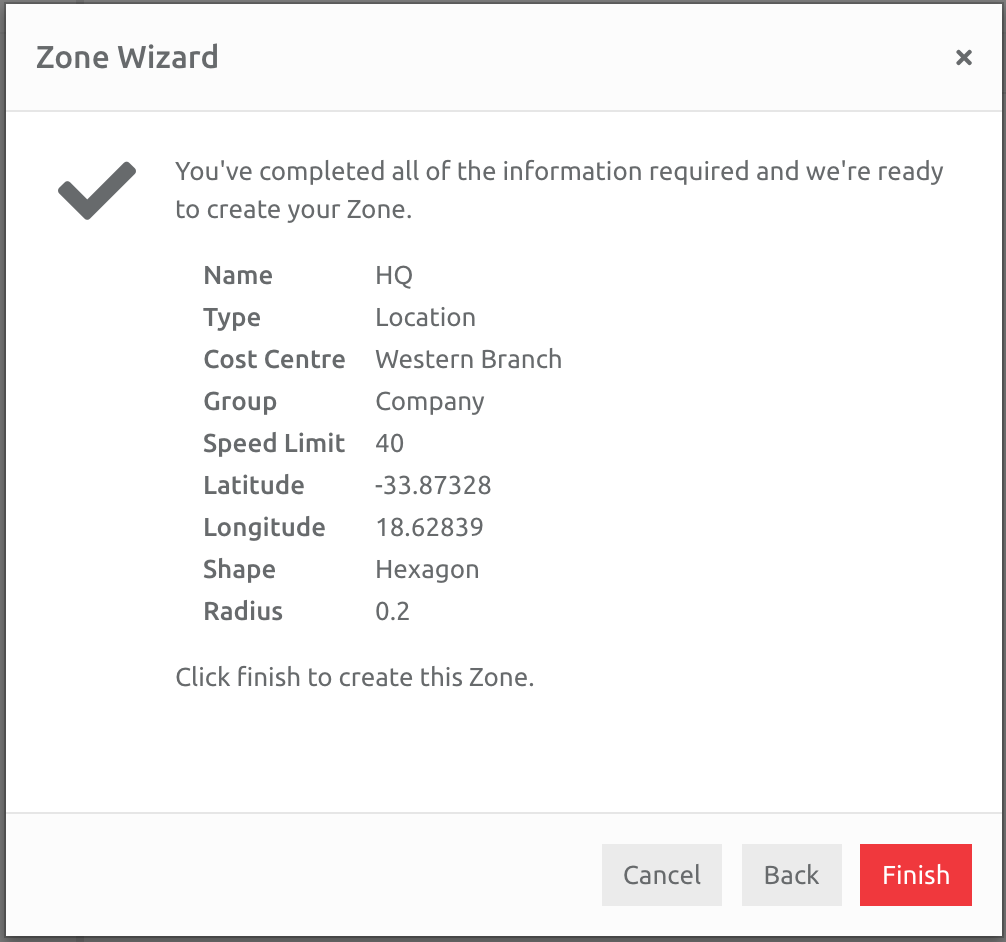
Check the information entered and either change (click Back), or click Finish.
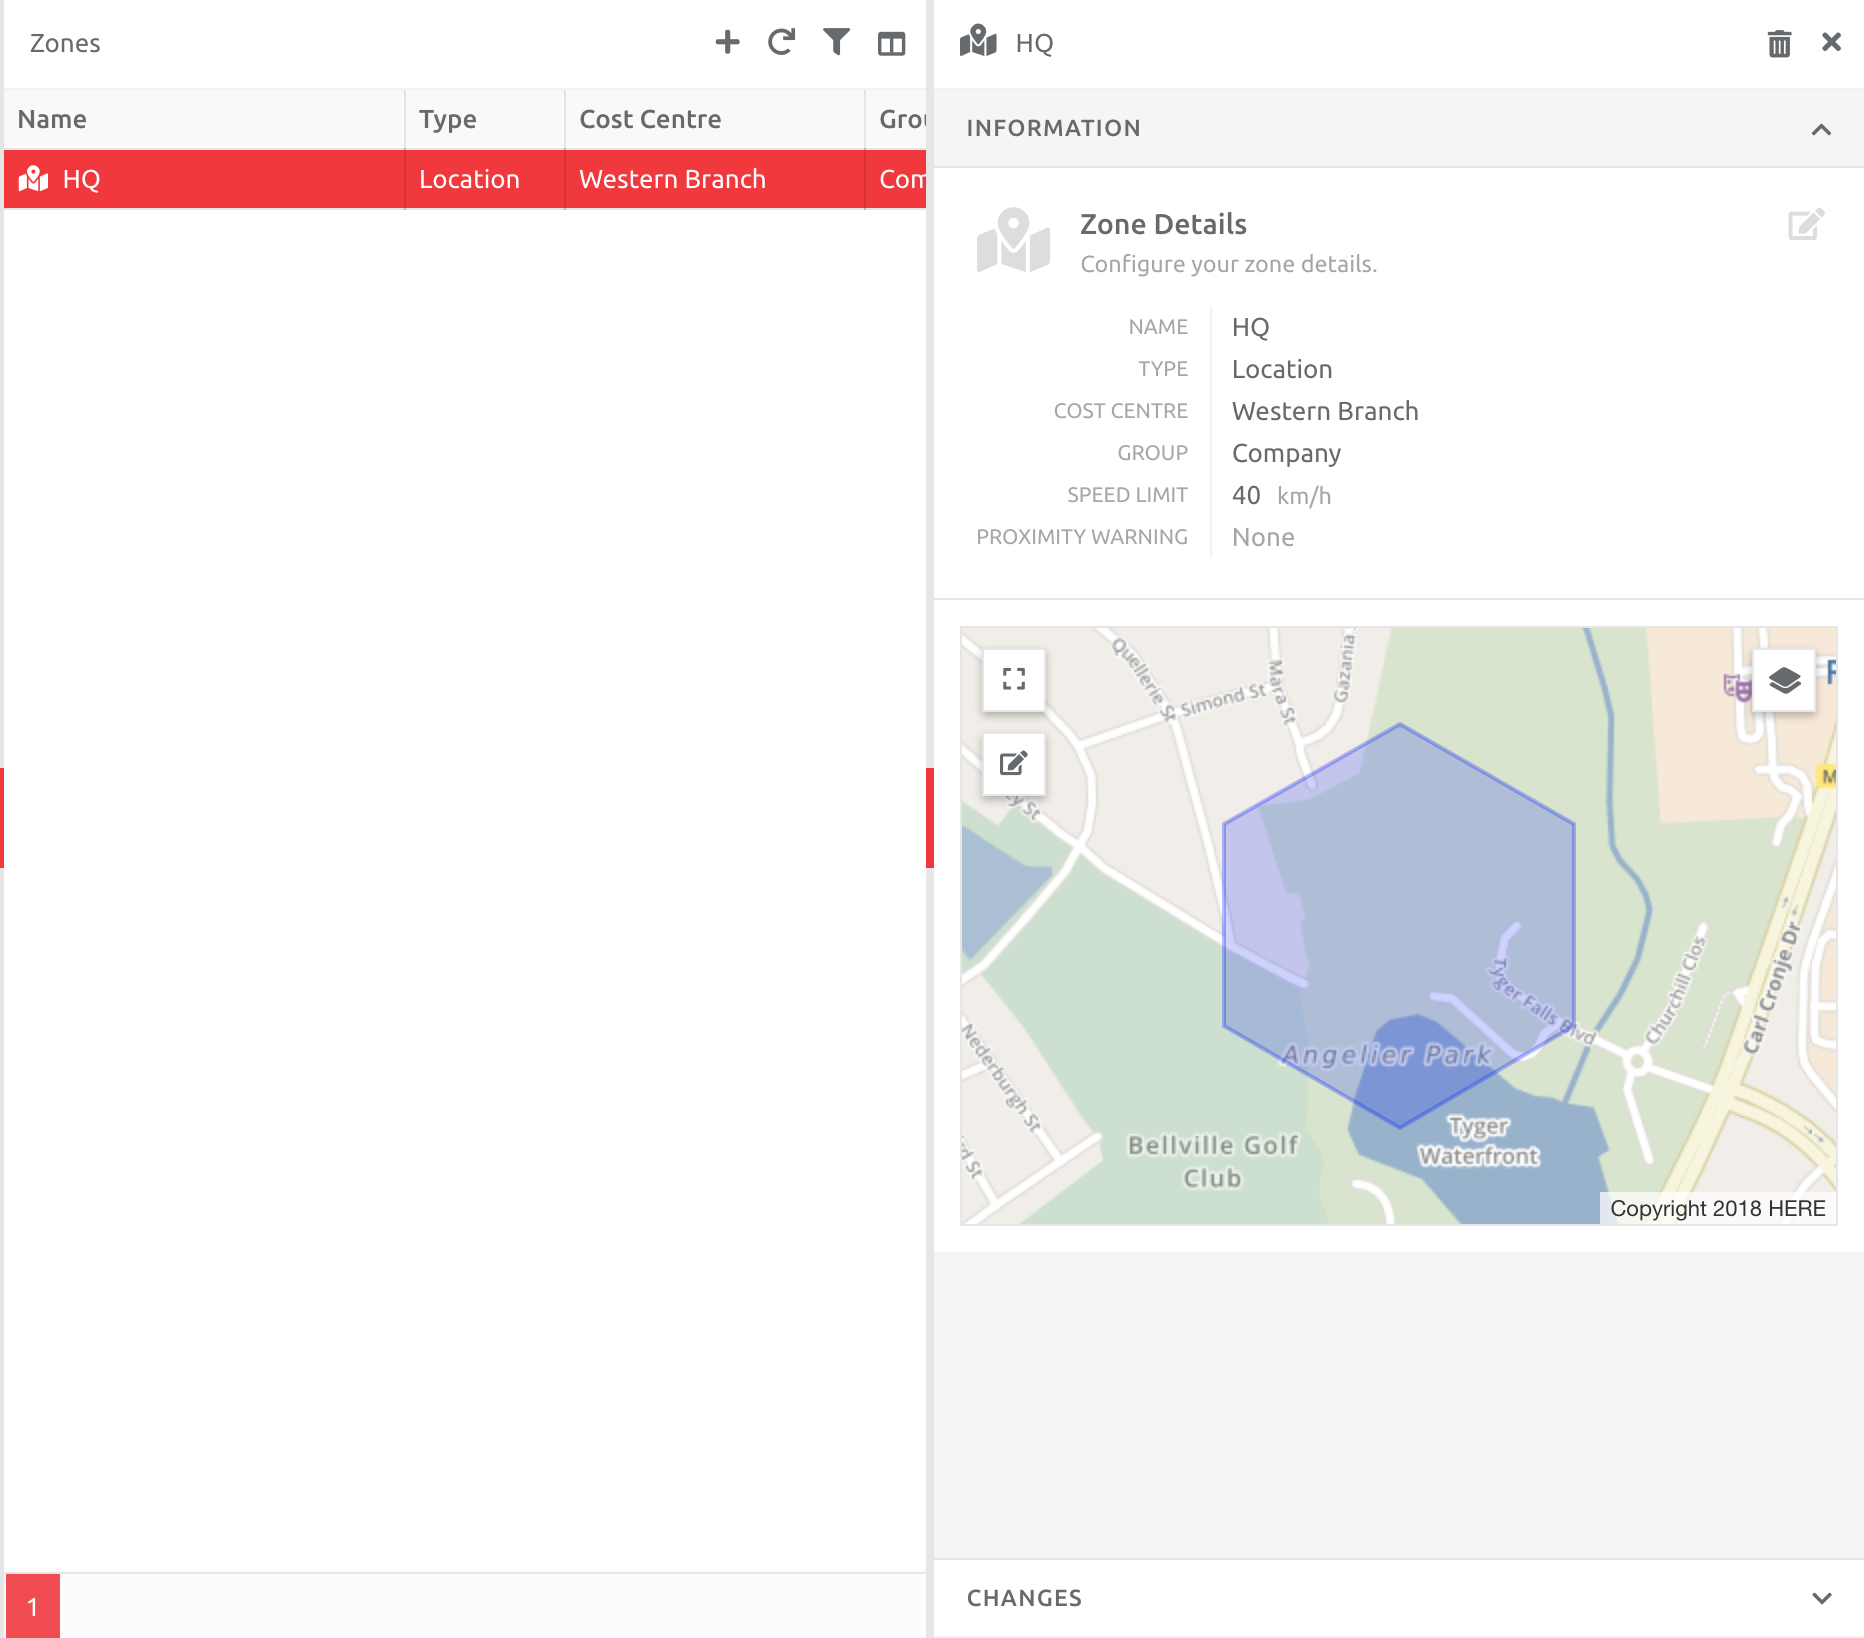
The Zone will appear in the list, with the map position, and shape, under the Information tab.
Edit a Zone
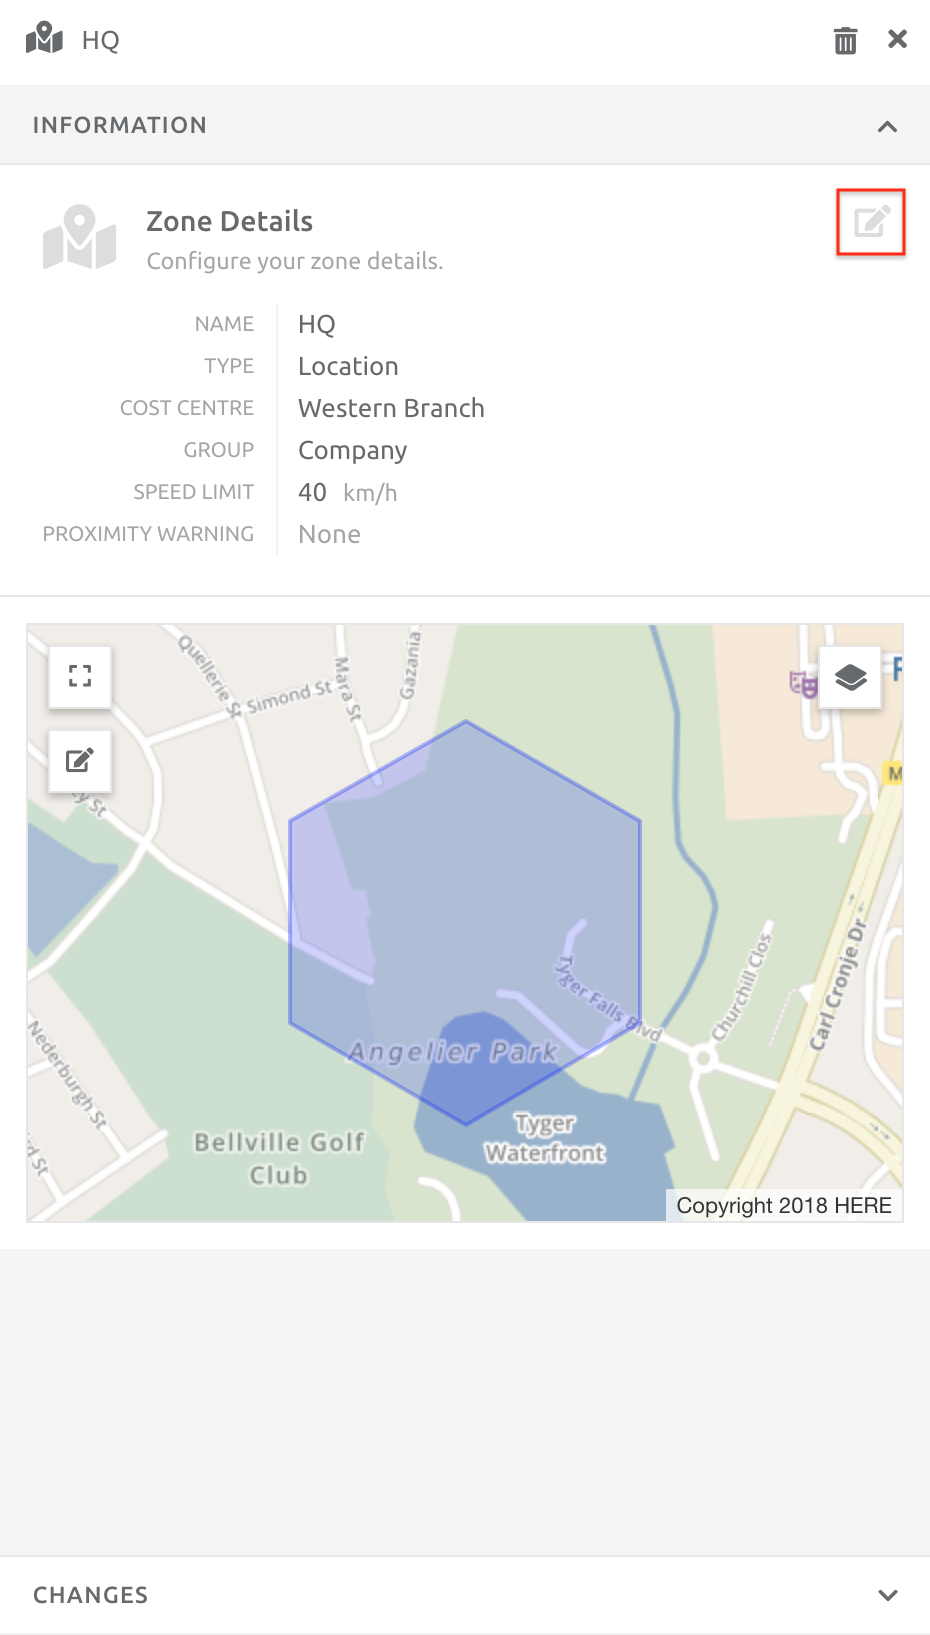
The Zone Information
Choose the Zone from the list and choose the Edit option under the Zone Details.
The Zone Itself
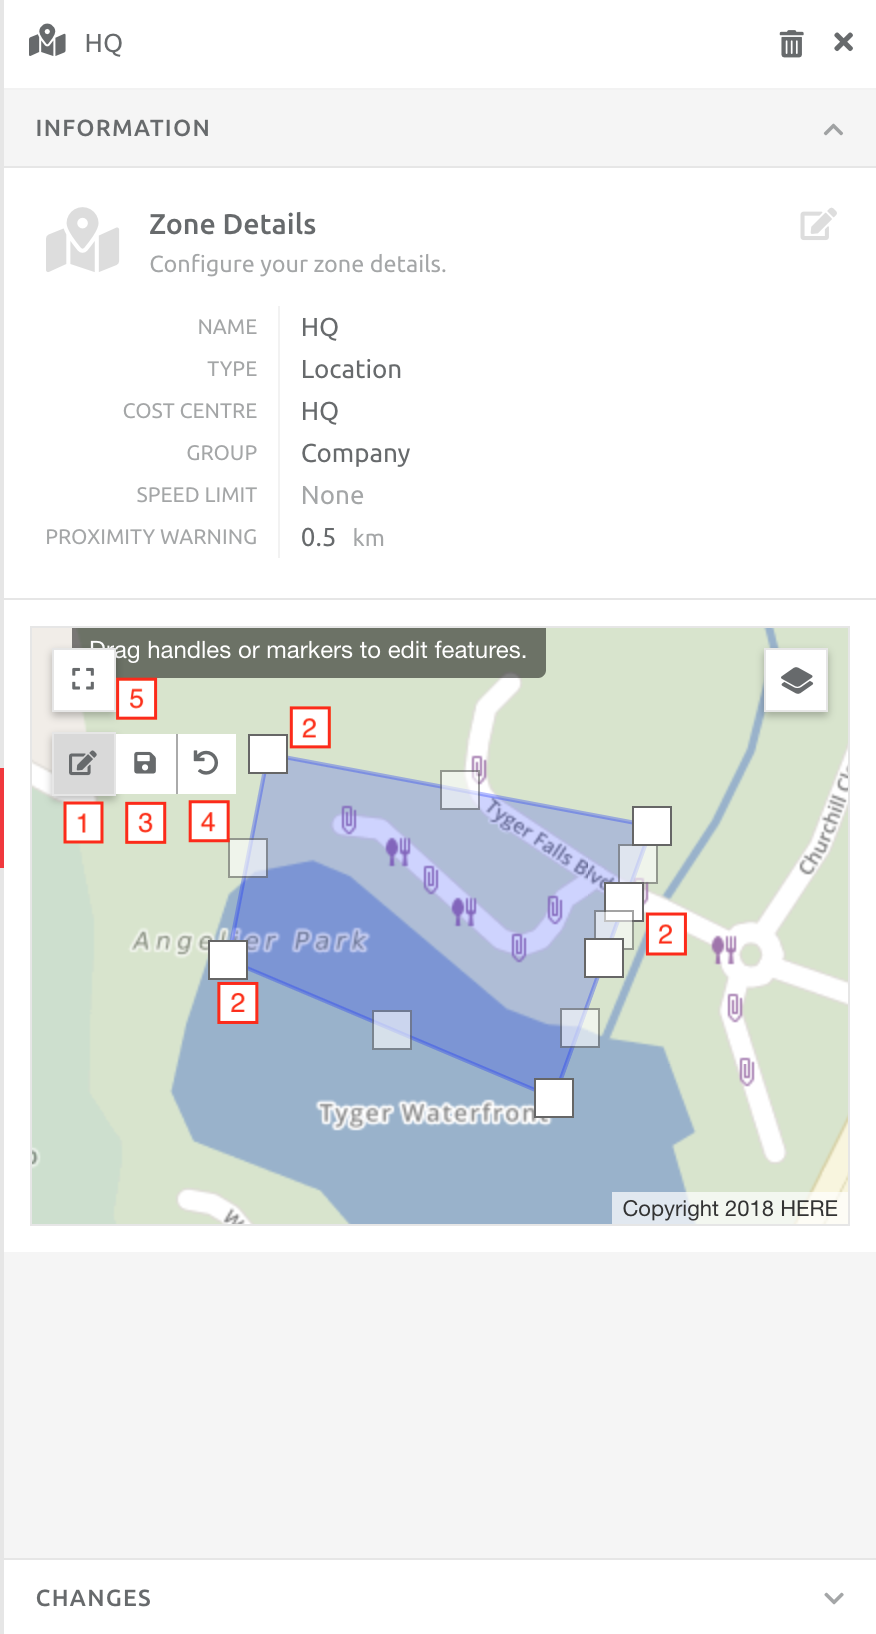
1. Click the Edit button,
2. Click and drag one or more of the markers indicated by squares,
3. Save the changes once complete, or
4. Revert back to the original shape,
5. If a User would like to edit the zone in a full screen mode, click the full screen button.
Comments
0 comments
Please sign in to leave a comment.