Introduction
Users access the platform, and depending on the Features set in the Client, and what Roles they have been given, view and manage items on the platform. Users can be created at different levels, and at the Vendor level, will access all Clients under that Vendor. At Client level, the User will only access their specific Client.
The way the platform Users works when creating a User is one of two ways:
1. Users are invited to the platform, receive a link to activate their account, and add their own password. This is the preferred method of adding Users. NB this will not work unless there is a Custom Domain set up at Vendor level.
2. Users are created by another User, and the password is automatically generated by the platform. The new User either uses the Forgot? option on the Login page to change their password, or the User who created them resets their account to send them a link to change their password.
Create a User
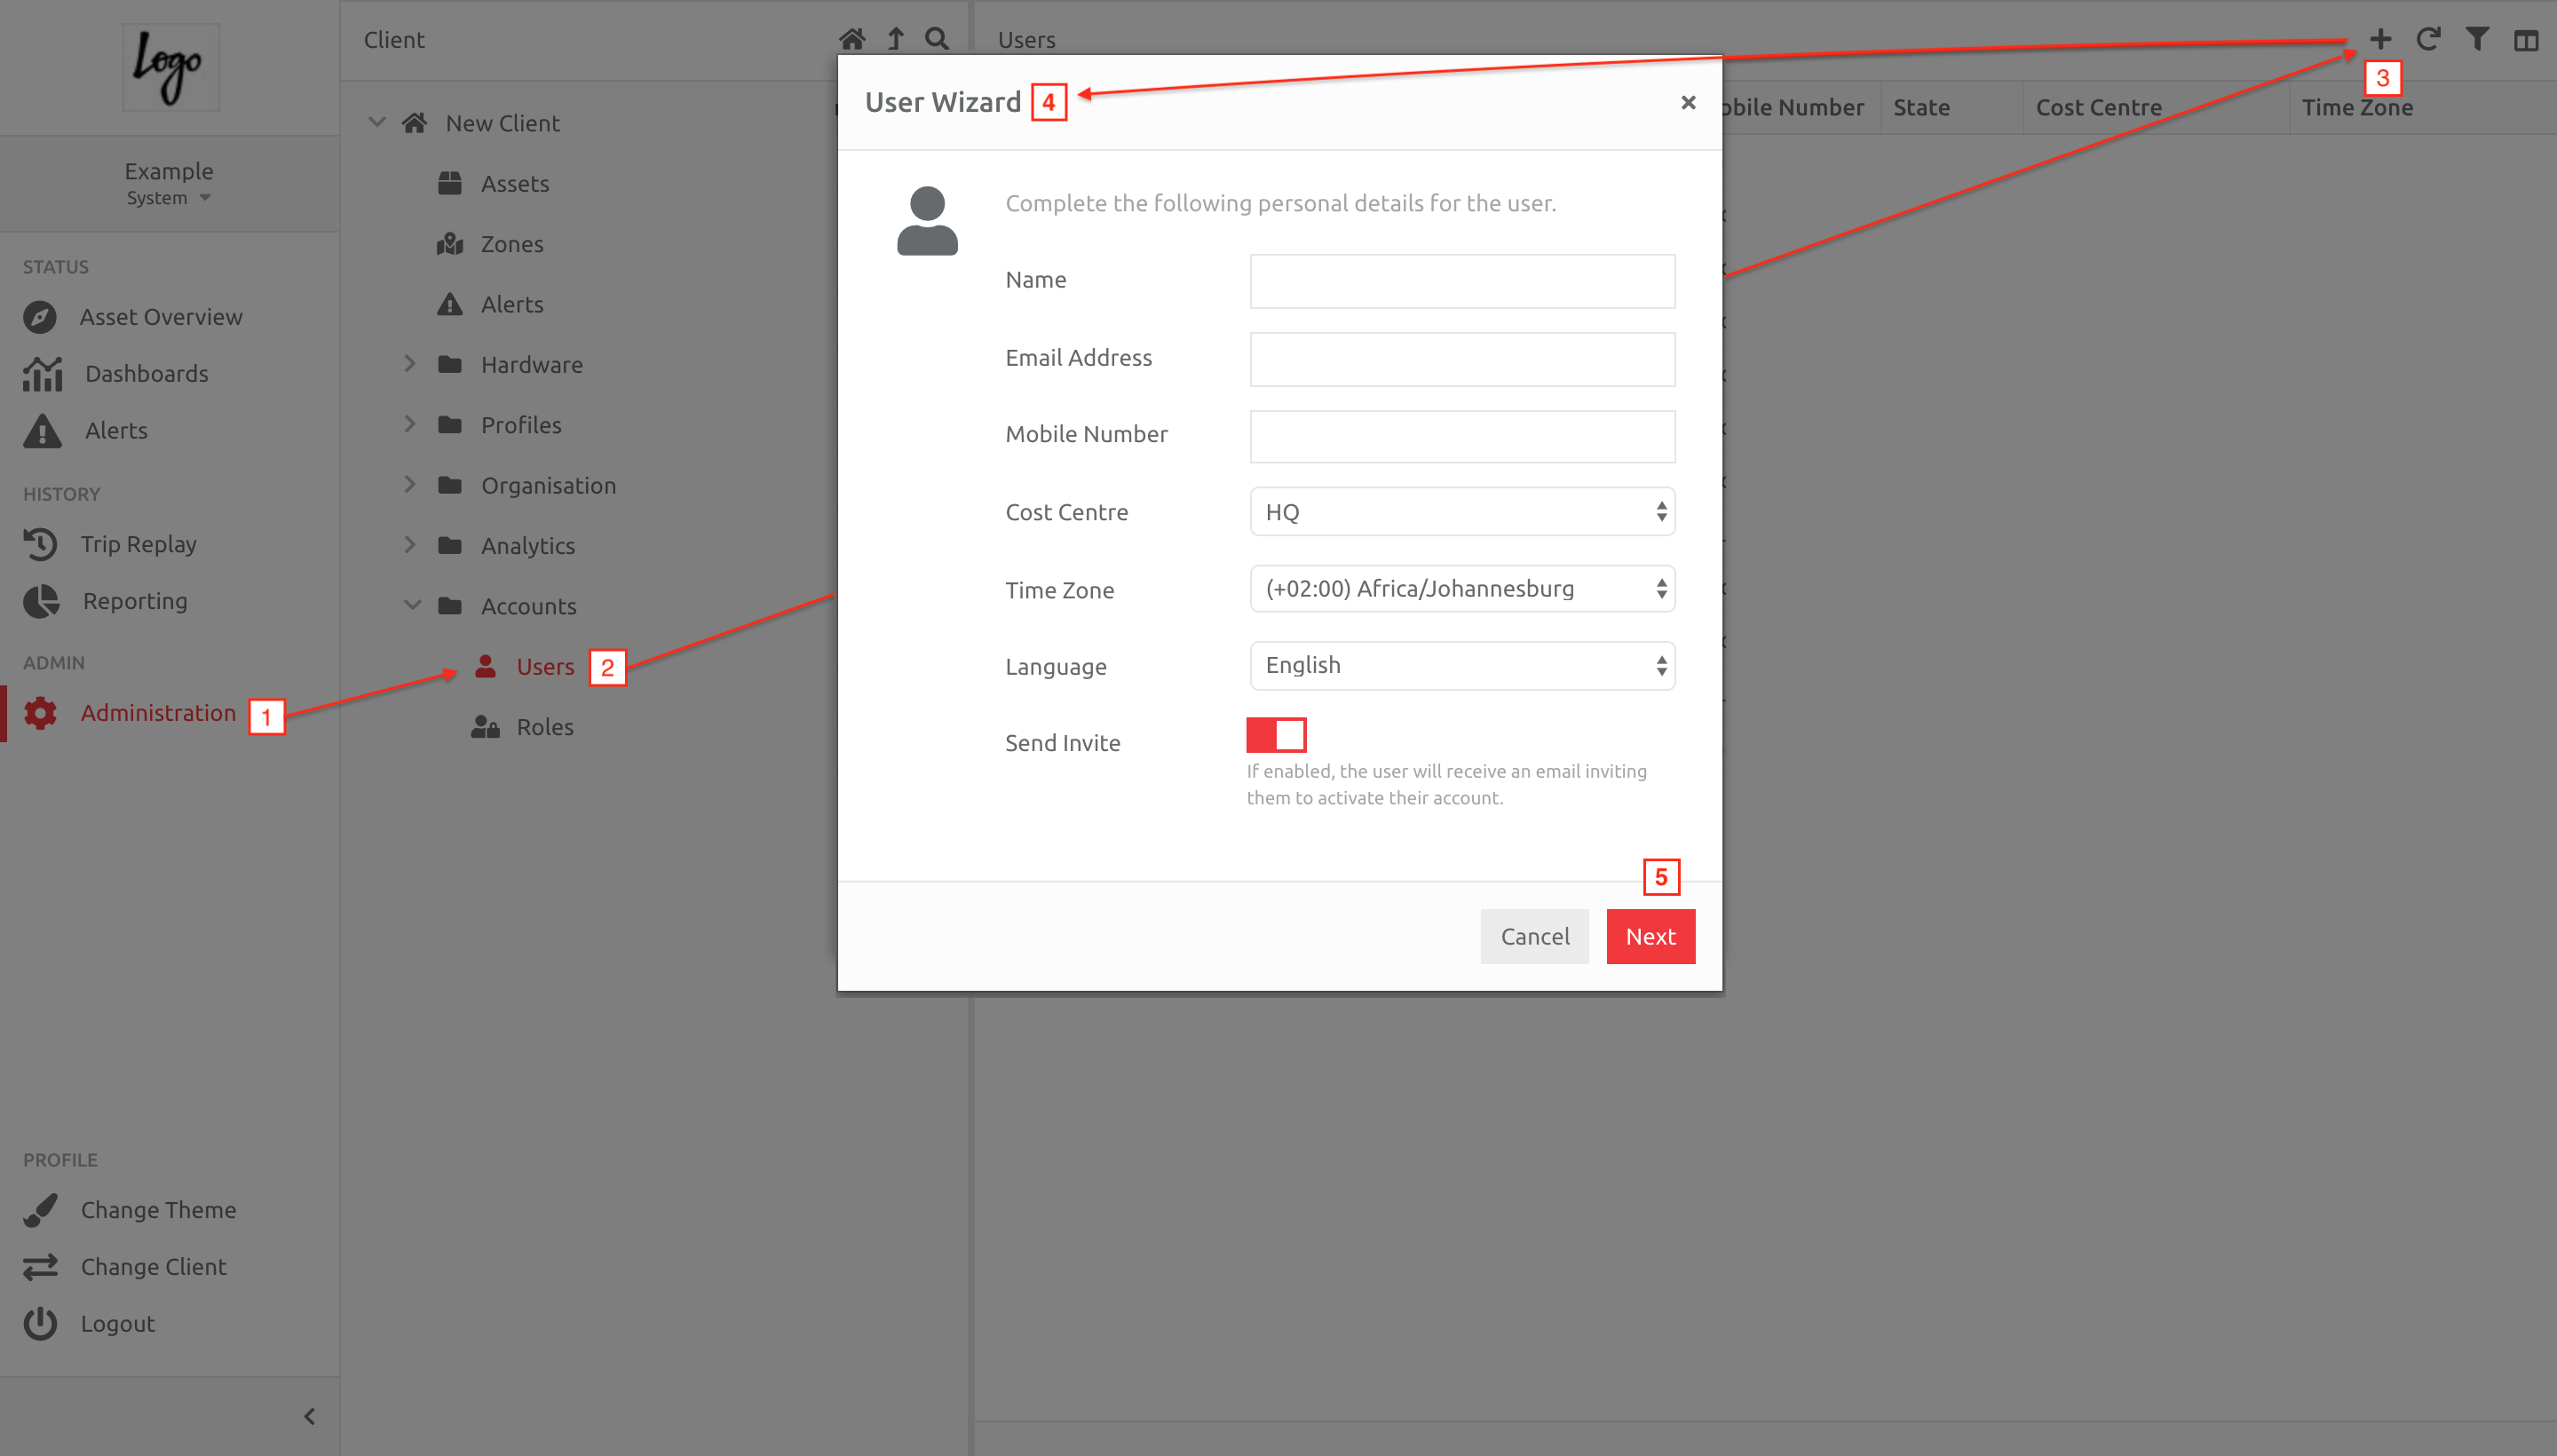
1. Navigate to Administration,
2. Choose Users under the Accounts folder,
3. Click the Plus button,
4. Enter the information in the Wizard.
Important Notes:
1. Leaving the Send Invite checked means the User will receive an email asking them to set up their account. Please ensure you have a Custom Domain set up for the Vendor where the Client is located, otherwise the link will not generate.
2. If the User creating the new User unchecks the Send Invite option, the new User will be created, and a password automatically generates. This can be changed by resetting the account or the User using the Forgot? link on the login page.
5. Then click Next.
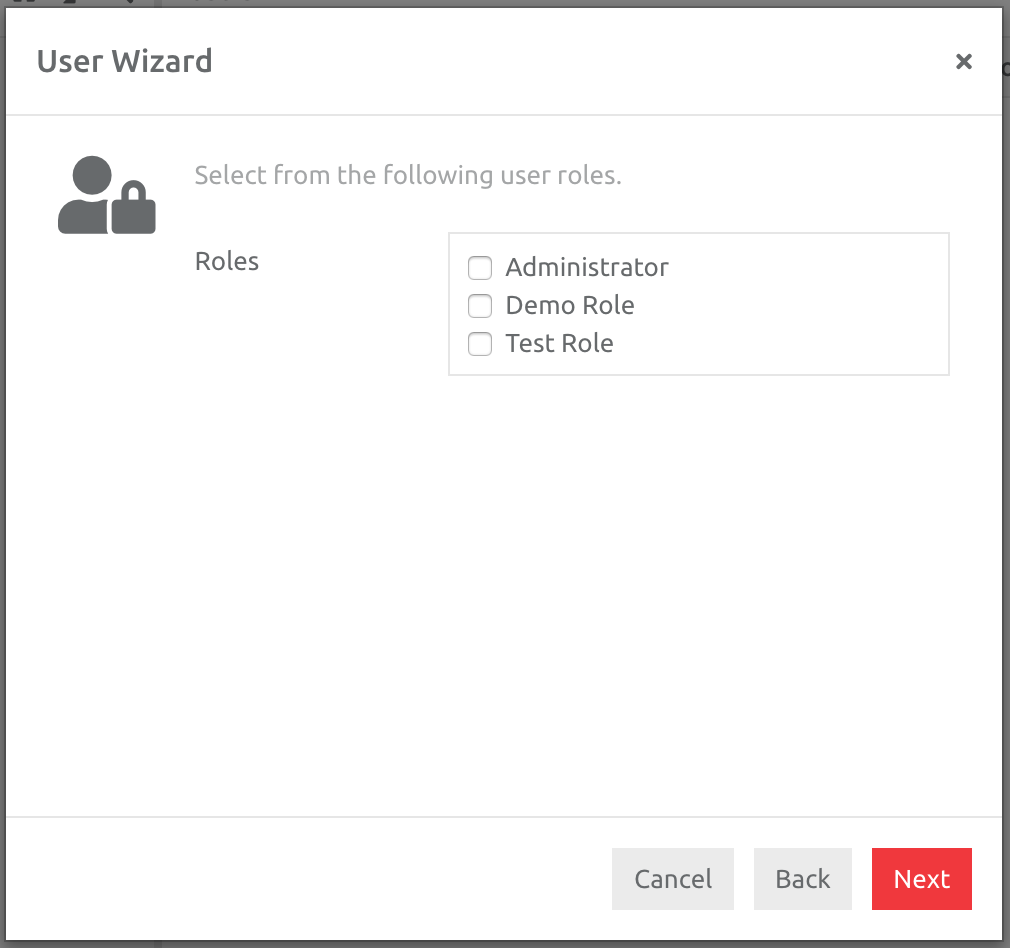
Choose the Role for the User. If no Roles have been created, only Administrator appears.
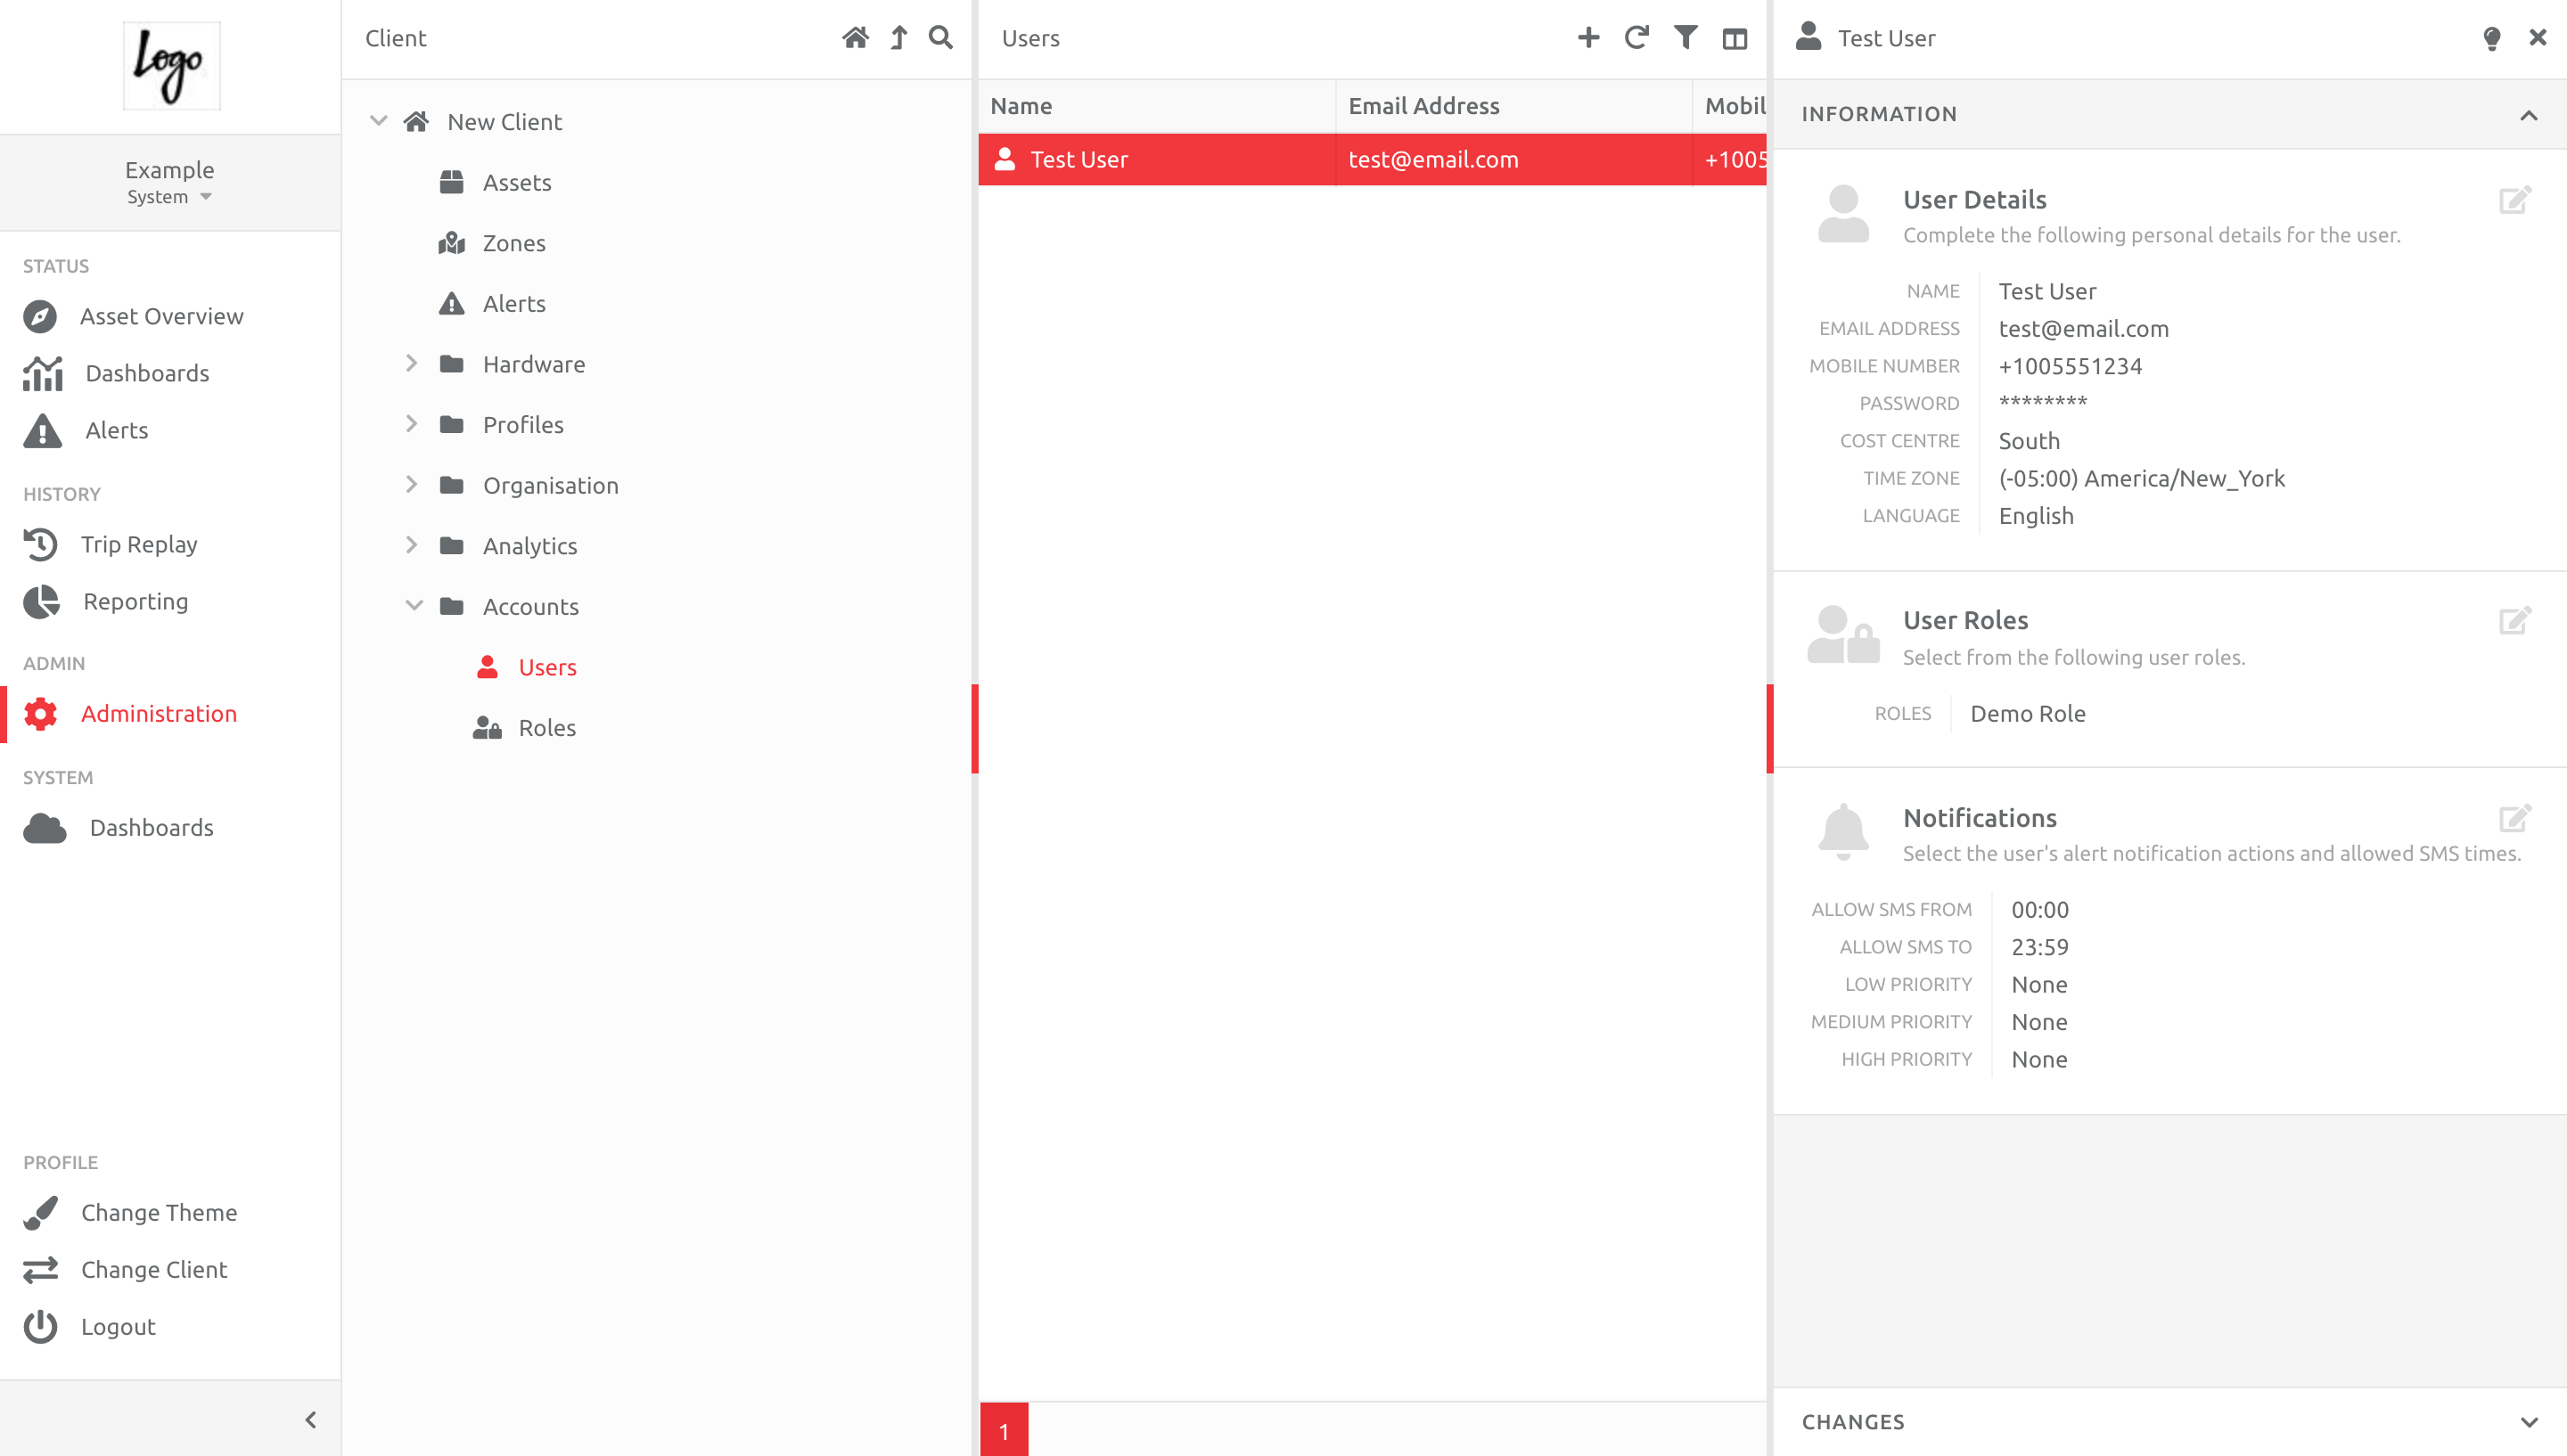
Once completed, the User will appear in the list, with the information entered. This can be edited as needed:
Resetting a User's Account
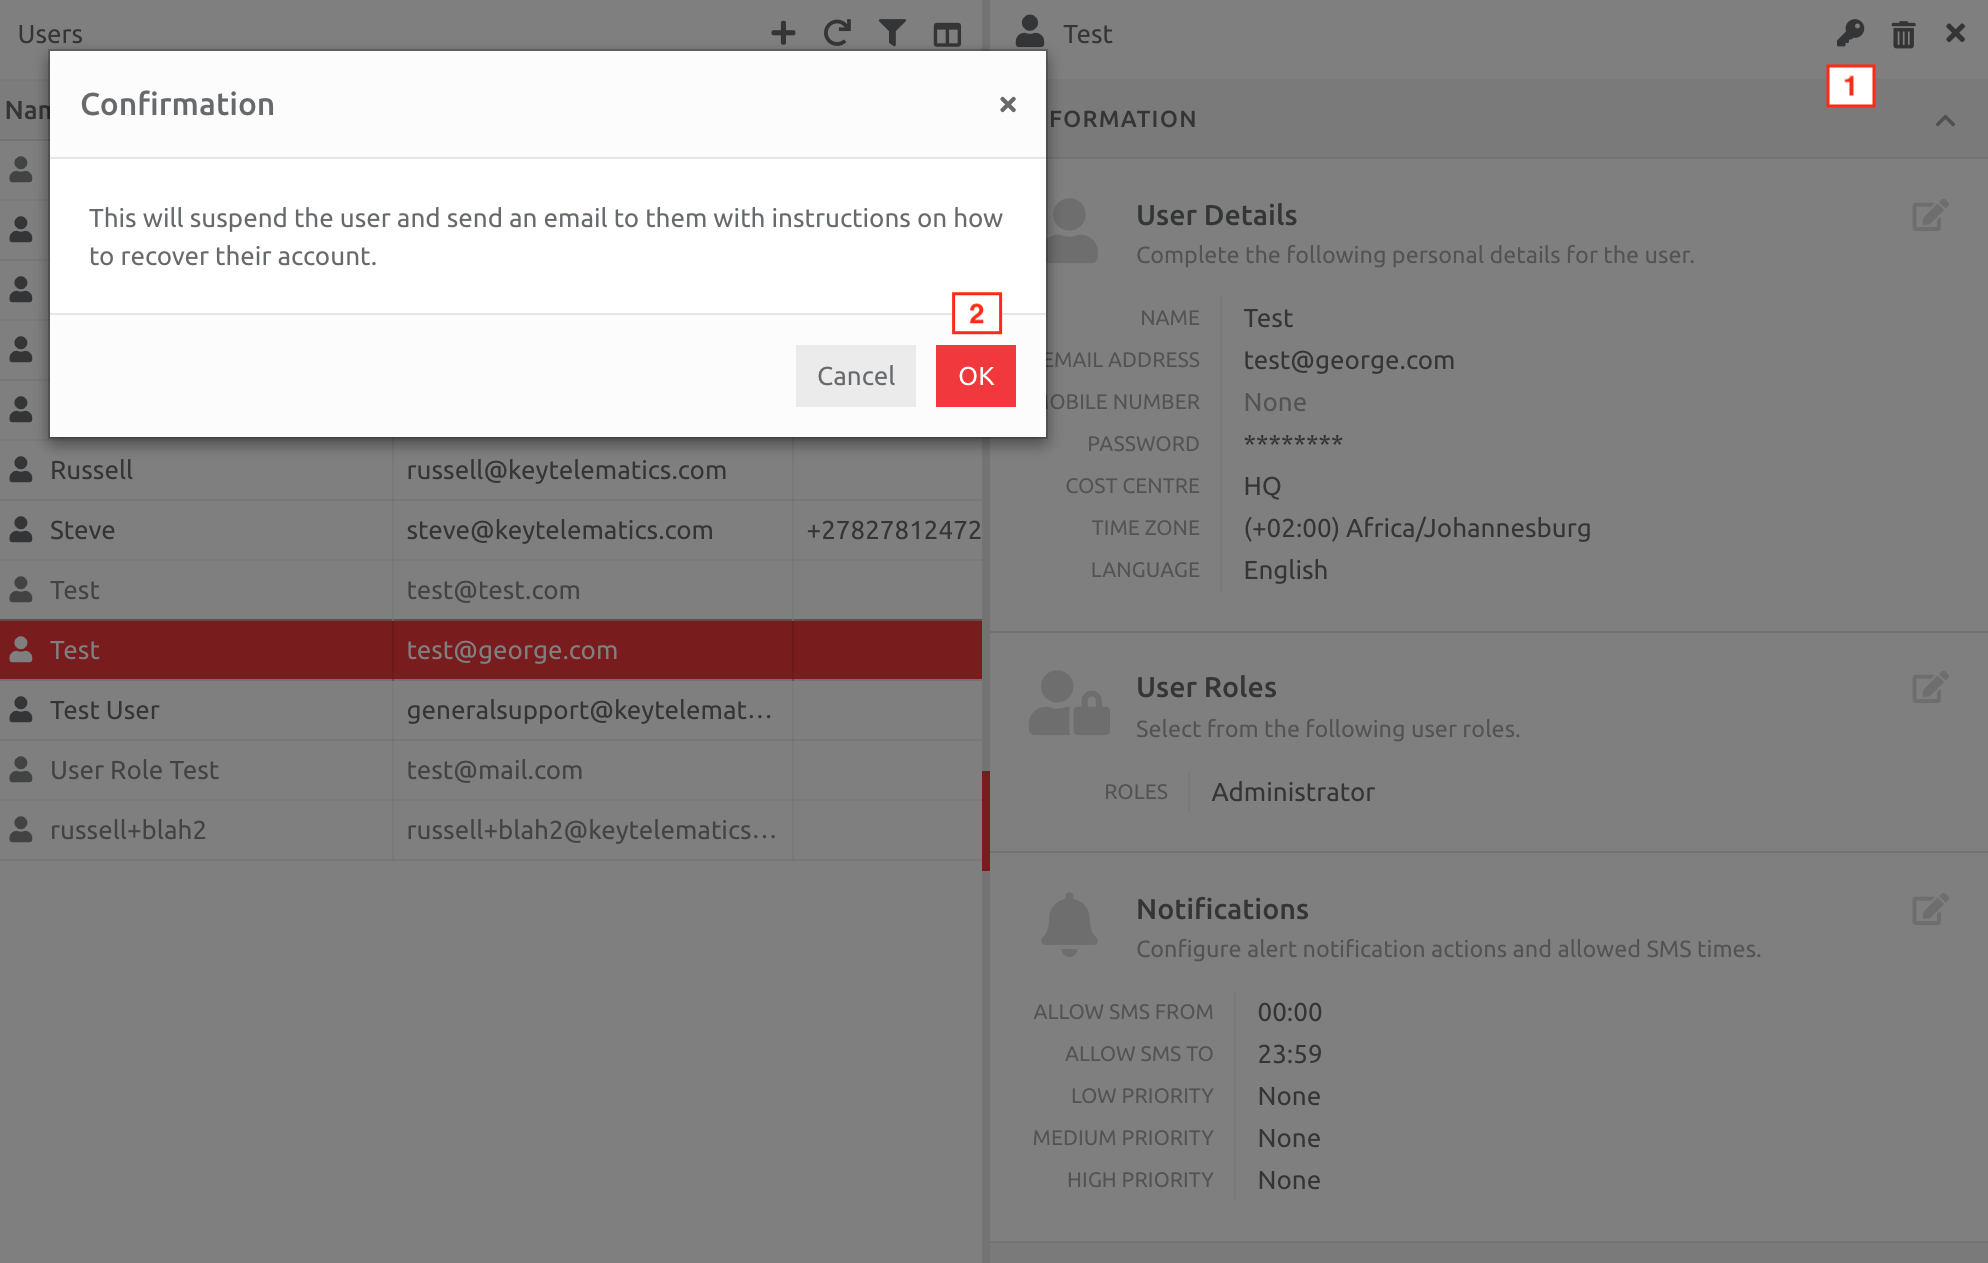
If a User has forgotten their password and cannot use the login screen to reset their password, another User can reset their account. This inactivates the User account, and sends them an email with a link to create a new password. This reset option can also be used to reset a password if created automatically by the platform (see above).
1. Choose the Reset button, and
2. Click OK.
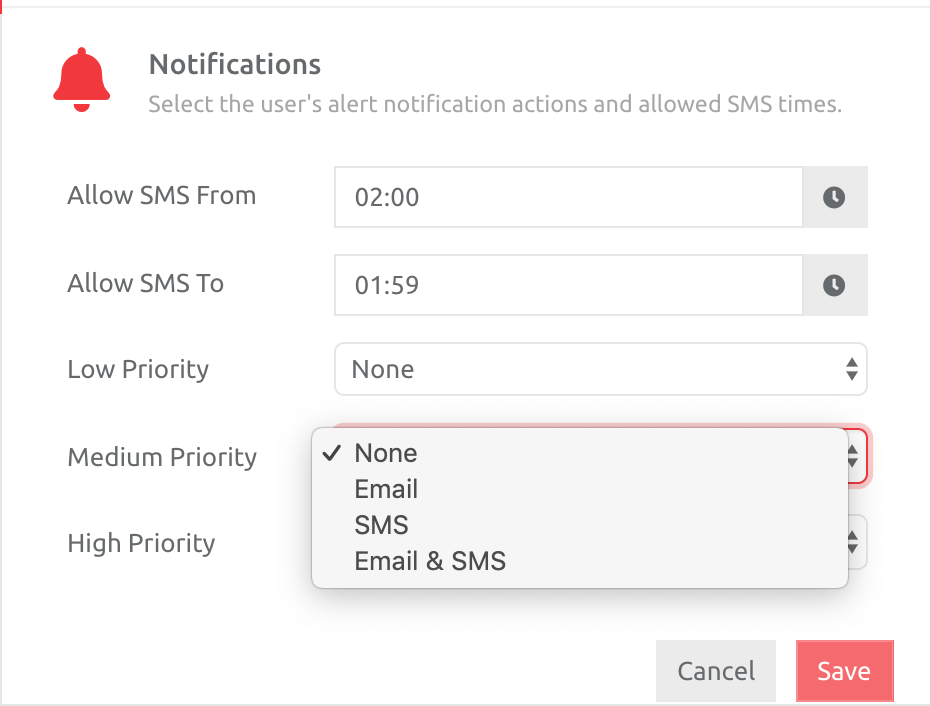
Choose How and When Notifications are Delivered
If you would like the User notified when an Alert triggers, please edit the information under Notifications. You can choose to allow notifications for the different priority Alerts, and how and when these are received. Please ensure there is an Email Server, and/or SMS Gateway set up, if those options are chosen:
Comments
0 comments
Please sign in to leave a comment.