Introduction
The platform offers two ways in which to measure over speeding on assets:
Instantaneously, when an Asset goes over the speed limit of the road, location, as defined by the speed limit and tolerances set on the Asset. This is an Overspeed event, and triggers on the first data point breaching the threshold, and every time a subsequent infringement occurs. (START of the speeding)
Retrospectively by measuring the distance and time of an infringement. This is by using the Overspeed Profile, which can be split into bands, based on the severity of the speeding. This measures how long the Asset was in each band, i.e. how long did the person stay in each band during a trip/day etc. (BANDS)
The Overspeed Profile is designed to measure the time and distance of speeding, to help differentiate serial speedsters from a driver occasionally overtaking another vehicle, and infringing the speed limits once off. The difference between an overtaking manoeuvre, and constant speeding are highlighted in these snippets from a speed graph:
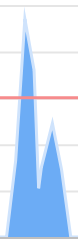
figure 1: an overtaking manoeuvre
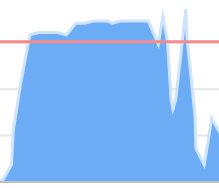
figure 2: constant speeding
The Overspeeding Profile can be split into bands, which are User defined. For ease of understanding, all the examples described in this article will use a reference of Low, Medium and High bands. Bands can be called anything, with a % value above the speed limit for each. In this table below, two different examples are shown for a 3 tiered Low/Medium/High profile:
|
Band |
Example 1 |
Example 2 |
|
Low |
0 - 5% |
5 - 15% |
|
Medium |
5 - 10% |
15 - 25% |
|
High |
> 10% |
> 25% |
Each time the Asset moves into the band, the platform will start recording the time and distance. Only once the Asset moves into another band, or below the lowest, will this be recorded and displayed as an event. The event occurs at the end of the speeding, and should not be used to trigger an alert (i.e. it is too late to do anything with the Alert, as the speeding is finished).
The event will look like this:

The speeding event was 60 seconds and 2.16km long. It was in the Low band.
Speeding bands can also be used in the Asset Rating Profile, with the time or distance used as a penalty, i.e. if a driver goes into the High band, and stays there for > 10 seconds, they can be penalised accordingly. Please see below for a detailed description of how to set this up. There are three steps to using Overspeeding bands in a Rating Profile:
1. Create an Overspeed Profile,
2. Add the Overspeed Profile to the Asset/s required,
3. Create or edit the Asset Rating as needed.
1. Create an Overspeed Profile
Overspeeding profiles can be created at Client or Vendor level (all Client will have access to it). Once created, they need to be assigned to the Asset/s to trigger the events.
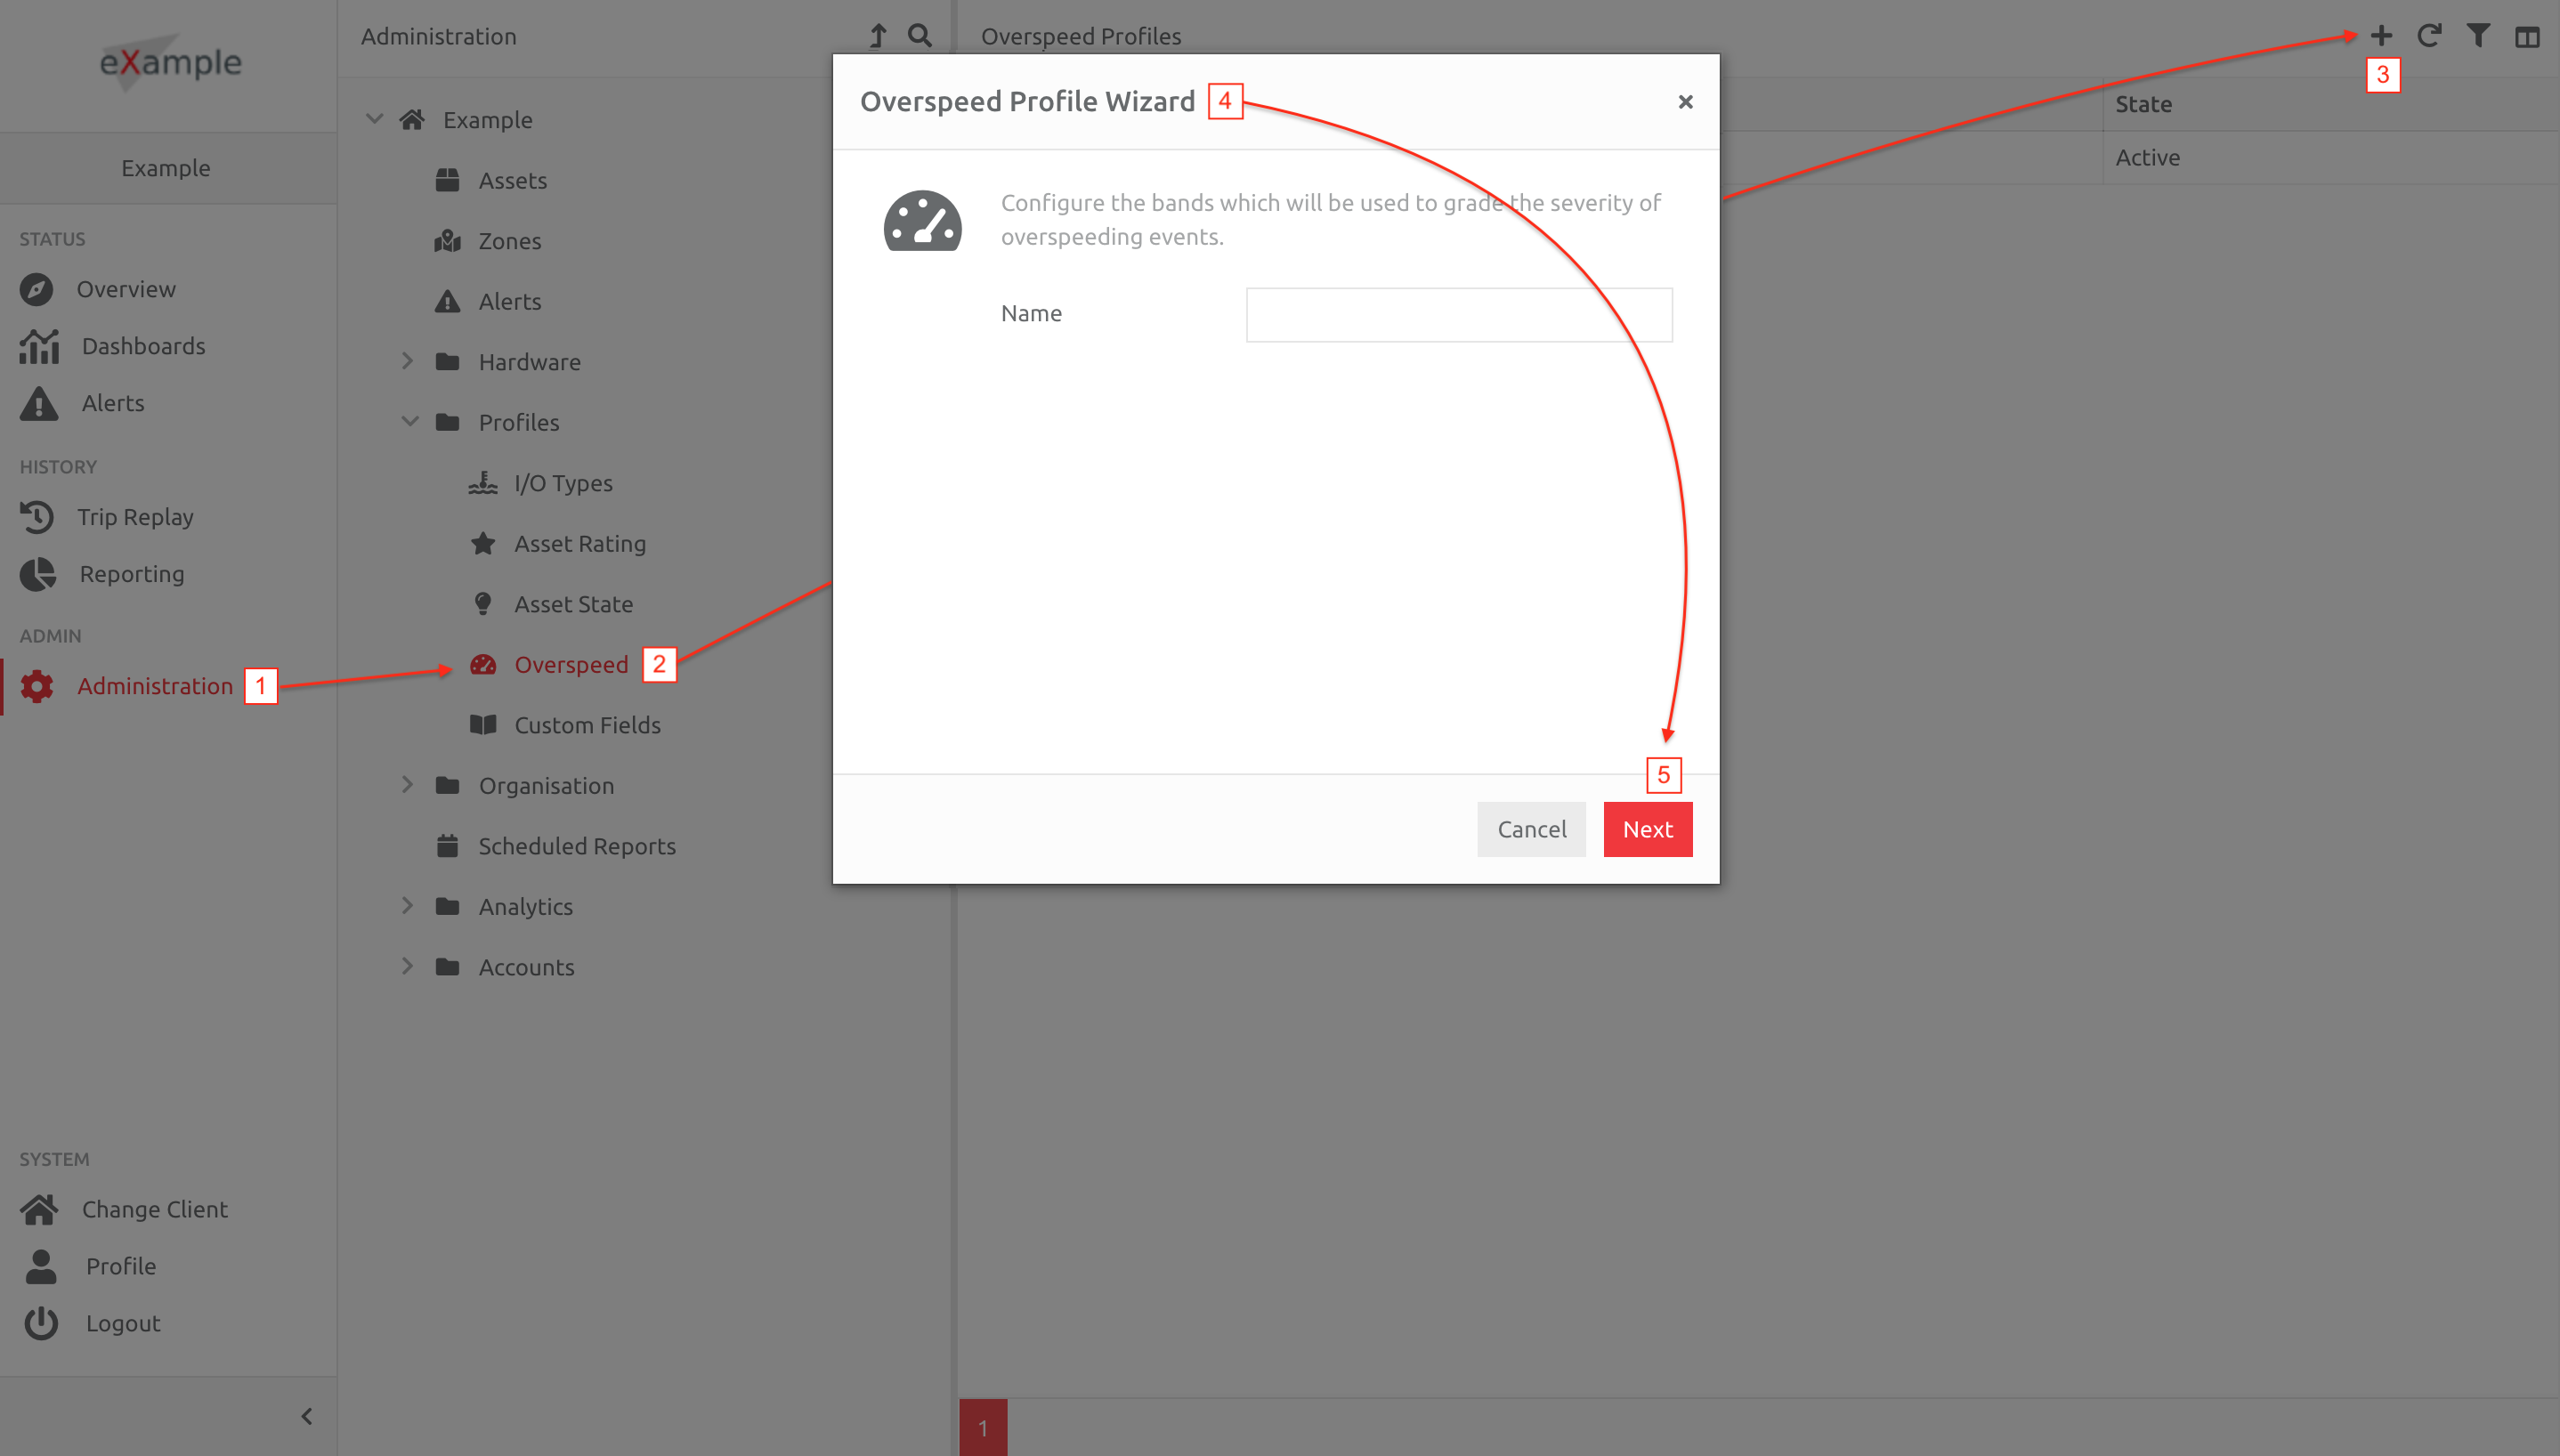
To create a new Overspeed Profile in a Client or Vendor, follow the steps below (example is within a Client):
1. Go to Administration,
2. Choose the Overspeed section under the Profiles folder,
3. Click the Plus button,
4. Enter the information in the Wizard,
5. Click Next, enter the information required on the next screens, until you reach the Finish button.
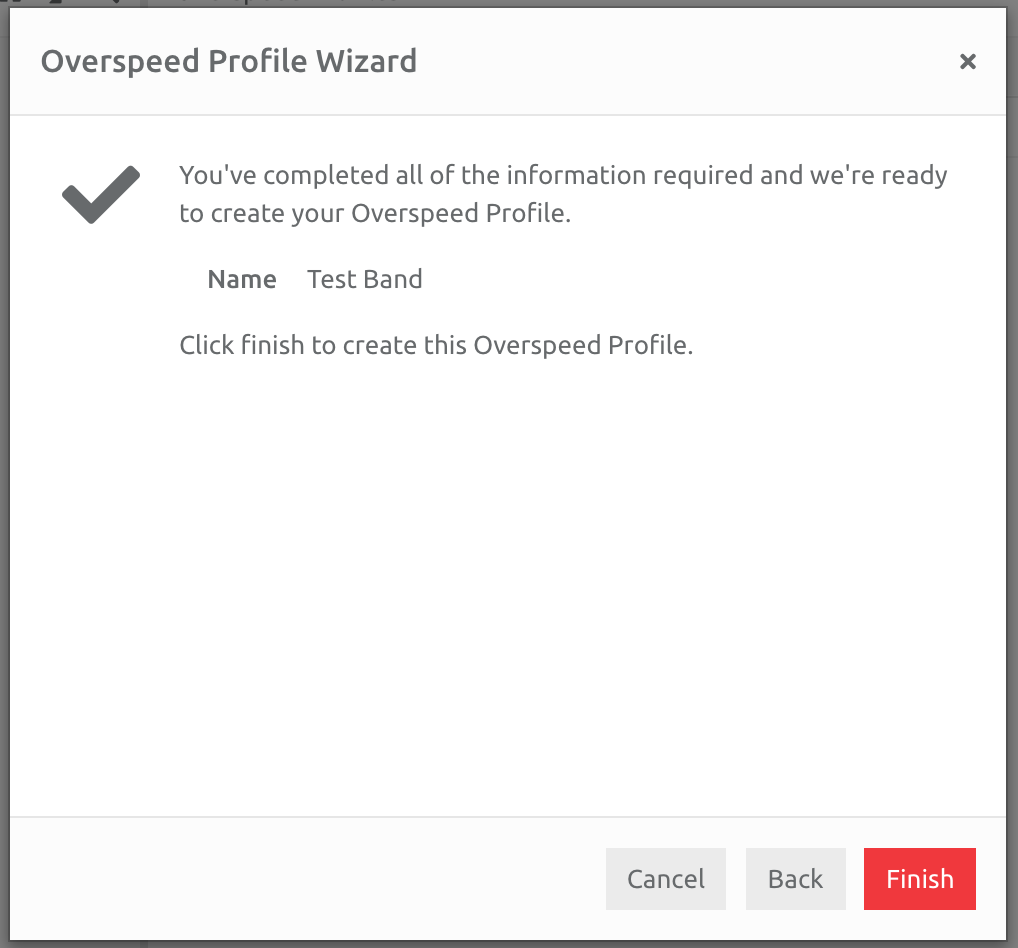
A summary of the information entered will appear on the screen. Make sure it is correct before choosing Finish. Otherwise go Back and edit the information as required.
The Profile created will display a warning that it is not complete, and that bands need to be added:
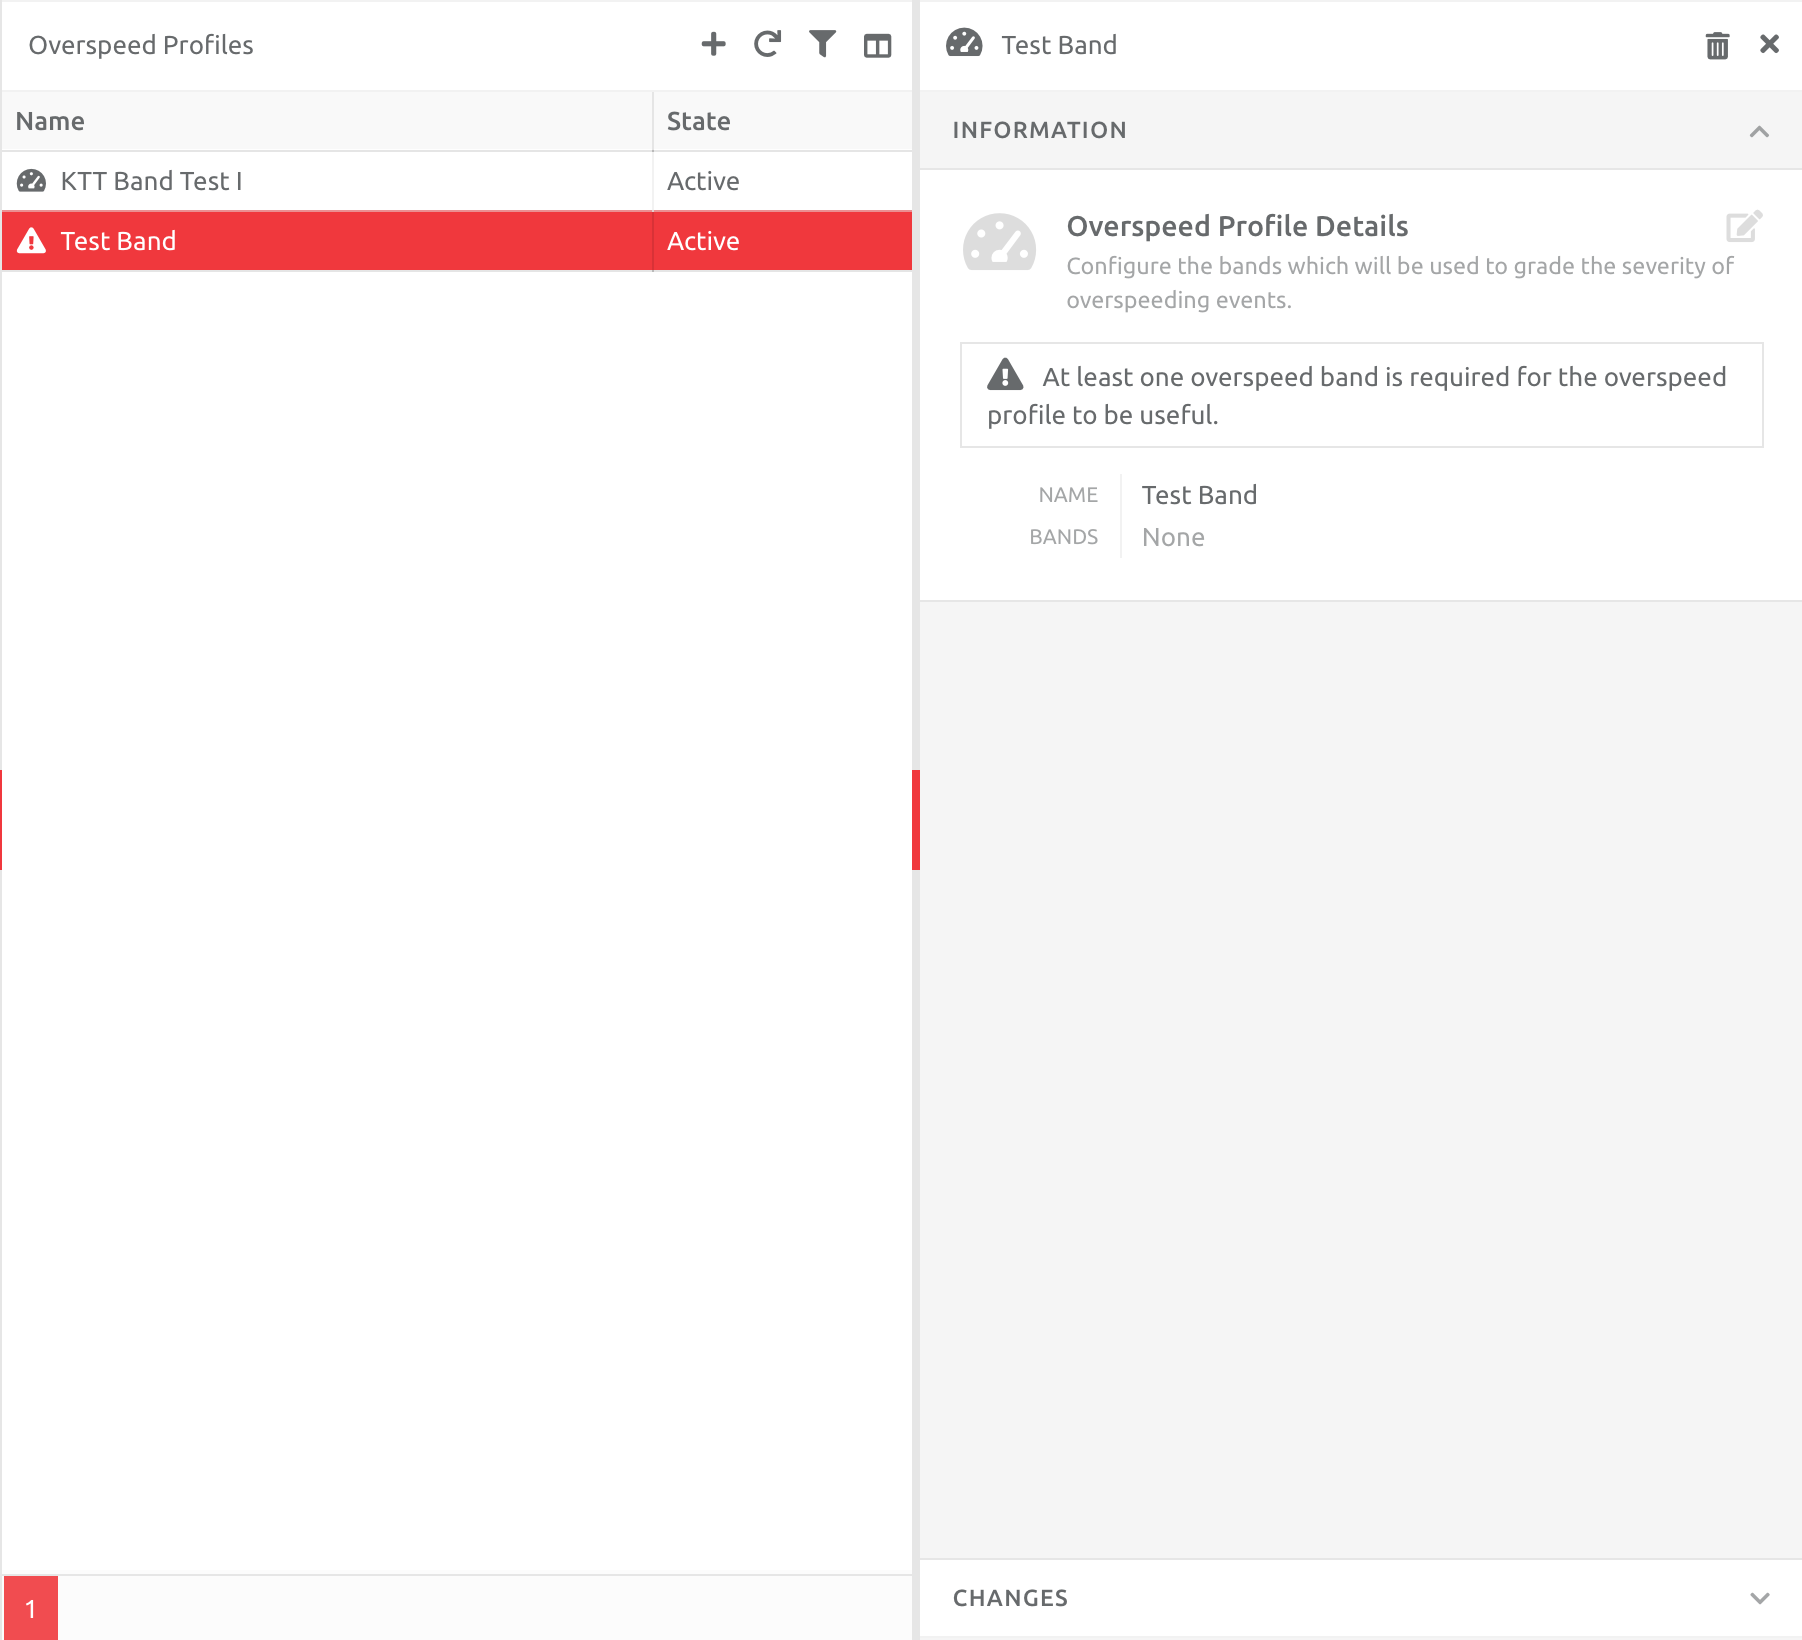
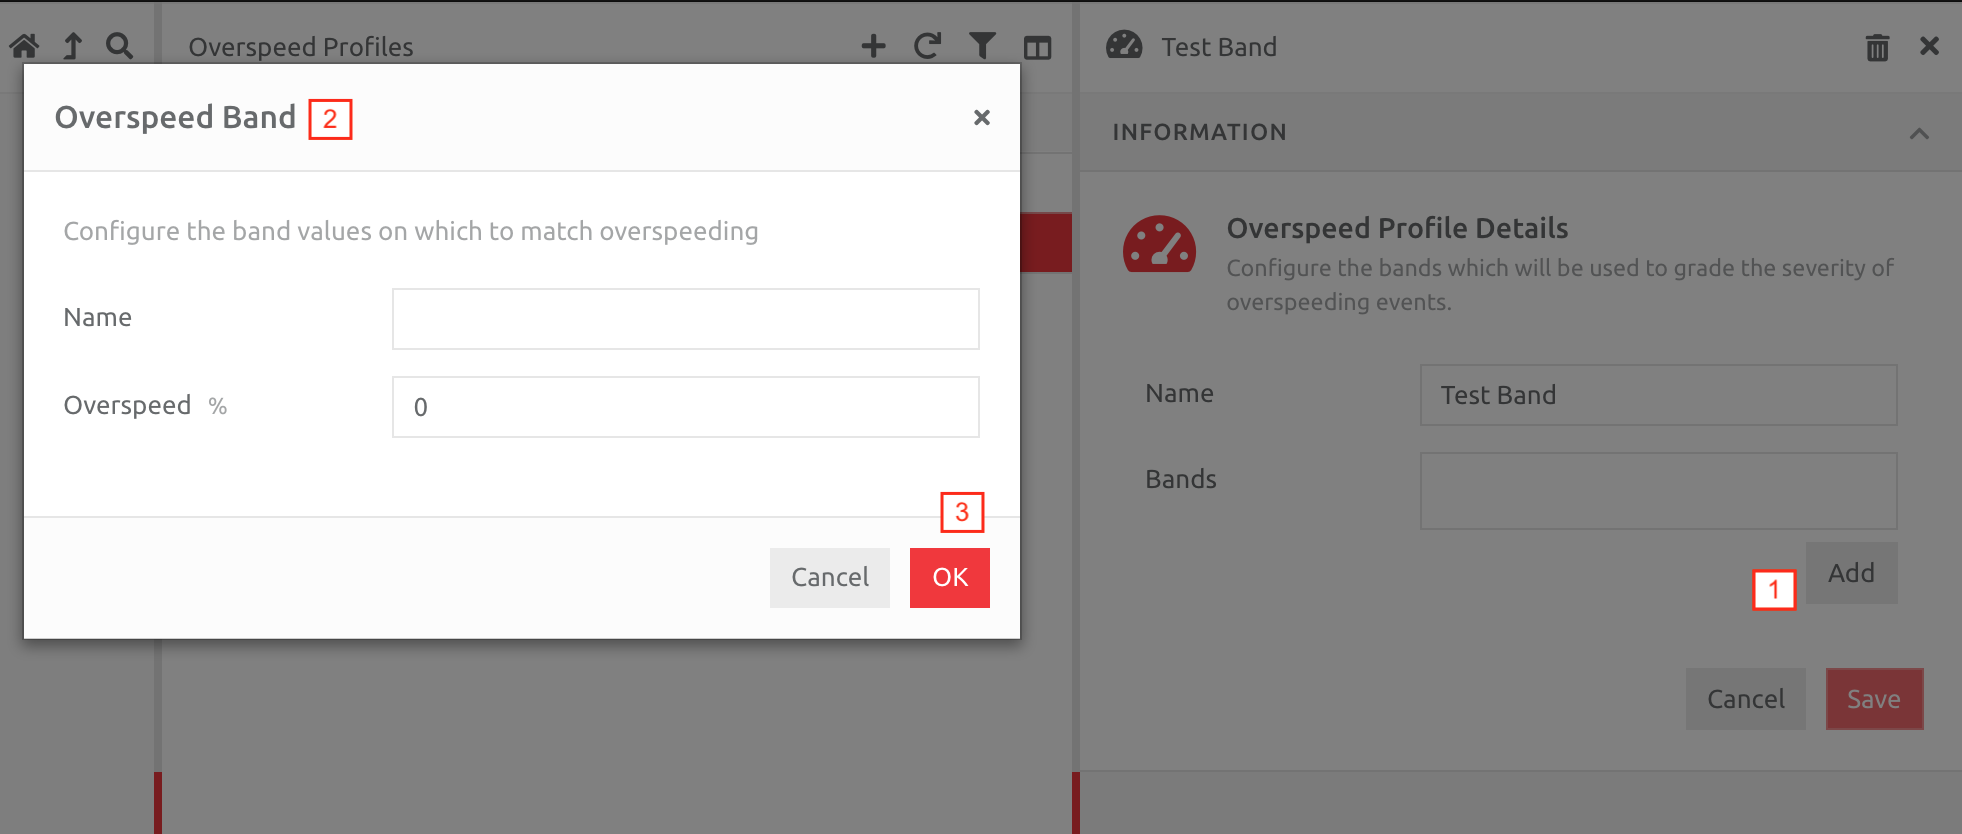
Adding Bands to the Profile
Edit the Overspeed Profile, then
1. Click Add,
2. Complete the details in the Overspeed Band box,
3. Click OK, then Save those changes.
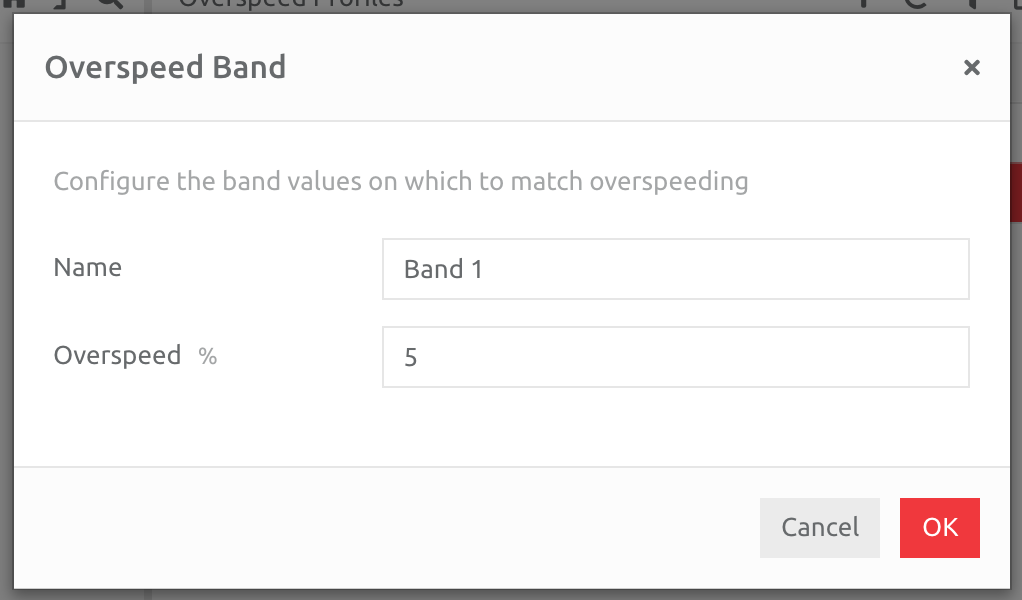
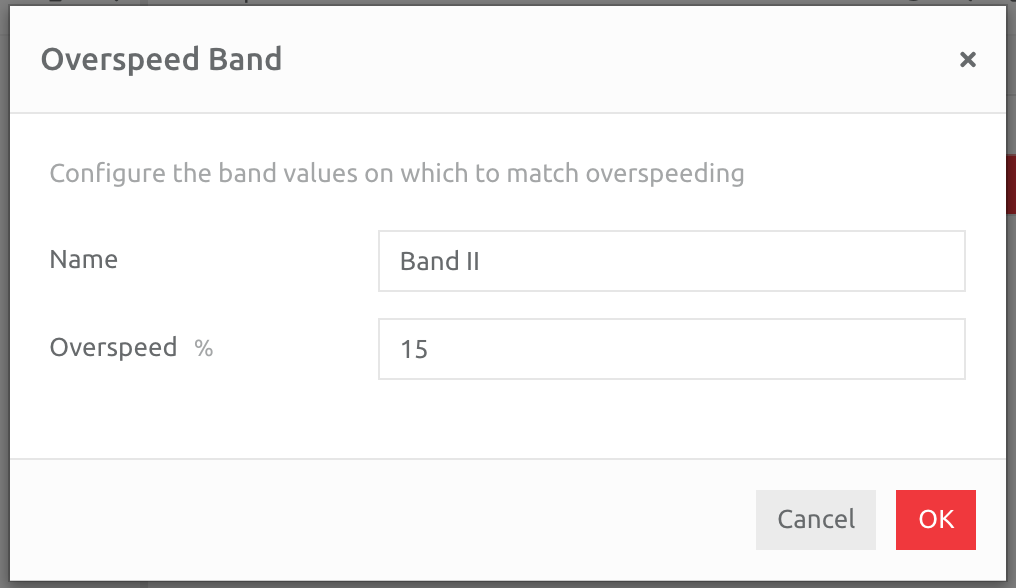
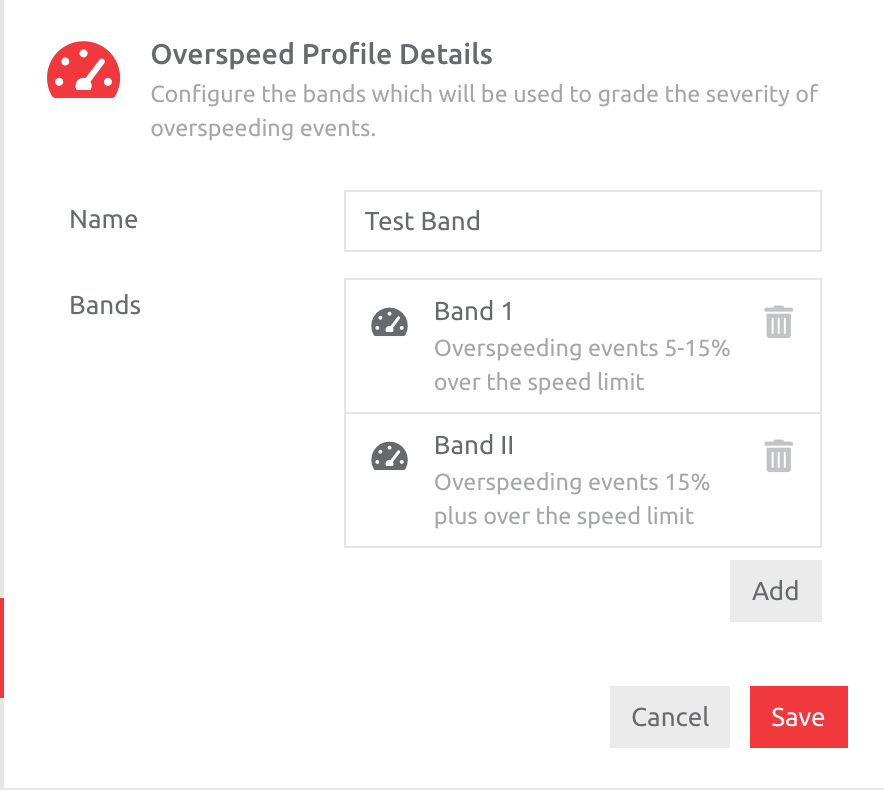
In the example below, band one starts at 5%, and band 2 at 15%. That means and one will be between 5 and 15%, and band 2 from 15%. If a third band were added, for example 25%, then band 2 would be between 15 and 25%, and band 3 start at 25%.
2. Adding an Overspeed Profile to an Asset or Multiple Assets
Individual Assets
Choose the Asset you would like to add the Overspeed Profile to, open the Events section, and add the Profile.
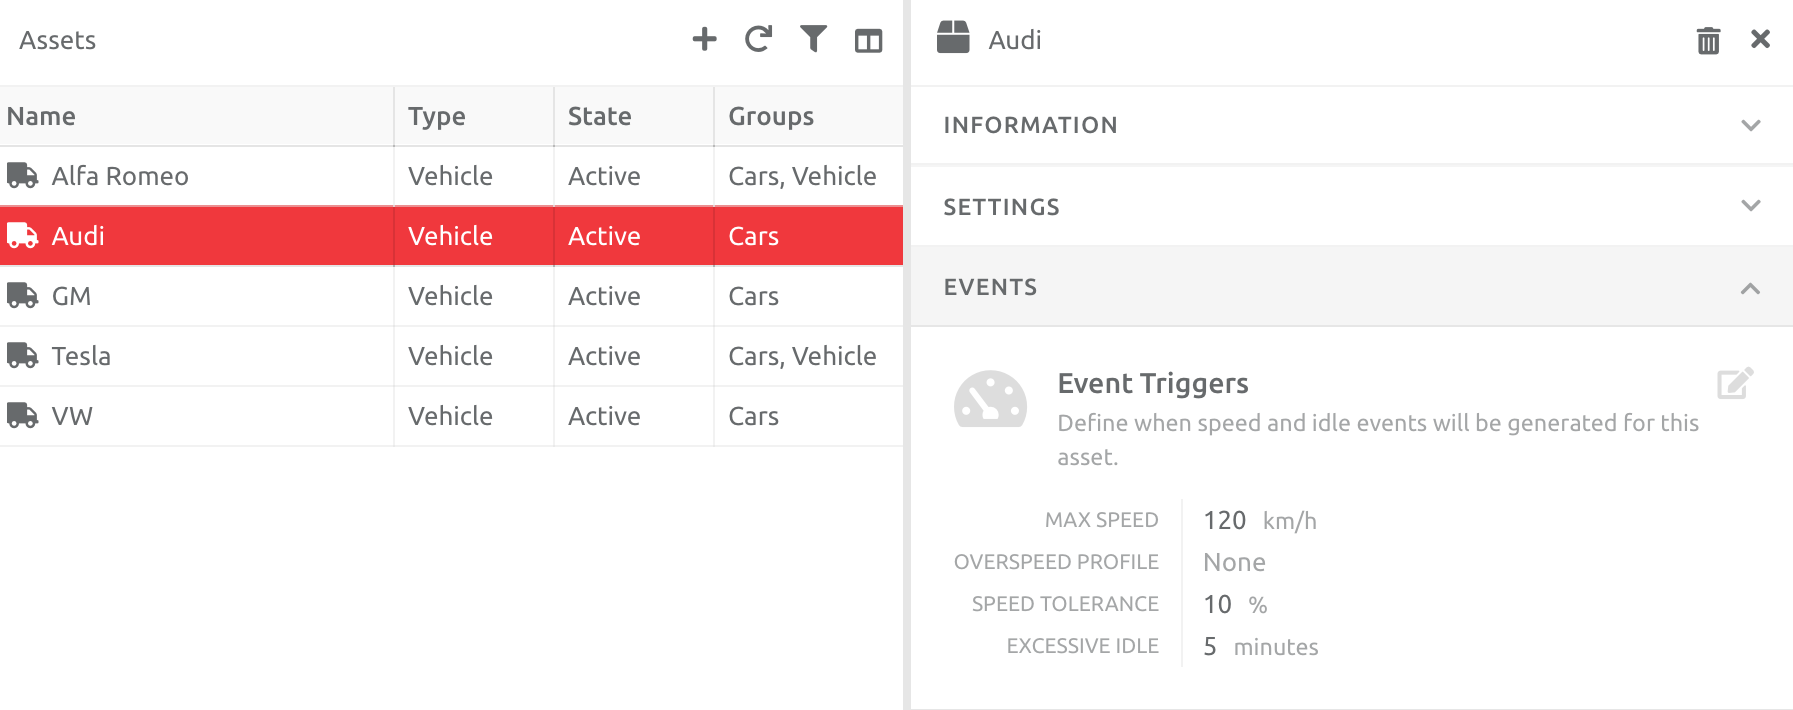
Please note - you can only add one speeding type to an Asset - a Profile or % Tolerance: the Speed Tolerance will disappear if the Overspeed Profile is added to the Asset. This means Events will not trigger if the asset goes above any "tolerance" , as no tolerance exists now, only the Bands.
Multiple Assets
Choose the Assets (ctrl-click) you would like to add the Overspeed Profile to, open the Events section, and add the Profile.
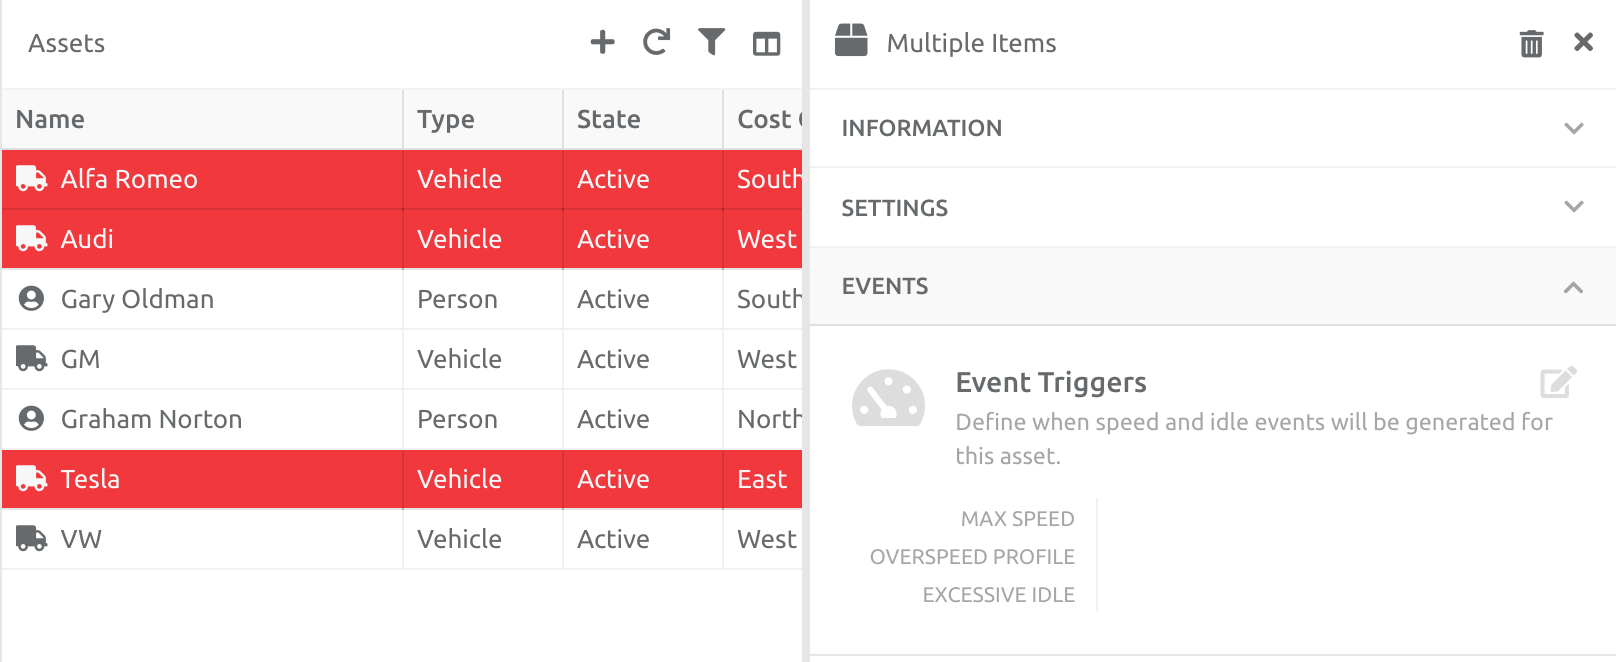
Please note - any Overspeed Profile already added to any of the Assets will be over-written.
3. Create or Edit an Asset Rating
Create an Asset Rating profile as per usual. To add a Band as an Event, follow the steps below:
Choose Action under the Event Filter, down to Overspeed > Band.
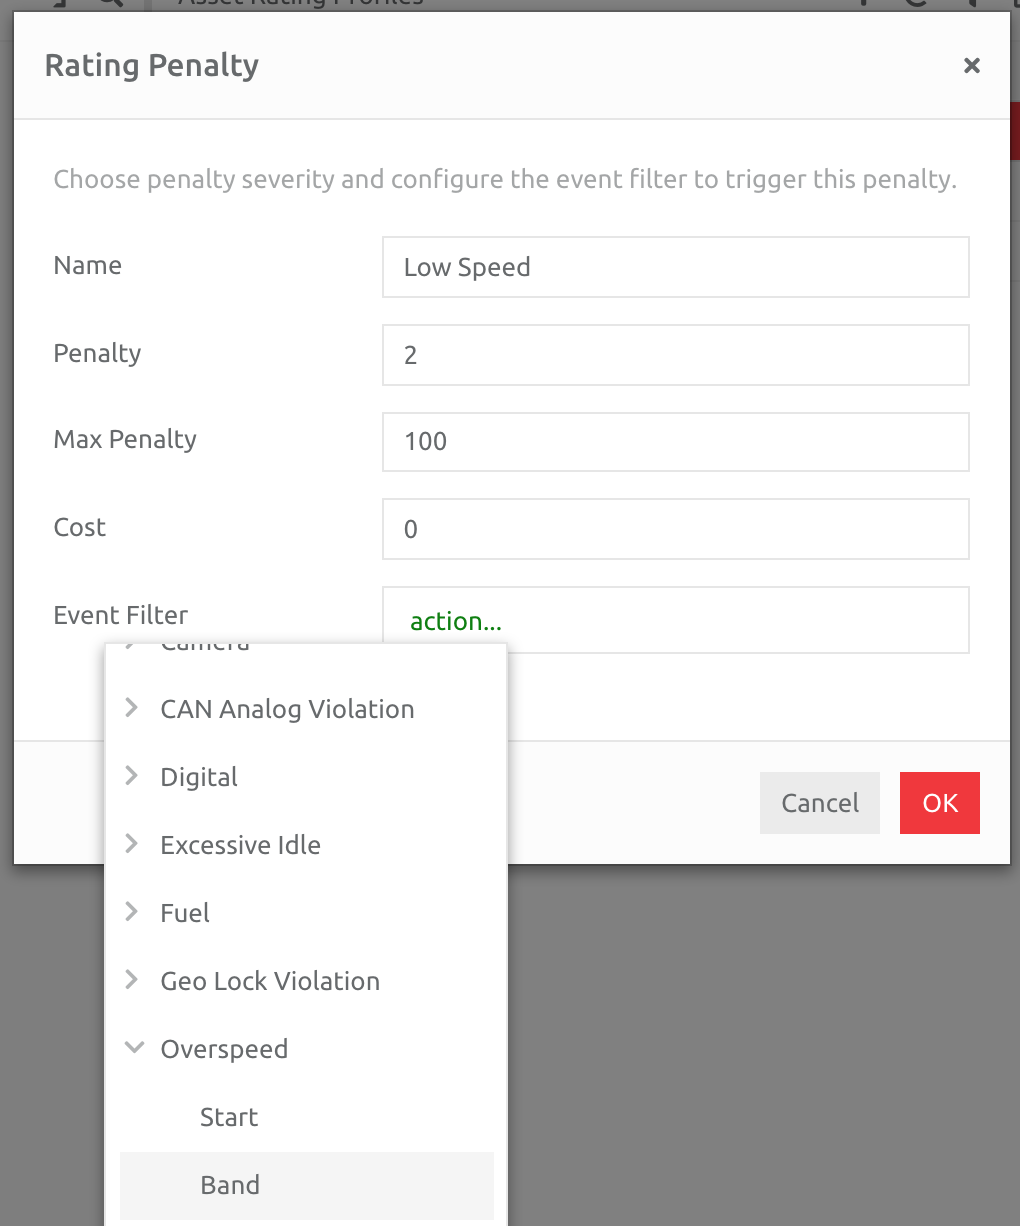
Choose the Profile name, and the band in it to add to the Rating profile (in this example we choose KTT Band Test I Profile and Low band).
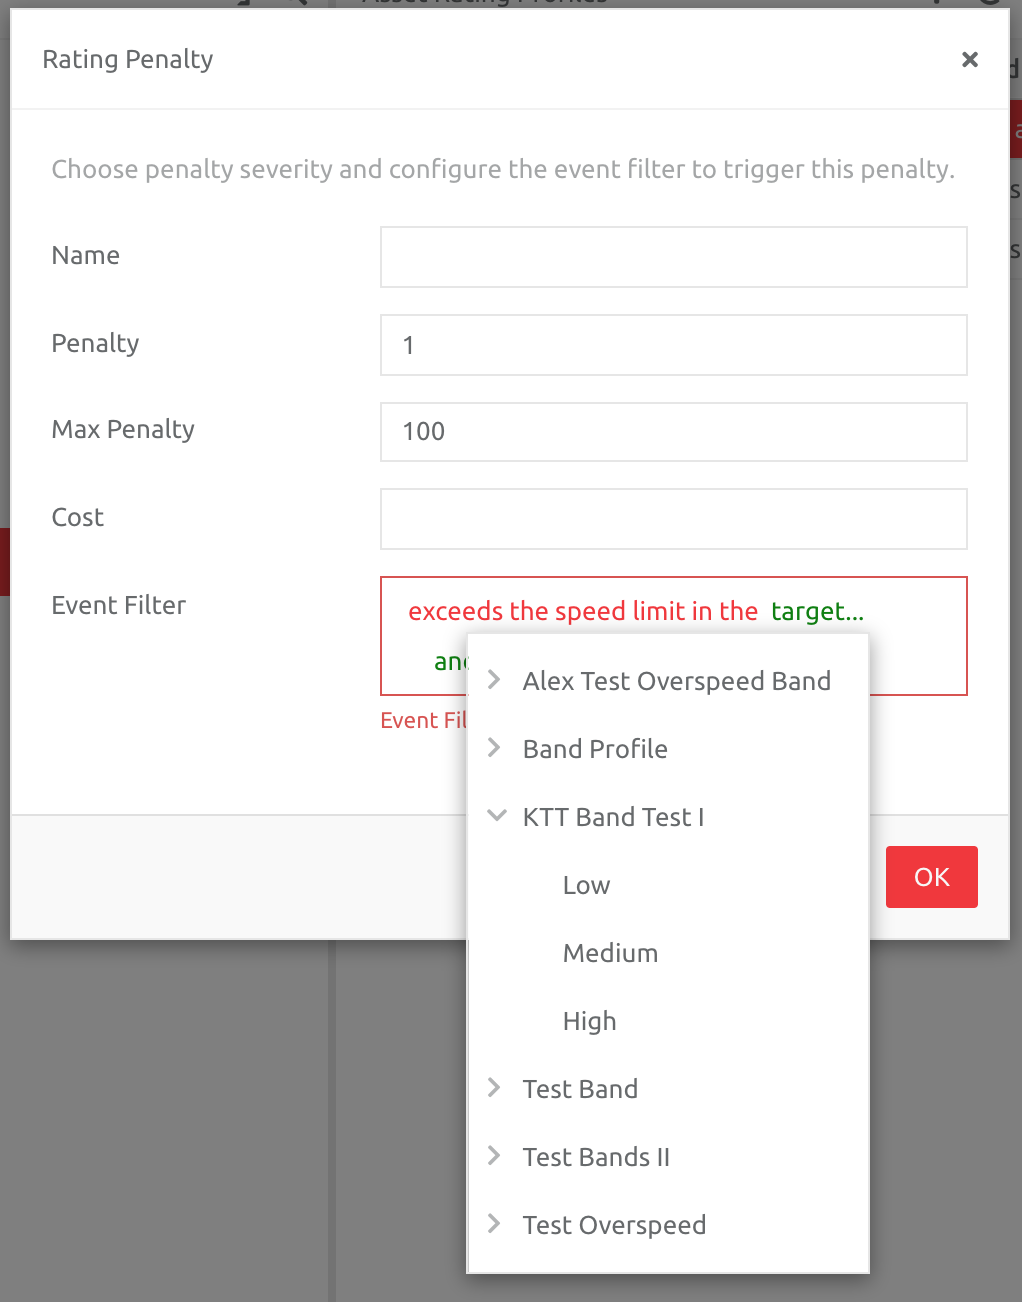
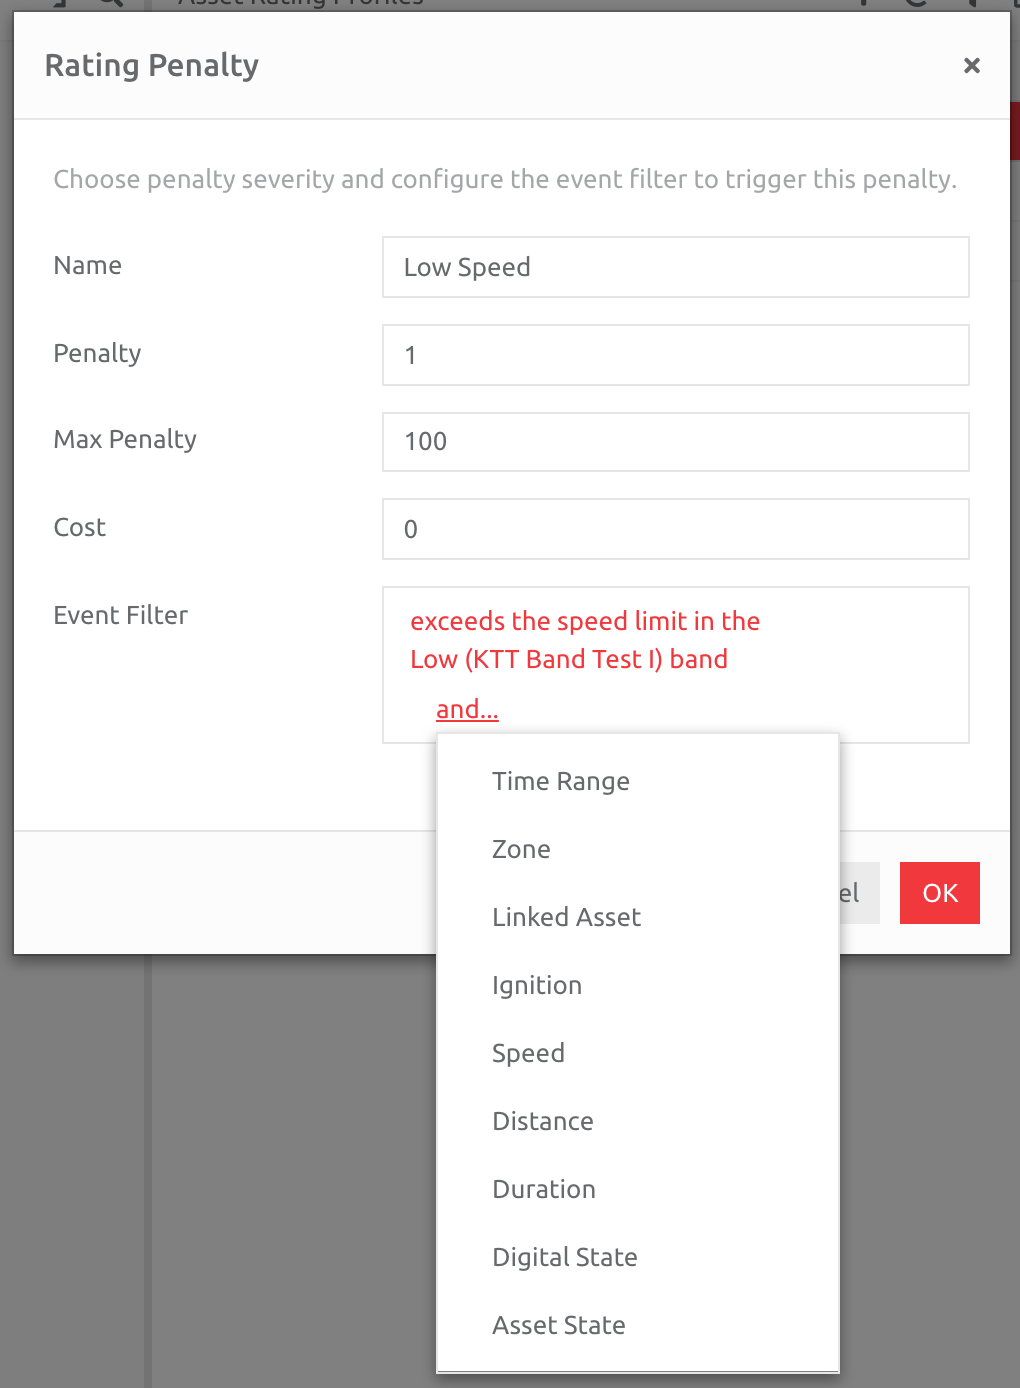
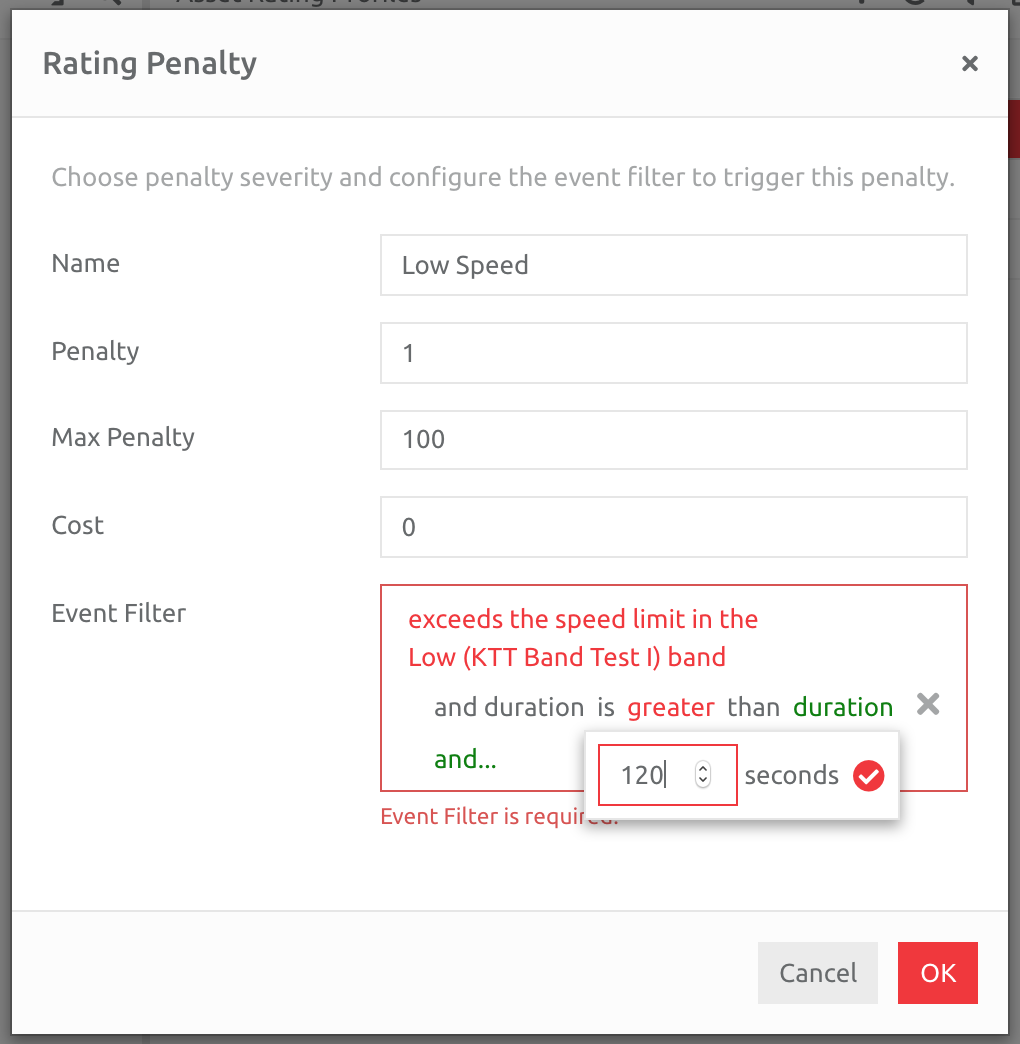
You can further refine the Rating Profile by adding the Distance or Duration of the Event, or Speed, above which the penalty will trigger. In this example, we added Duration of > 120 seconds:
Reporting on Overspeeding Events
Overspeeding Events per Band Profile can be reported in two ways:
1. Standard Reports
- Overspeeding Report - Profile, which shows Distance, Duration in each band, Maximum Speed, and Maximum Percentage over the speed limit.
2. Analytic Dashboards
- The Overspeed Profile Analytics Report includes the Instances and Distance and Duration for each band in the Profile.
- The Trip Analytics Report, if all or some of the profile has been used in the Asset Rating profile.
Comments
0 comments
Please sign in to leave a comment.