Introduction
Geo Lock Profiles are used to automatically geo-lock Assets, based on a set of rules defined by the User.
Different Asset types based on groups, cost centres etc can be geo-locked at different times of different days, using multiple Geo Lock Profiles.
Multiple rules can be added within one Geo Lock Profile, allowing Assets to be locked at different times on different days, or not locked at all on some days.
Creating a Geo Lock Profile
Create a Profile Name
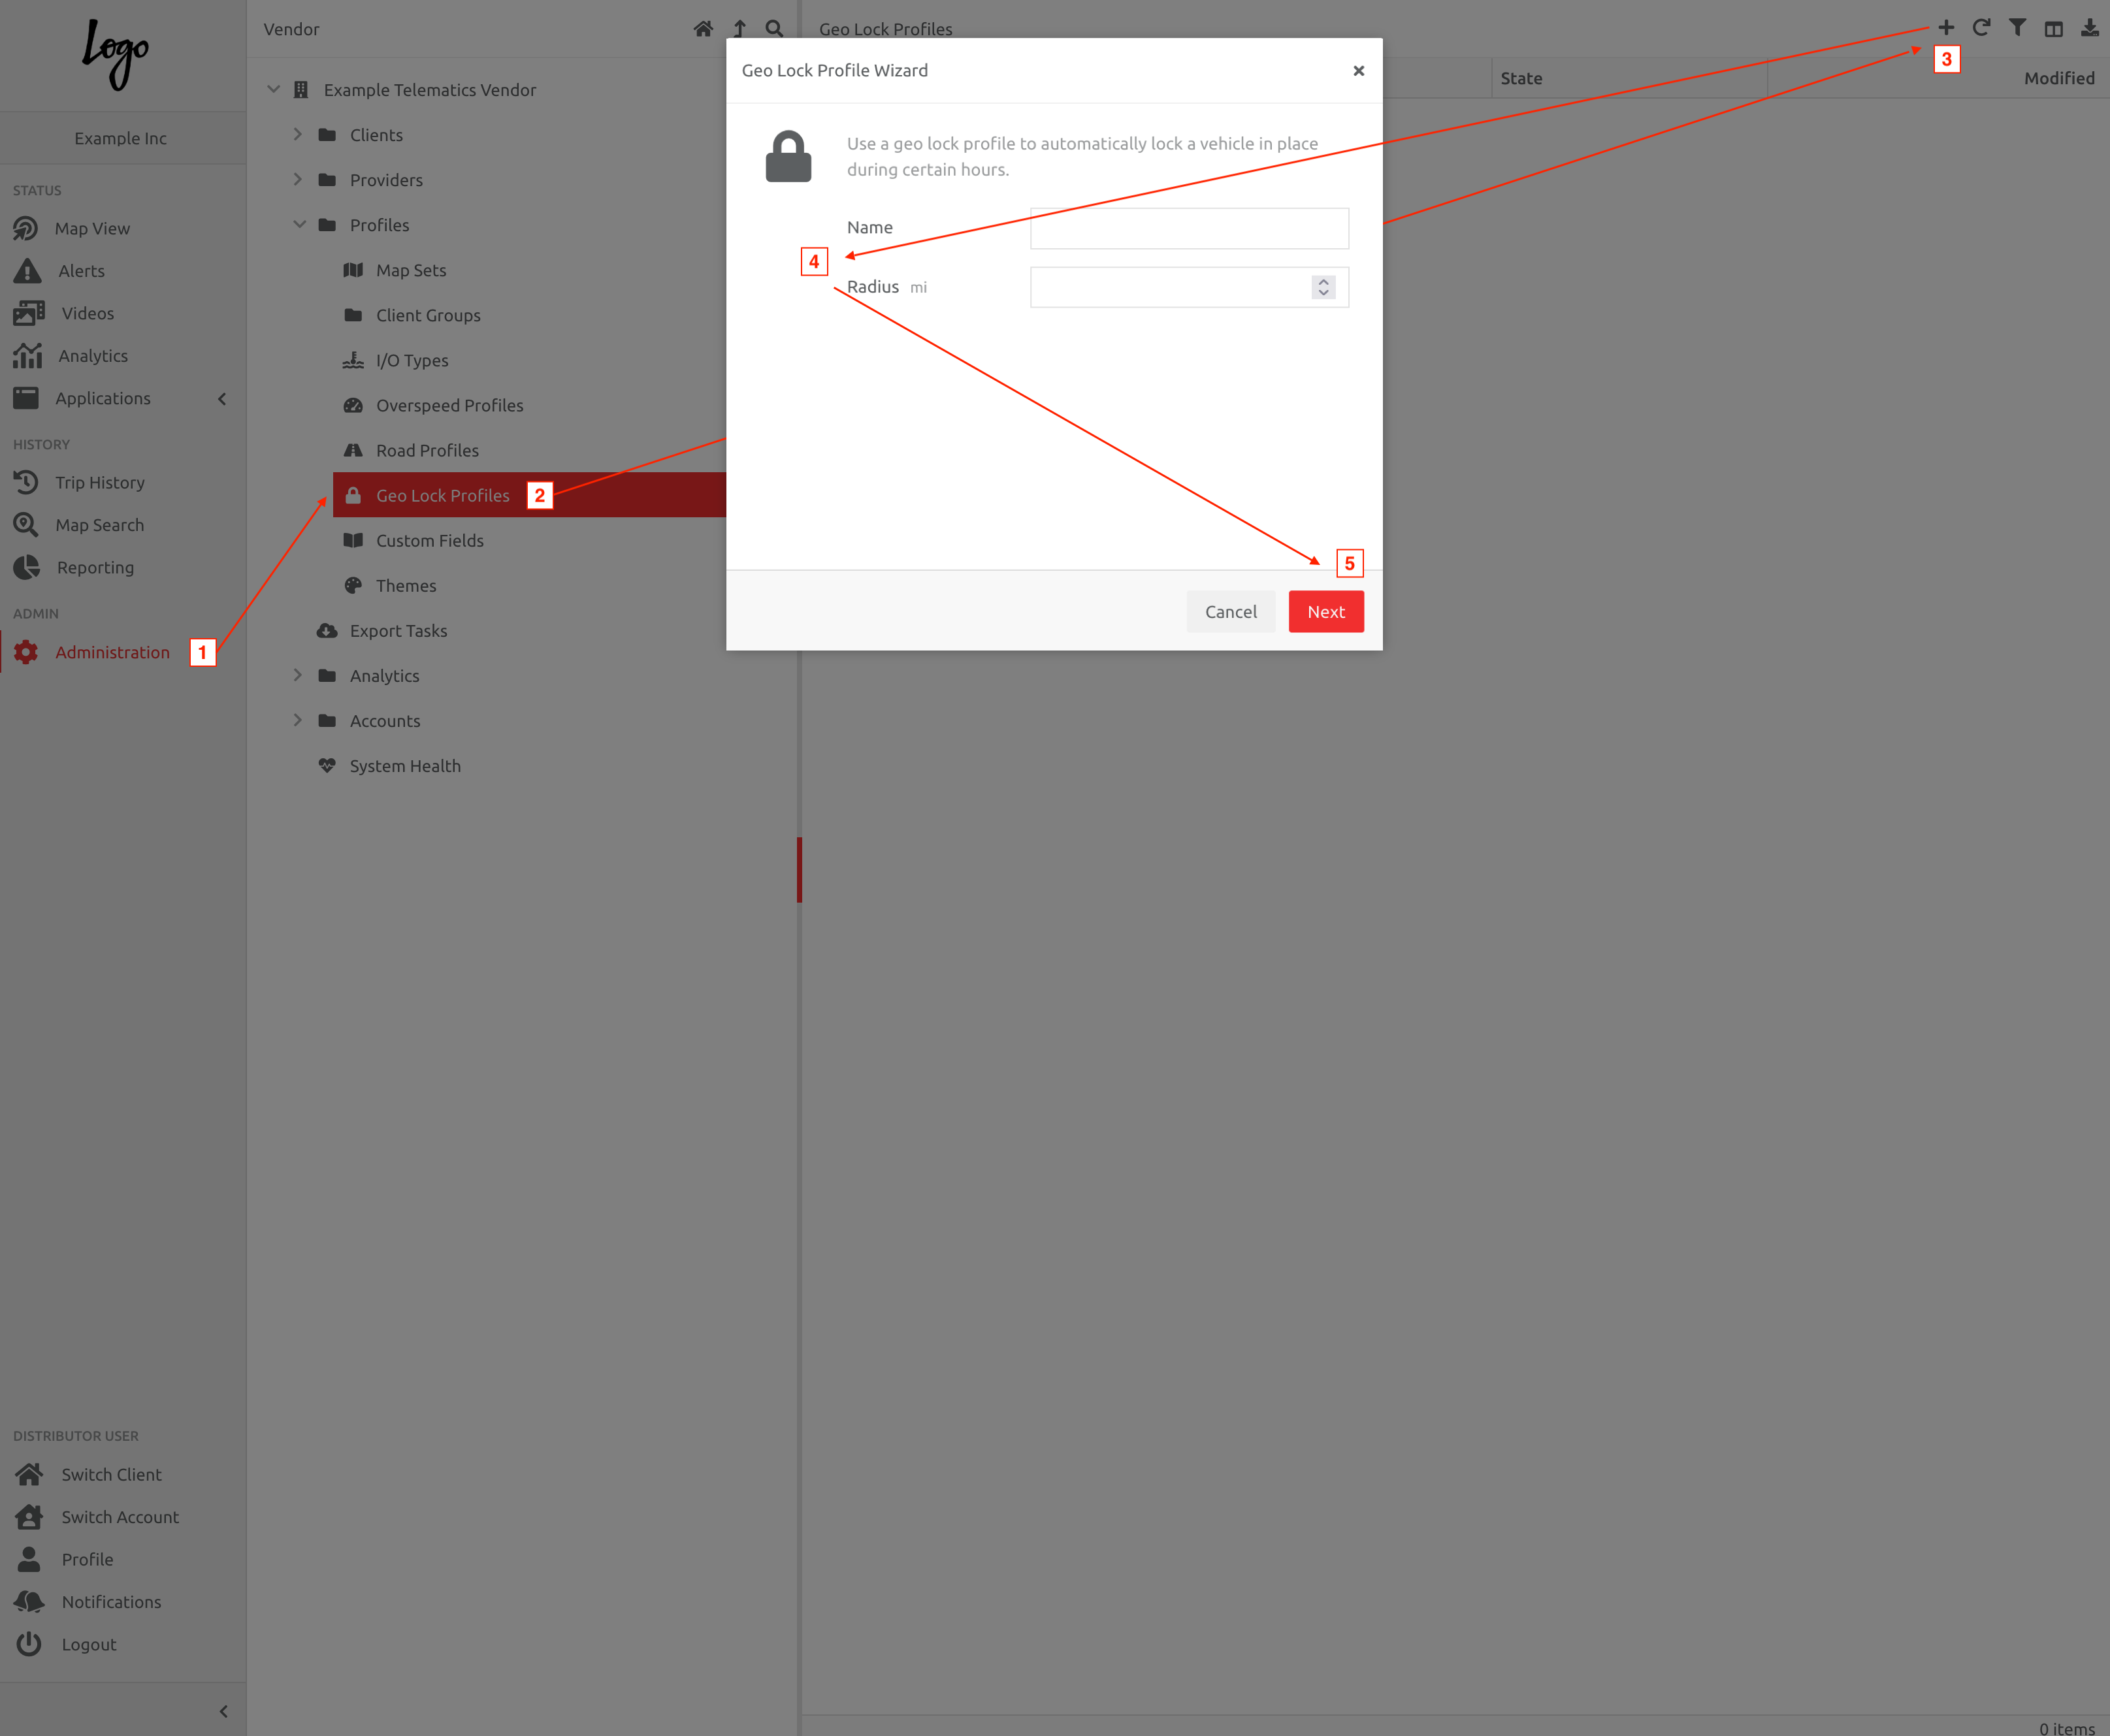
1. Go to Administration,
2. Choose the Geo Lock Profiles option under the Profiles section,
3. Click the + button above the Geo Lock Profile list,
4. Add a Name and Radius for the Geo Lock profile,
5. Click the Next button, and you will be asked to confirm the name, and Finish that part of the set up.
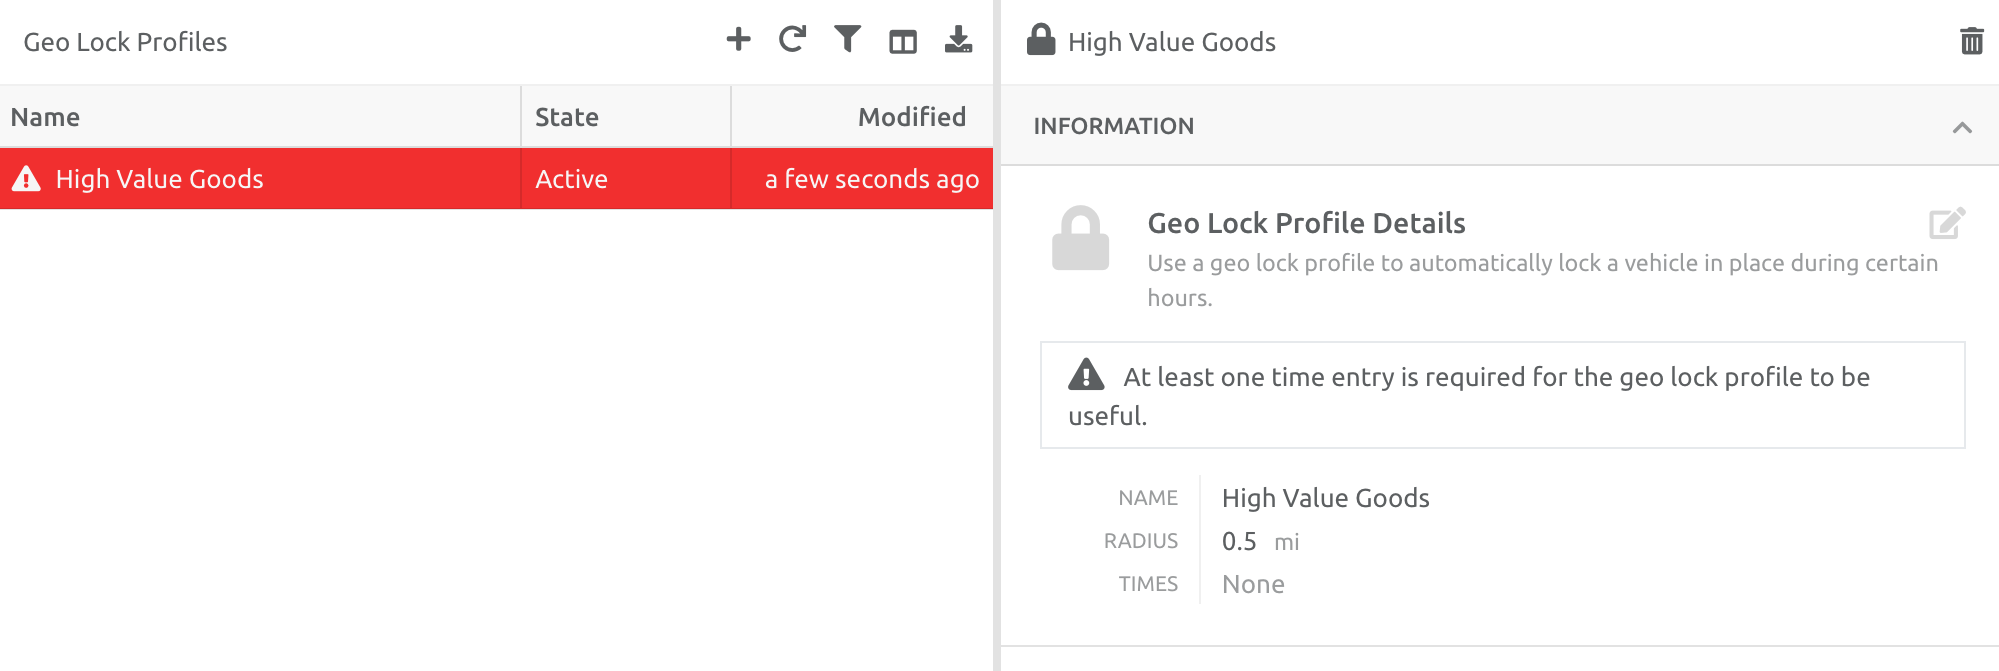
The Profile created will display a warning that it is not complete, and that penalties need to be added:
Adding Days and Times to the Profile
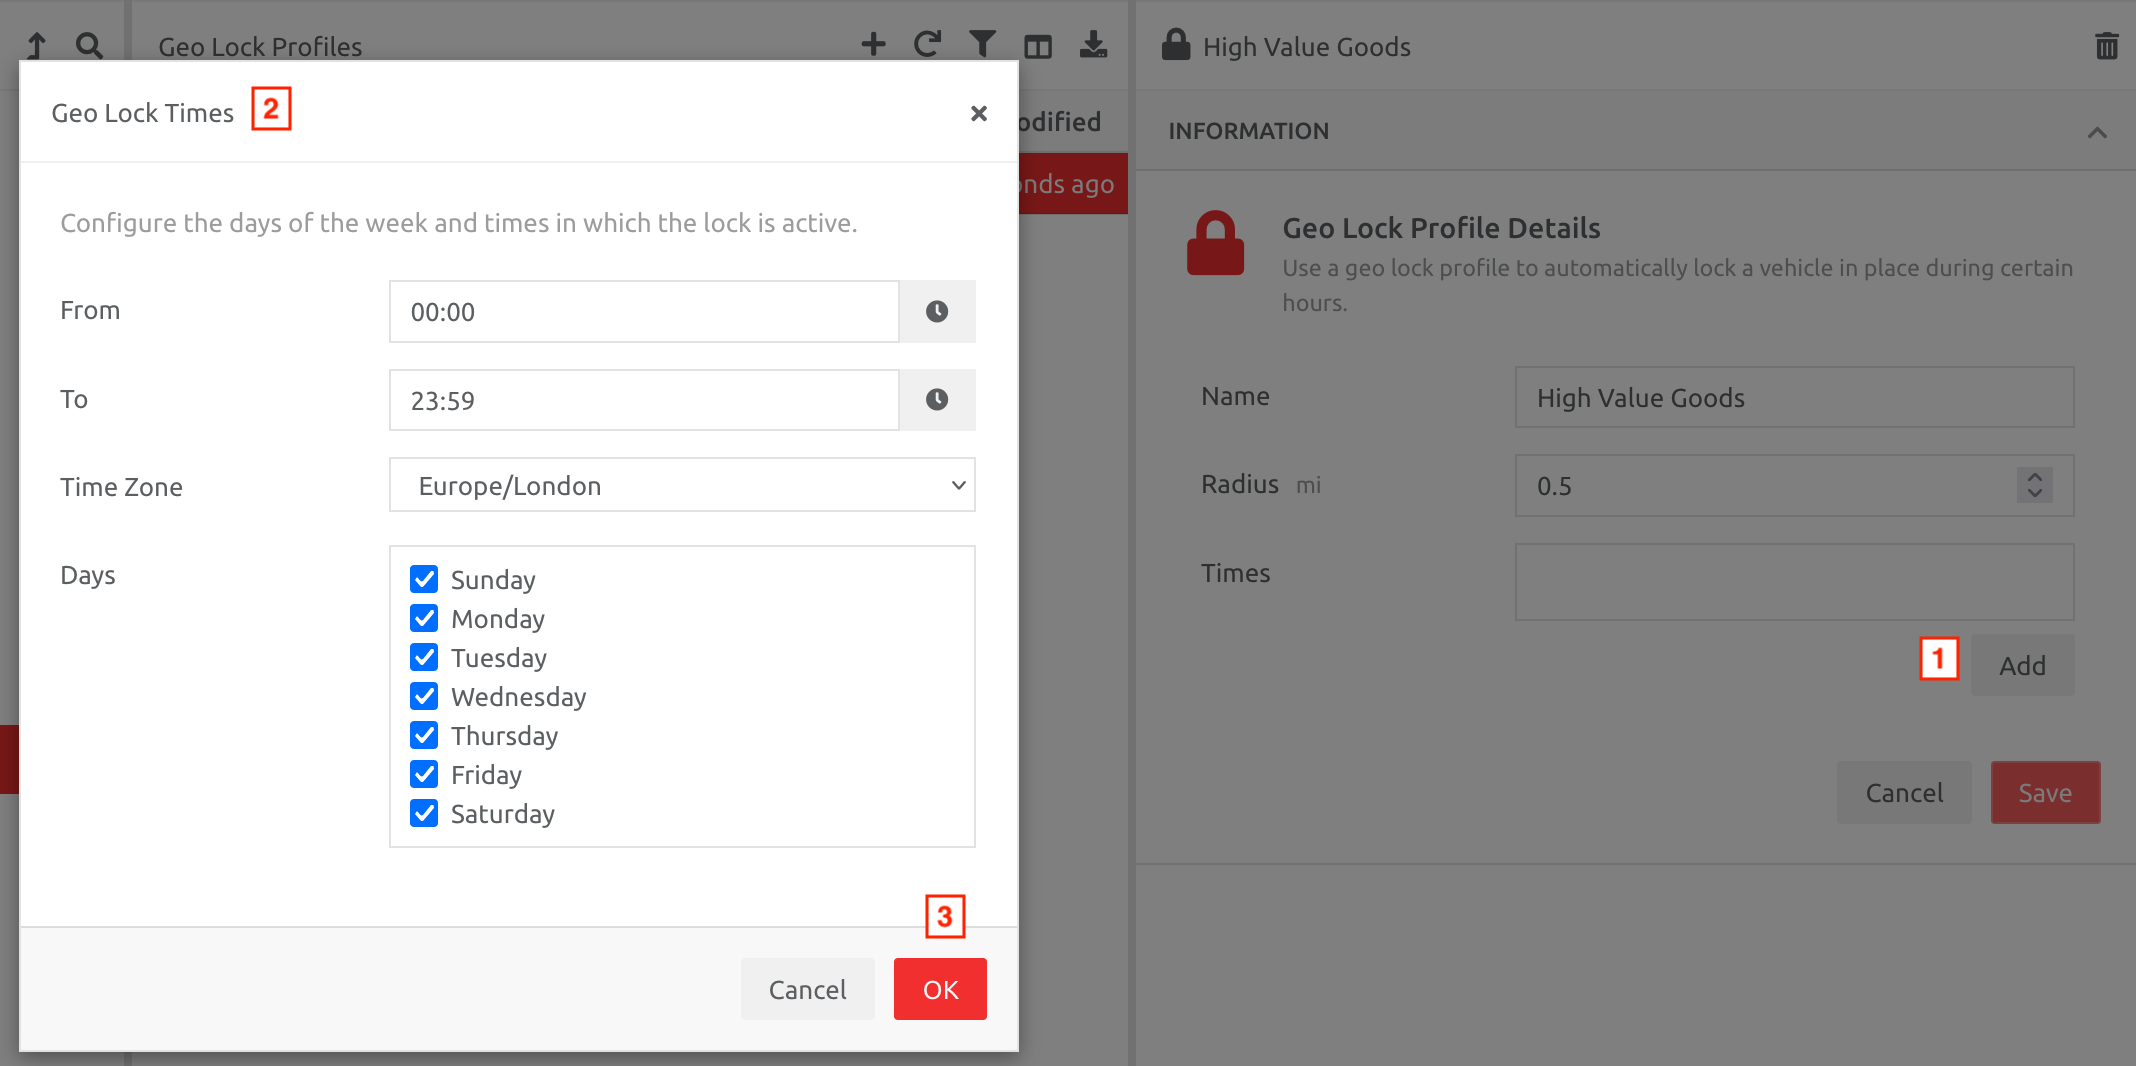
Edit the Rating Profile, then
1. Click Add,
2. Complete the details in the Geo Lock Times box, setting the From and To times,
3. Click OK.
If you would like to have multiple day and time triggers (e.g. weekend times differ to weekday times), then repeat the above procedure and add multiple day and time triggers, then Save those changes.
Adding a Geo Lock Profile to an Asset or Multiple Assets
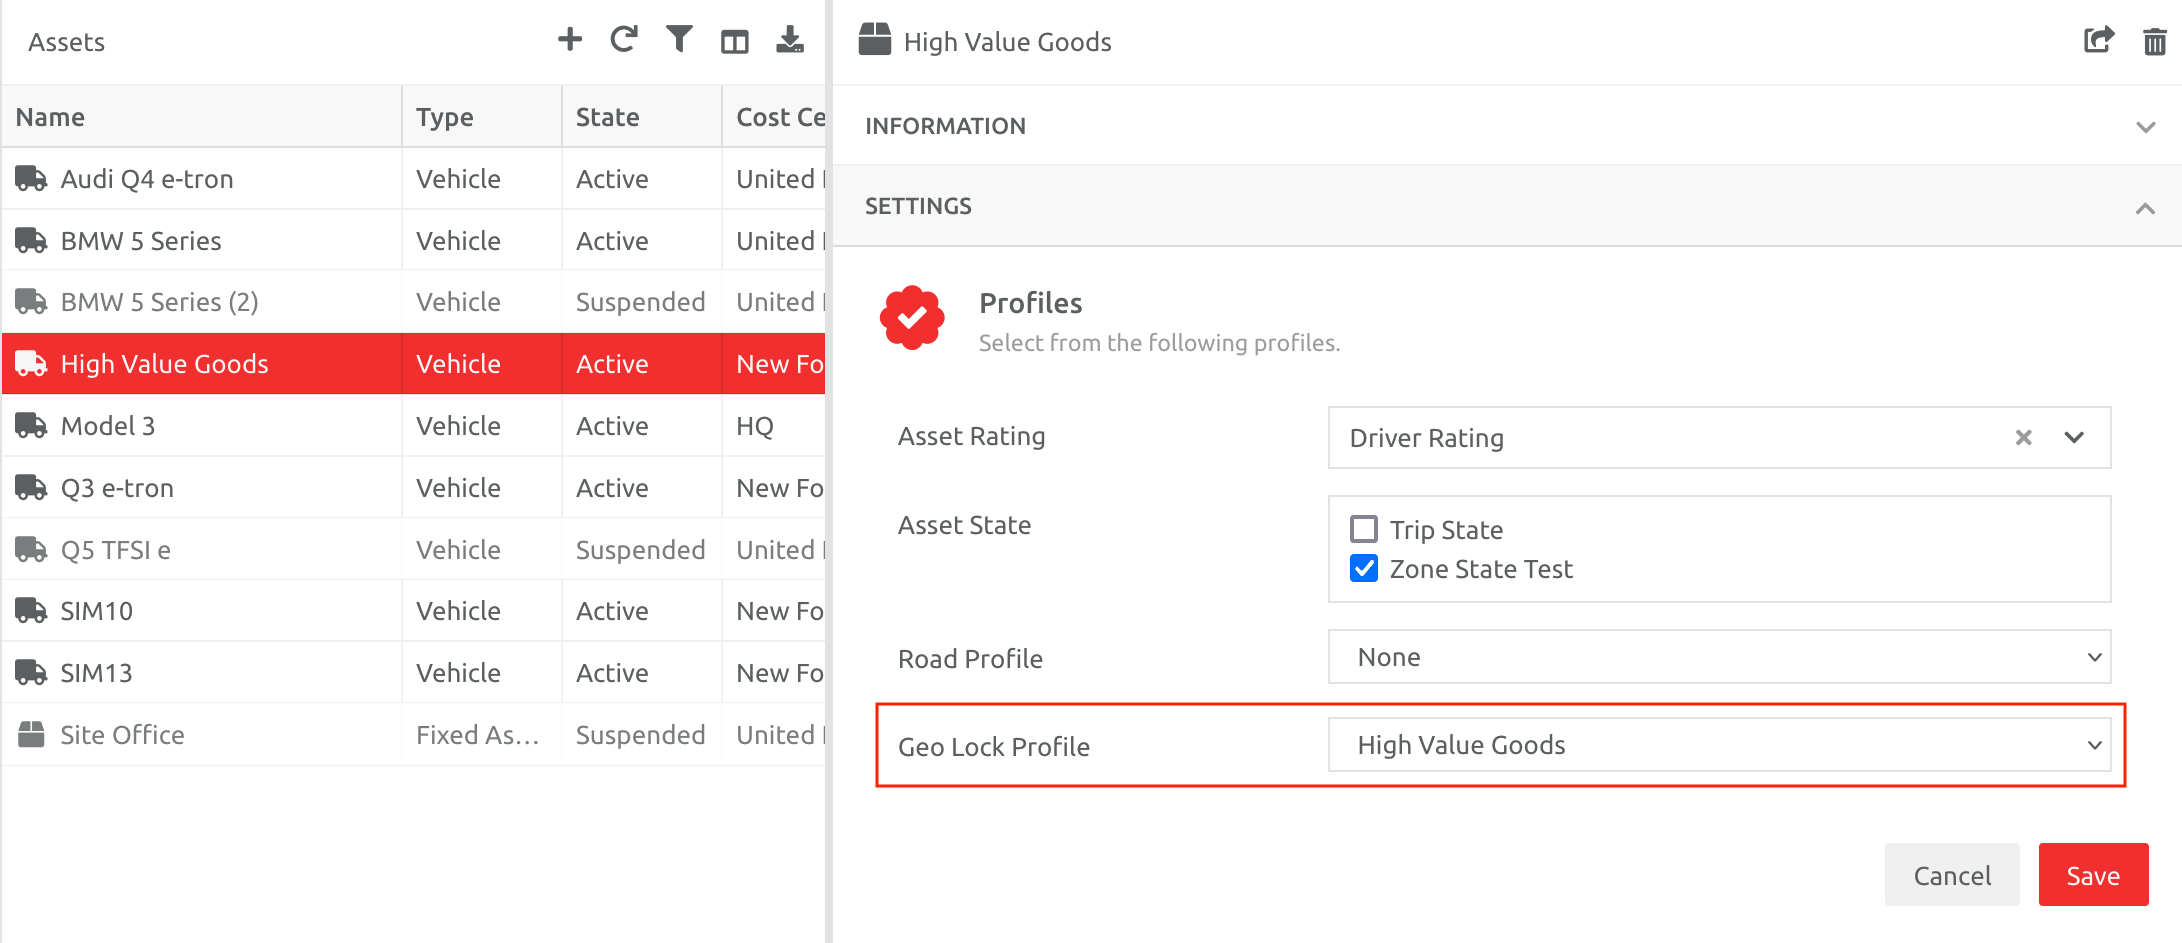
Choose the Asset/s you would like to add the Geo Lock Profile to, open the Settings section, and add the Profile.
Viewing Geo Locked Assets on the Overview Screen
When the Geo-Lock time triggers, the Asset will be geo-locked automatically, in the current position, indicated by a "lock" over the Asset:

The Asset Details section will also indicate what has locked the Asset. In this case the Profile called GeoLock:

The lock will automatically disappear when the Geo Lock Profile end time triggers.
Comments
0 comments
Please sign in to leave a comment.