Introduction
When creating items on the platform, there may be a need to include information that is pertinent to yourself or the Client, but that is not part of the basic information on the platform. This information can be added to items using the Custom Fields feature, and displayed on the Asset Overview screen, as well as reported on, or used to filter items (e.g. Devices, Assets, SIM Cards).
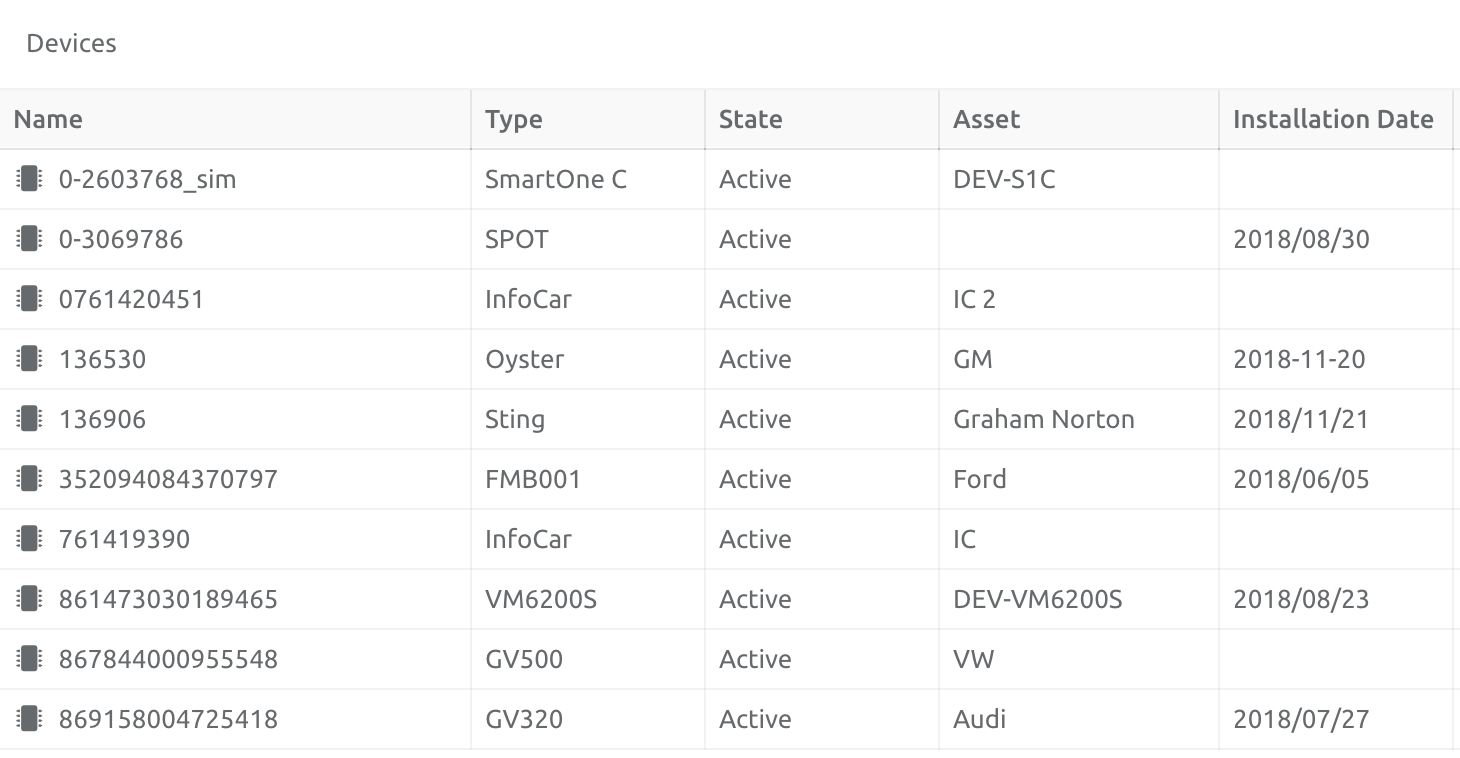
For example, you may want to keep track of the Installation date, or when a Driver's license expires. You can also use Custom Fields to display the VIN of the vehicle. The information will display in the item folder, as a new column heading. In the screenshot below, the Installation Date of the Device has been included on some Devices:
Creating Custom Fields
You can create Custom Fields at two levels: Vendor or Client.
Vendor - If you create them at Vendor level, every Client will display those Fields as options under the items.
Client - If you create them at Client level, only that Client will display them.
Before creating the Fields, choose the appropriate level. They are created under the Vendor or Client Profiles. The example described below is at a Vendor level.
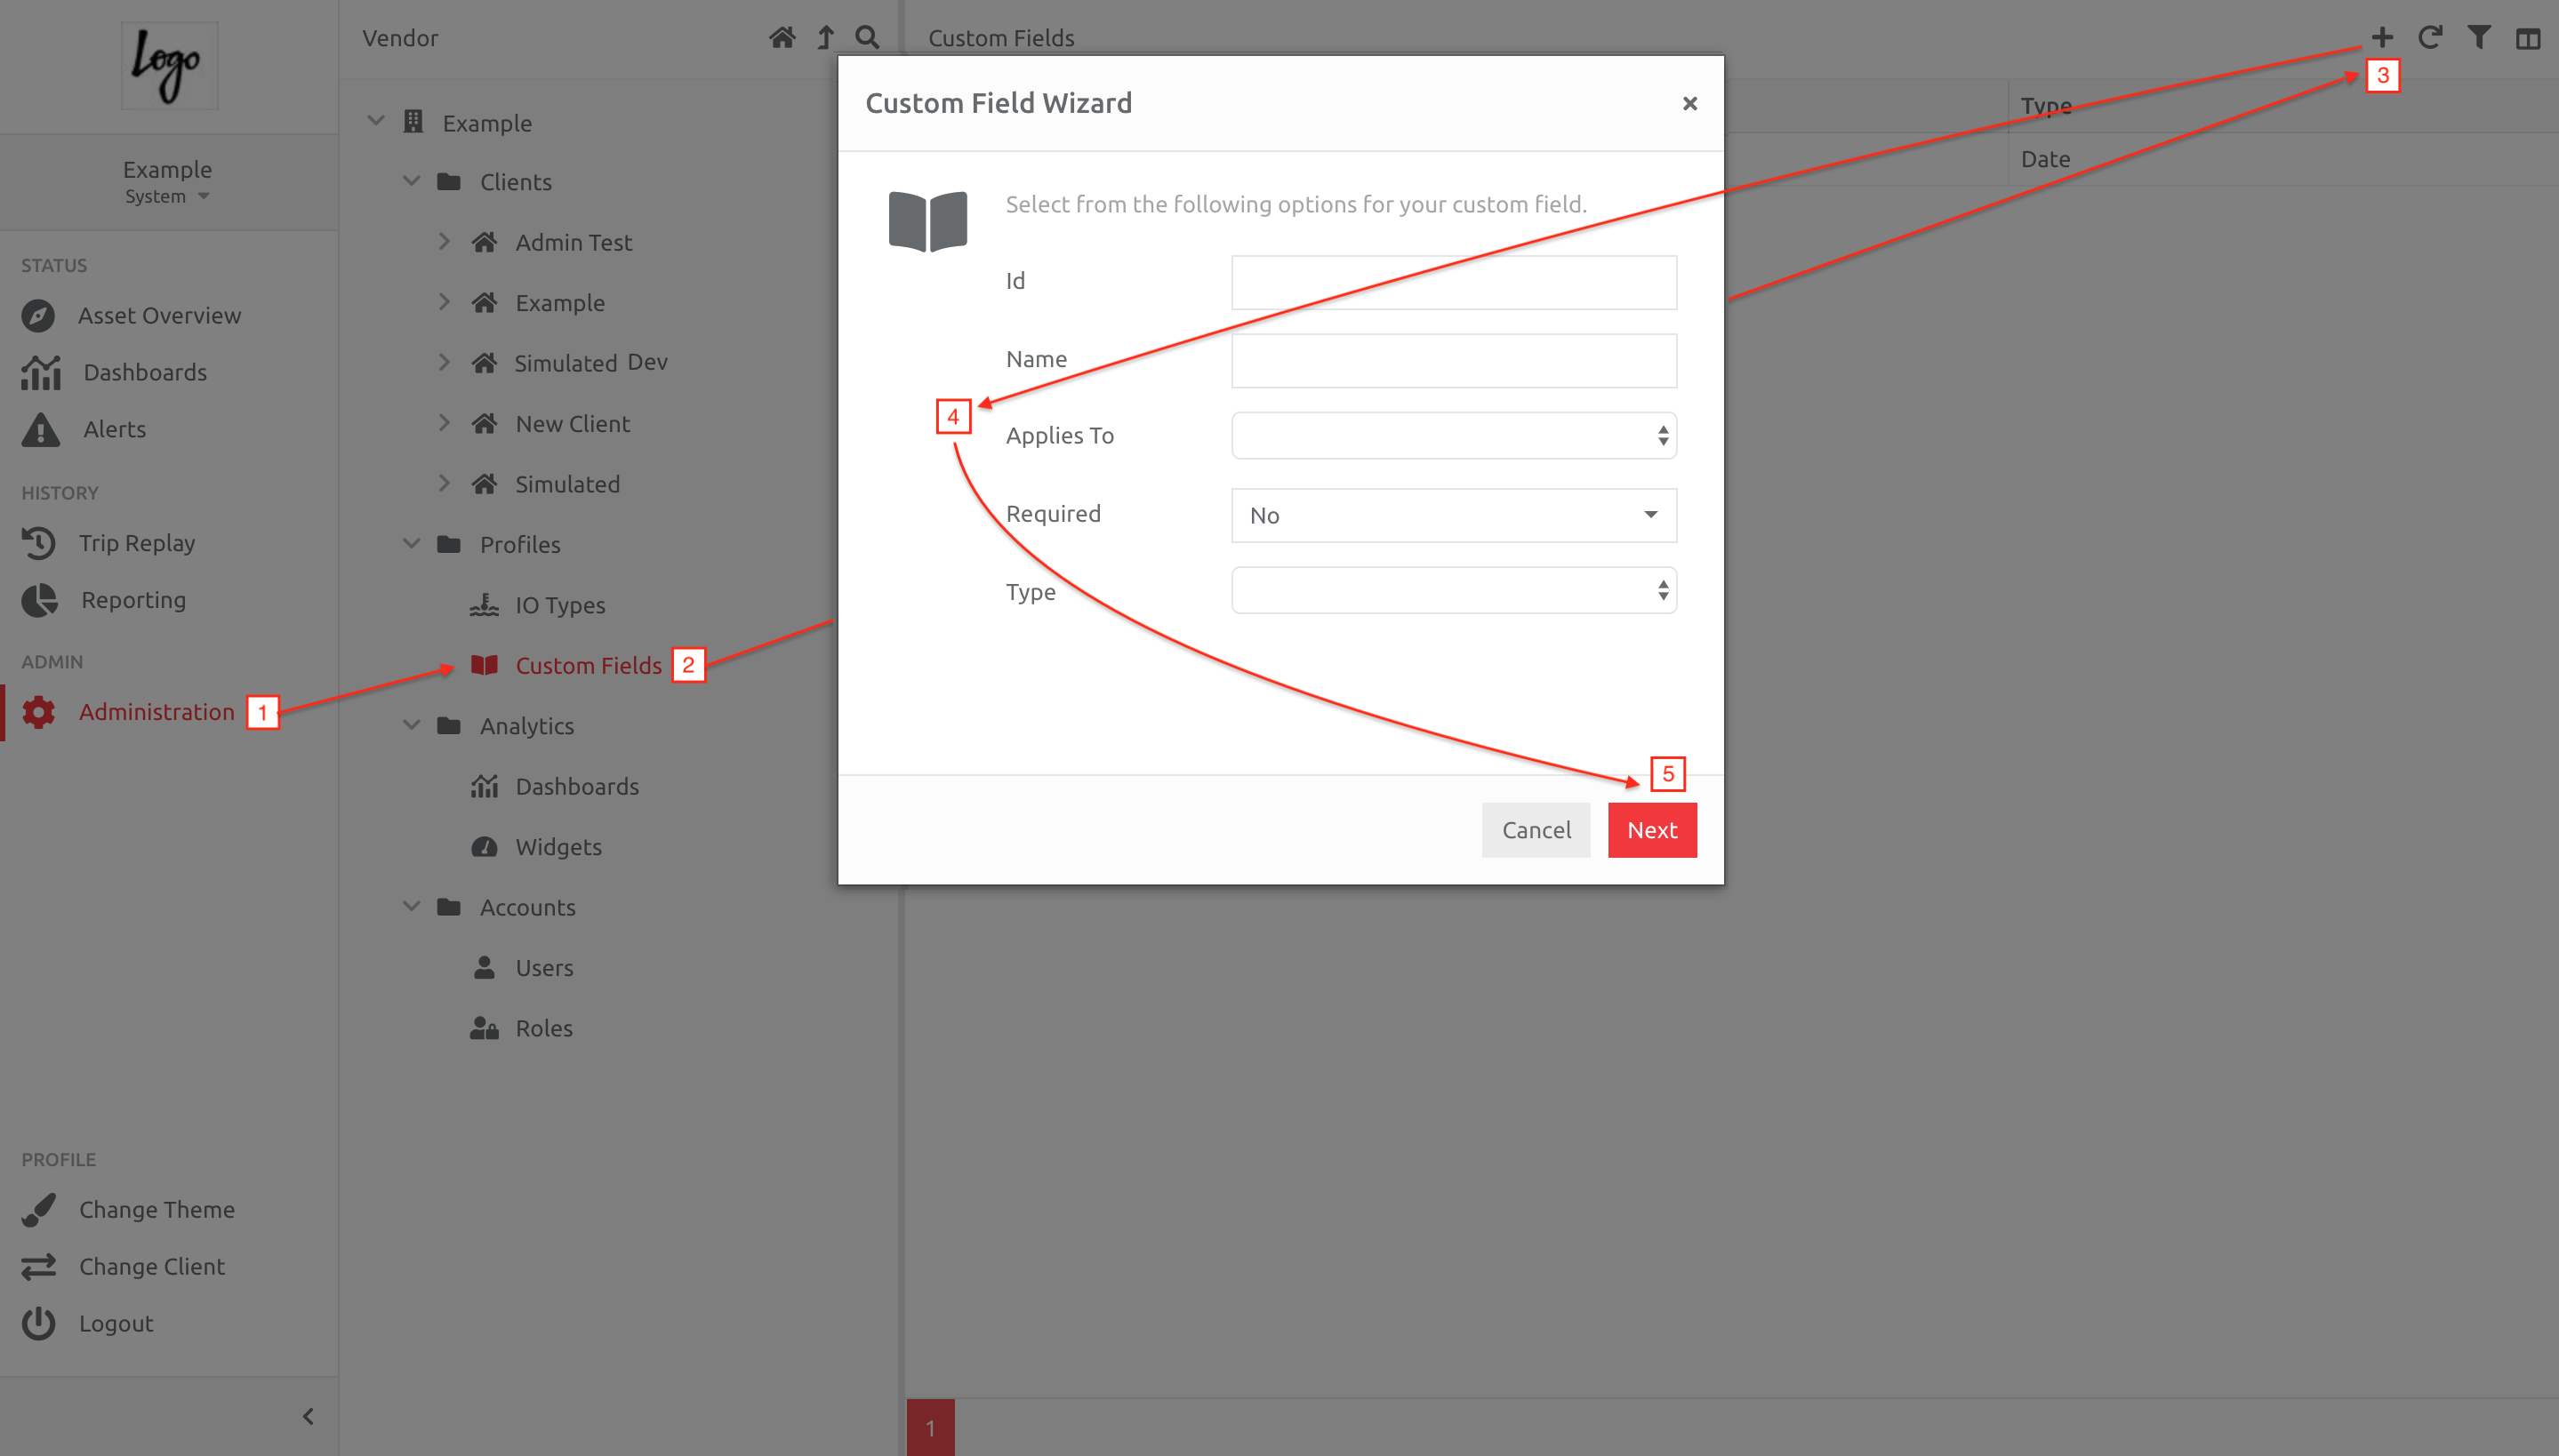
1. Go to Administration,
2. Choose the Custom Fields option under the Profiles section,
3. Click the + button above the Custom Field list,
4. Enter the information* in the fields shown,
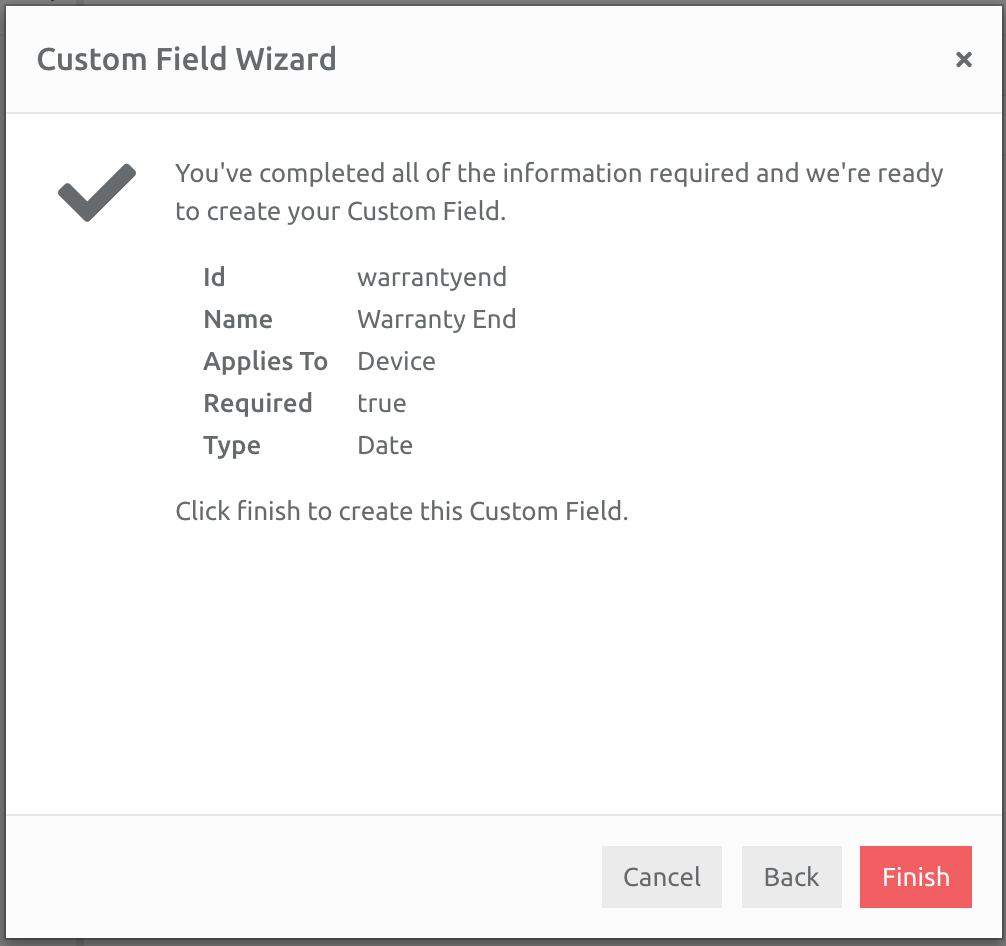
5. Click the Next button, and you will be asked to confirm the information, and click Finish to complete the set up.
*the information that needs to be added to the Custom Fields includes:
| Id | This is the ID that the platform uses to identify this type of information. It isn't visible to users, but is important to the platform. You can enter any value here, but the platform will remove all spaces and any character other than 'a' to 'z' and '0' to '9'. We suggest you enter the same value as you do for the Title. If 2 custom fields have the same ID, they will overwrite each other. Therefore it is important that this is a unique value. |
| Name | This is what will be used as the name whenever this information is displayed. |
| Applies To | This is a list of items that information can be added to. |
| Required | Select Yes here if you'd like to prevent the user from saving the custom fields information block if the value hasn't yet been entered. Selecting No will allow the user to leave the field blank. |
| Type | This is the type of information that the user will enter. You have the following options: Text: a simple text box to add text information Memo: a multi line text box for entering multiple lines of text information Dropdown Box: a dropdown box that restricts Users to predefined values (see Values** row below) Date: a date selection box Date & Time: a date and time selection box Yes / No: a dropdown that restricts Users to Yes or No |
| Values** | You will only see the Values box if you've selected "Dropdown Box" from the Type field. Here you can enter the values that the user is allowed to select from. |
Adding Custom Information to an Item
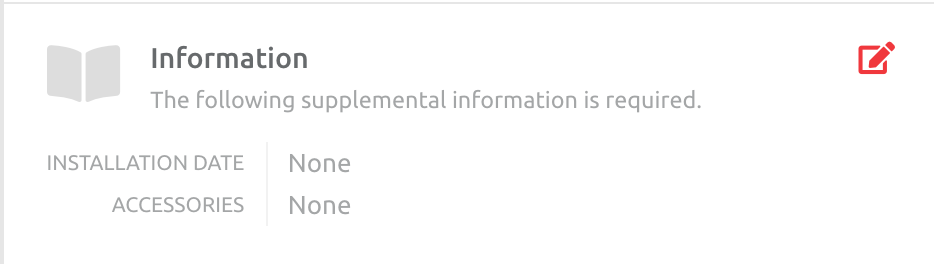
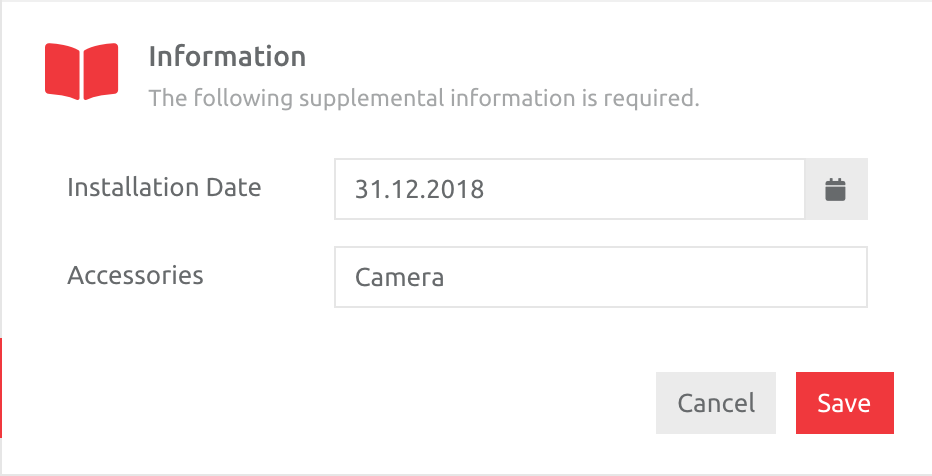
After you have created Custom Fields, they will appear as a list on all items of that type chosen under Applies To, under the Information section.
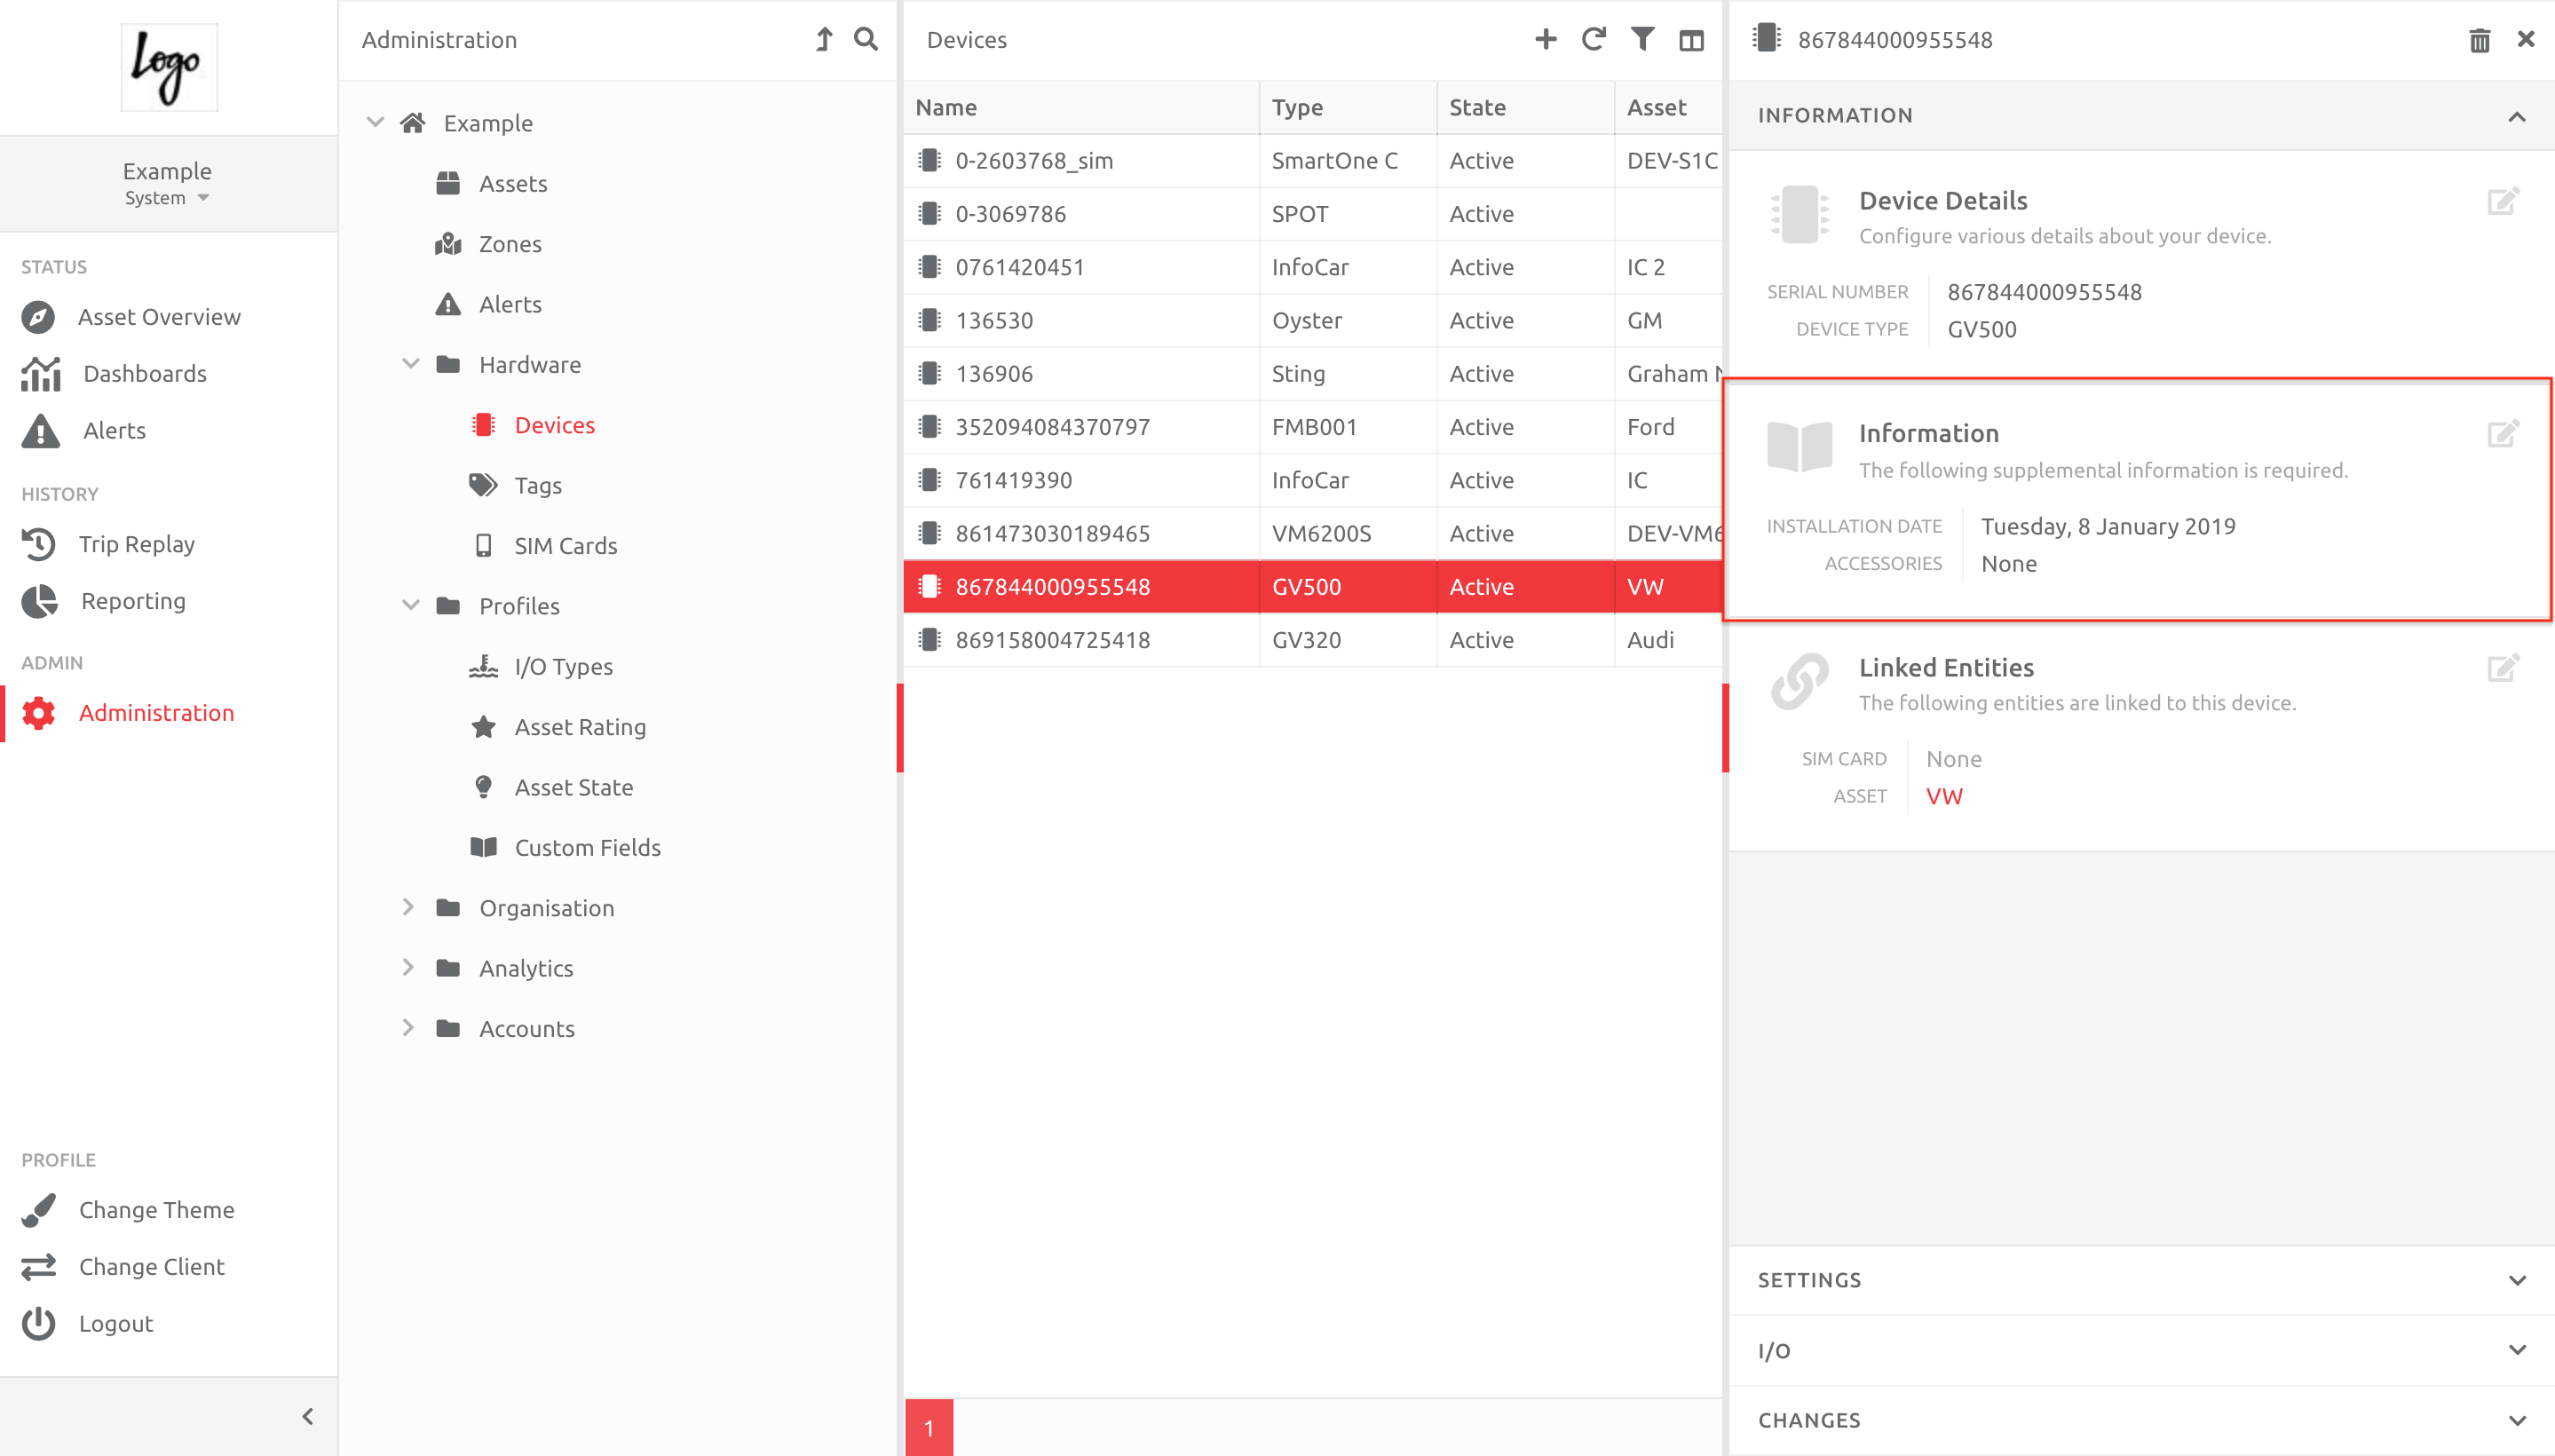
These Fields can be edited and changed by choosing the Edit option in Information. Save when the Information has been completed:
Displaying/Using Custom Field Information
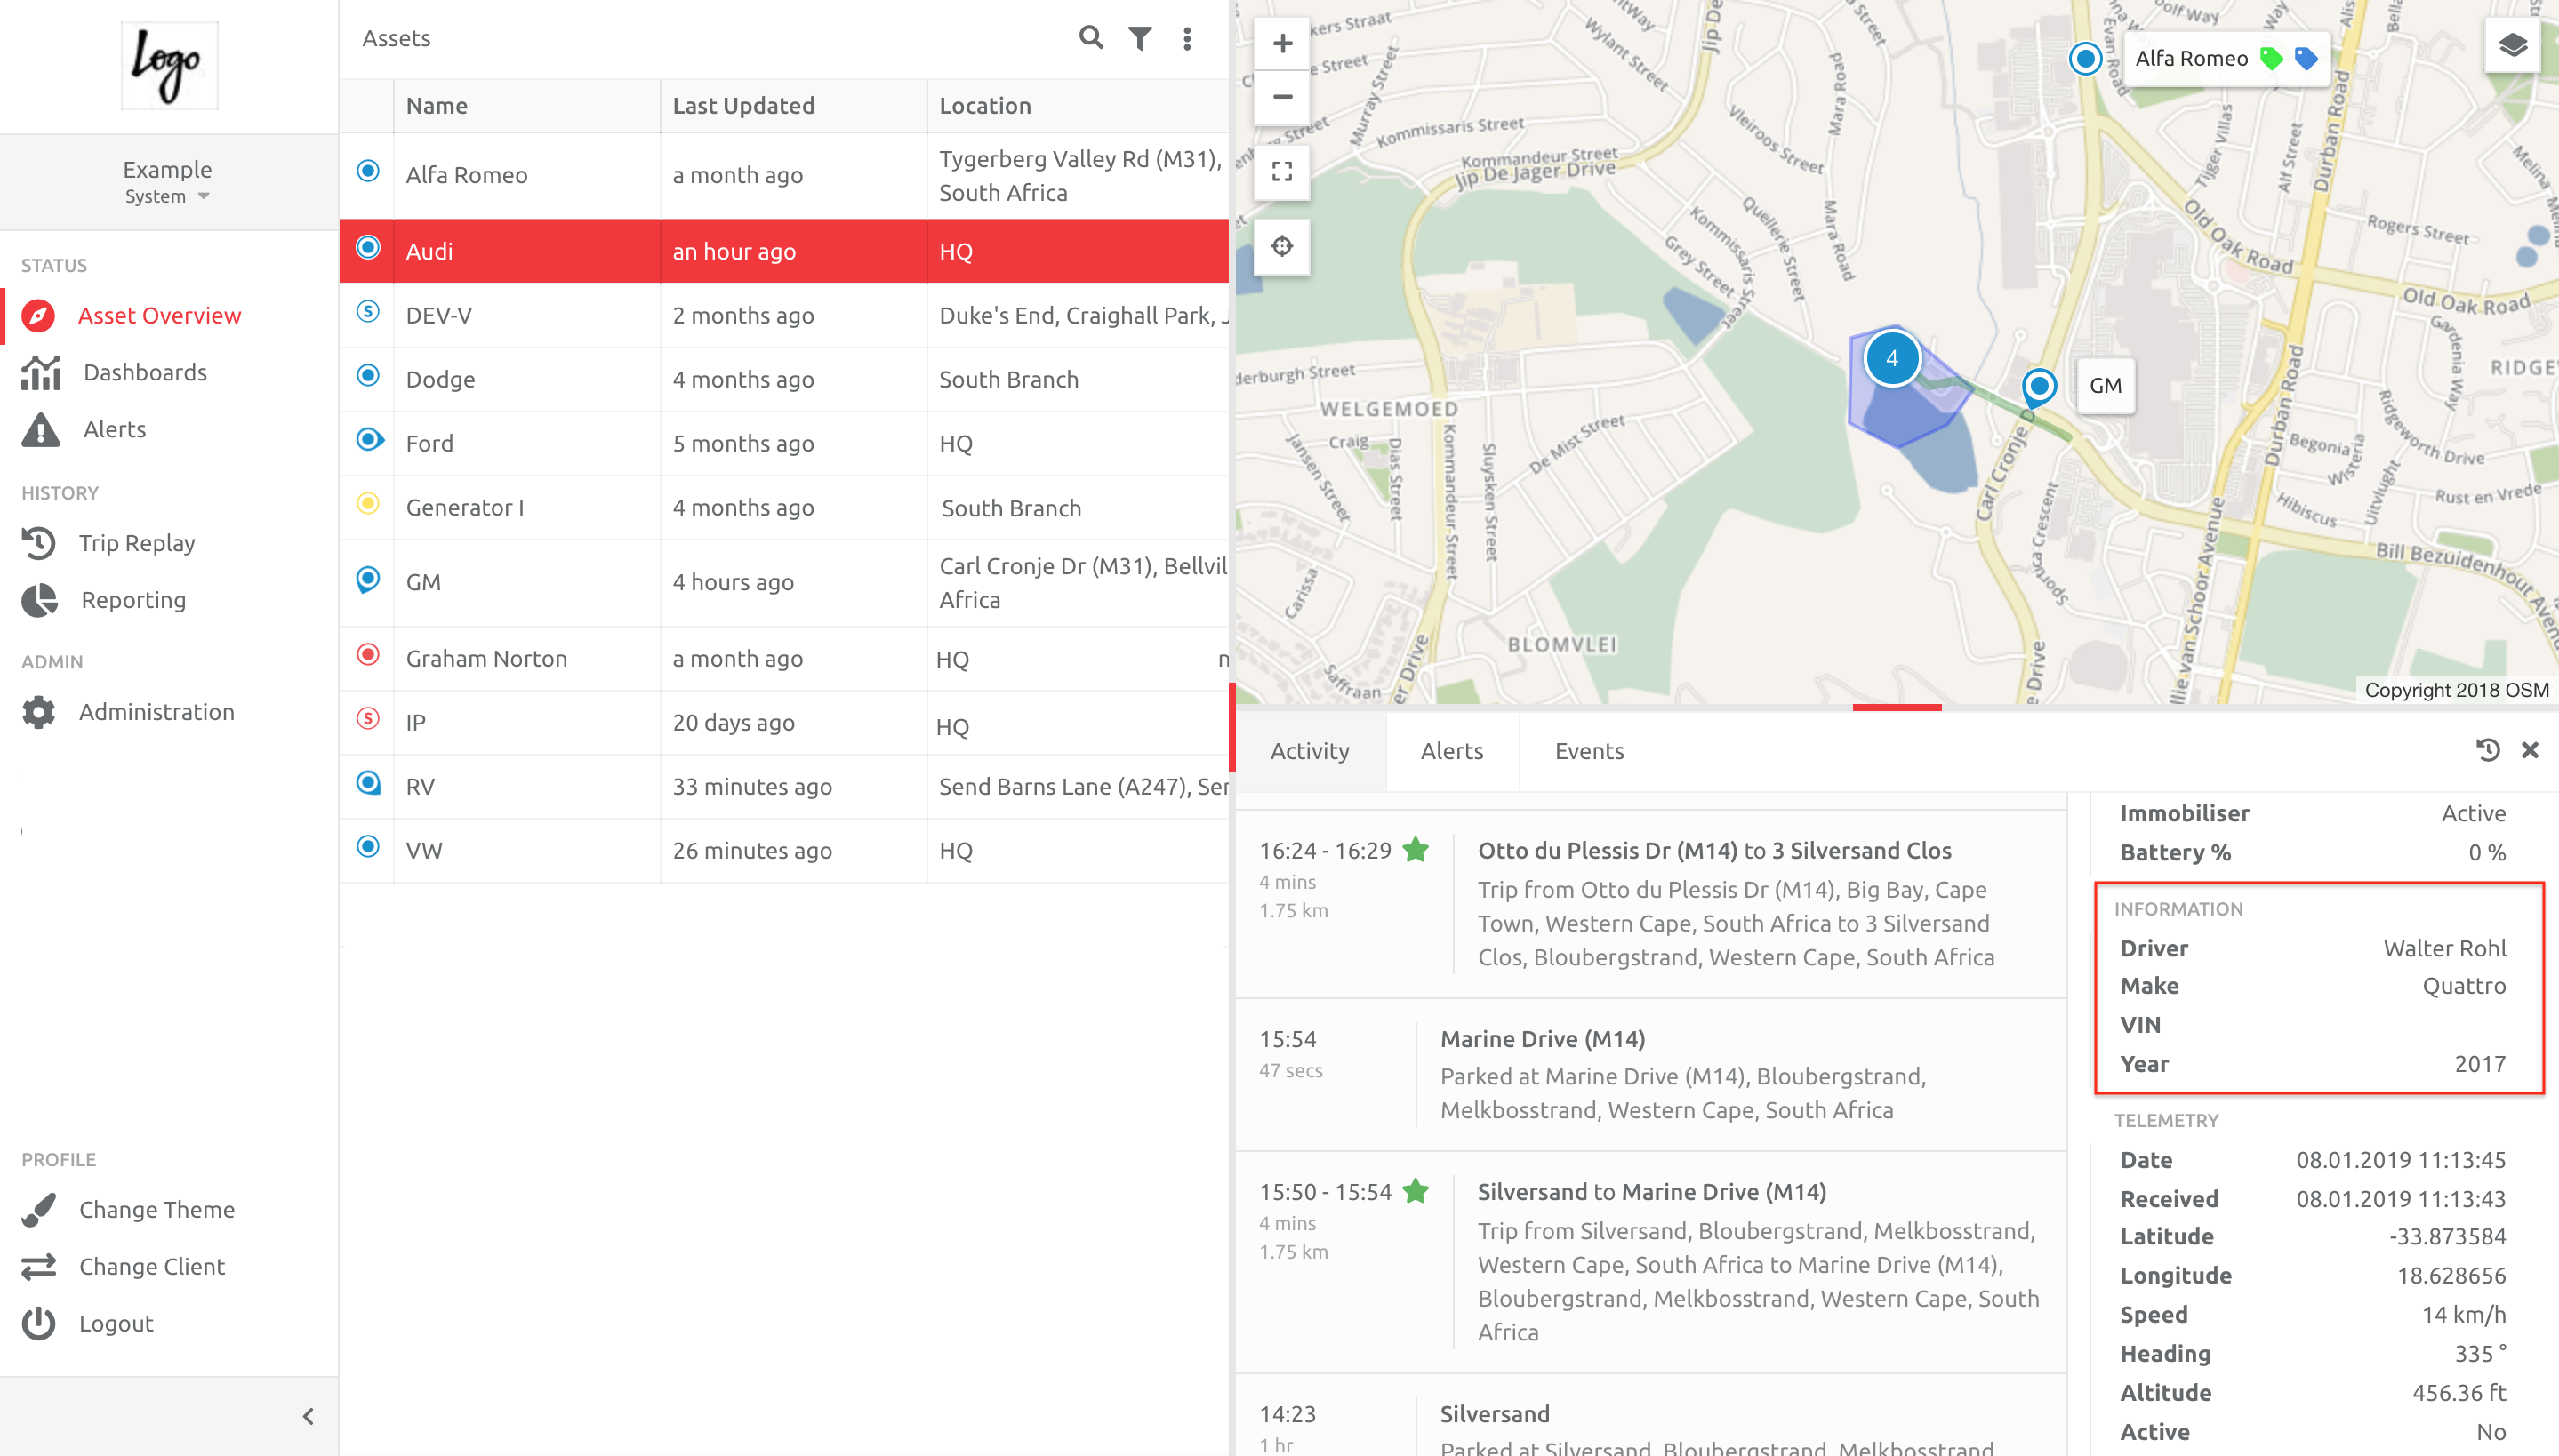
Asset Overview Screen
Custom Fields are displayed on the right hand side of the screen when an Asset is chosen:
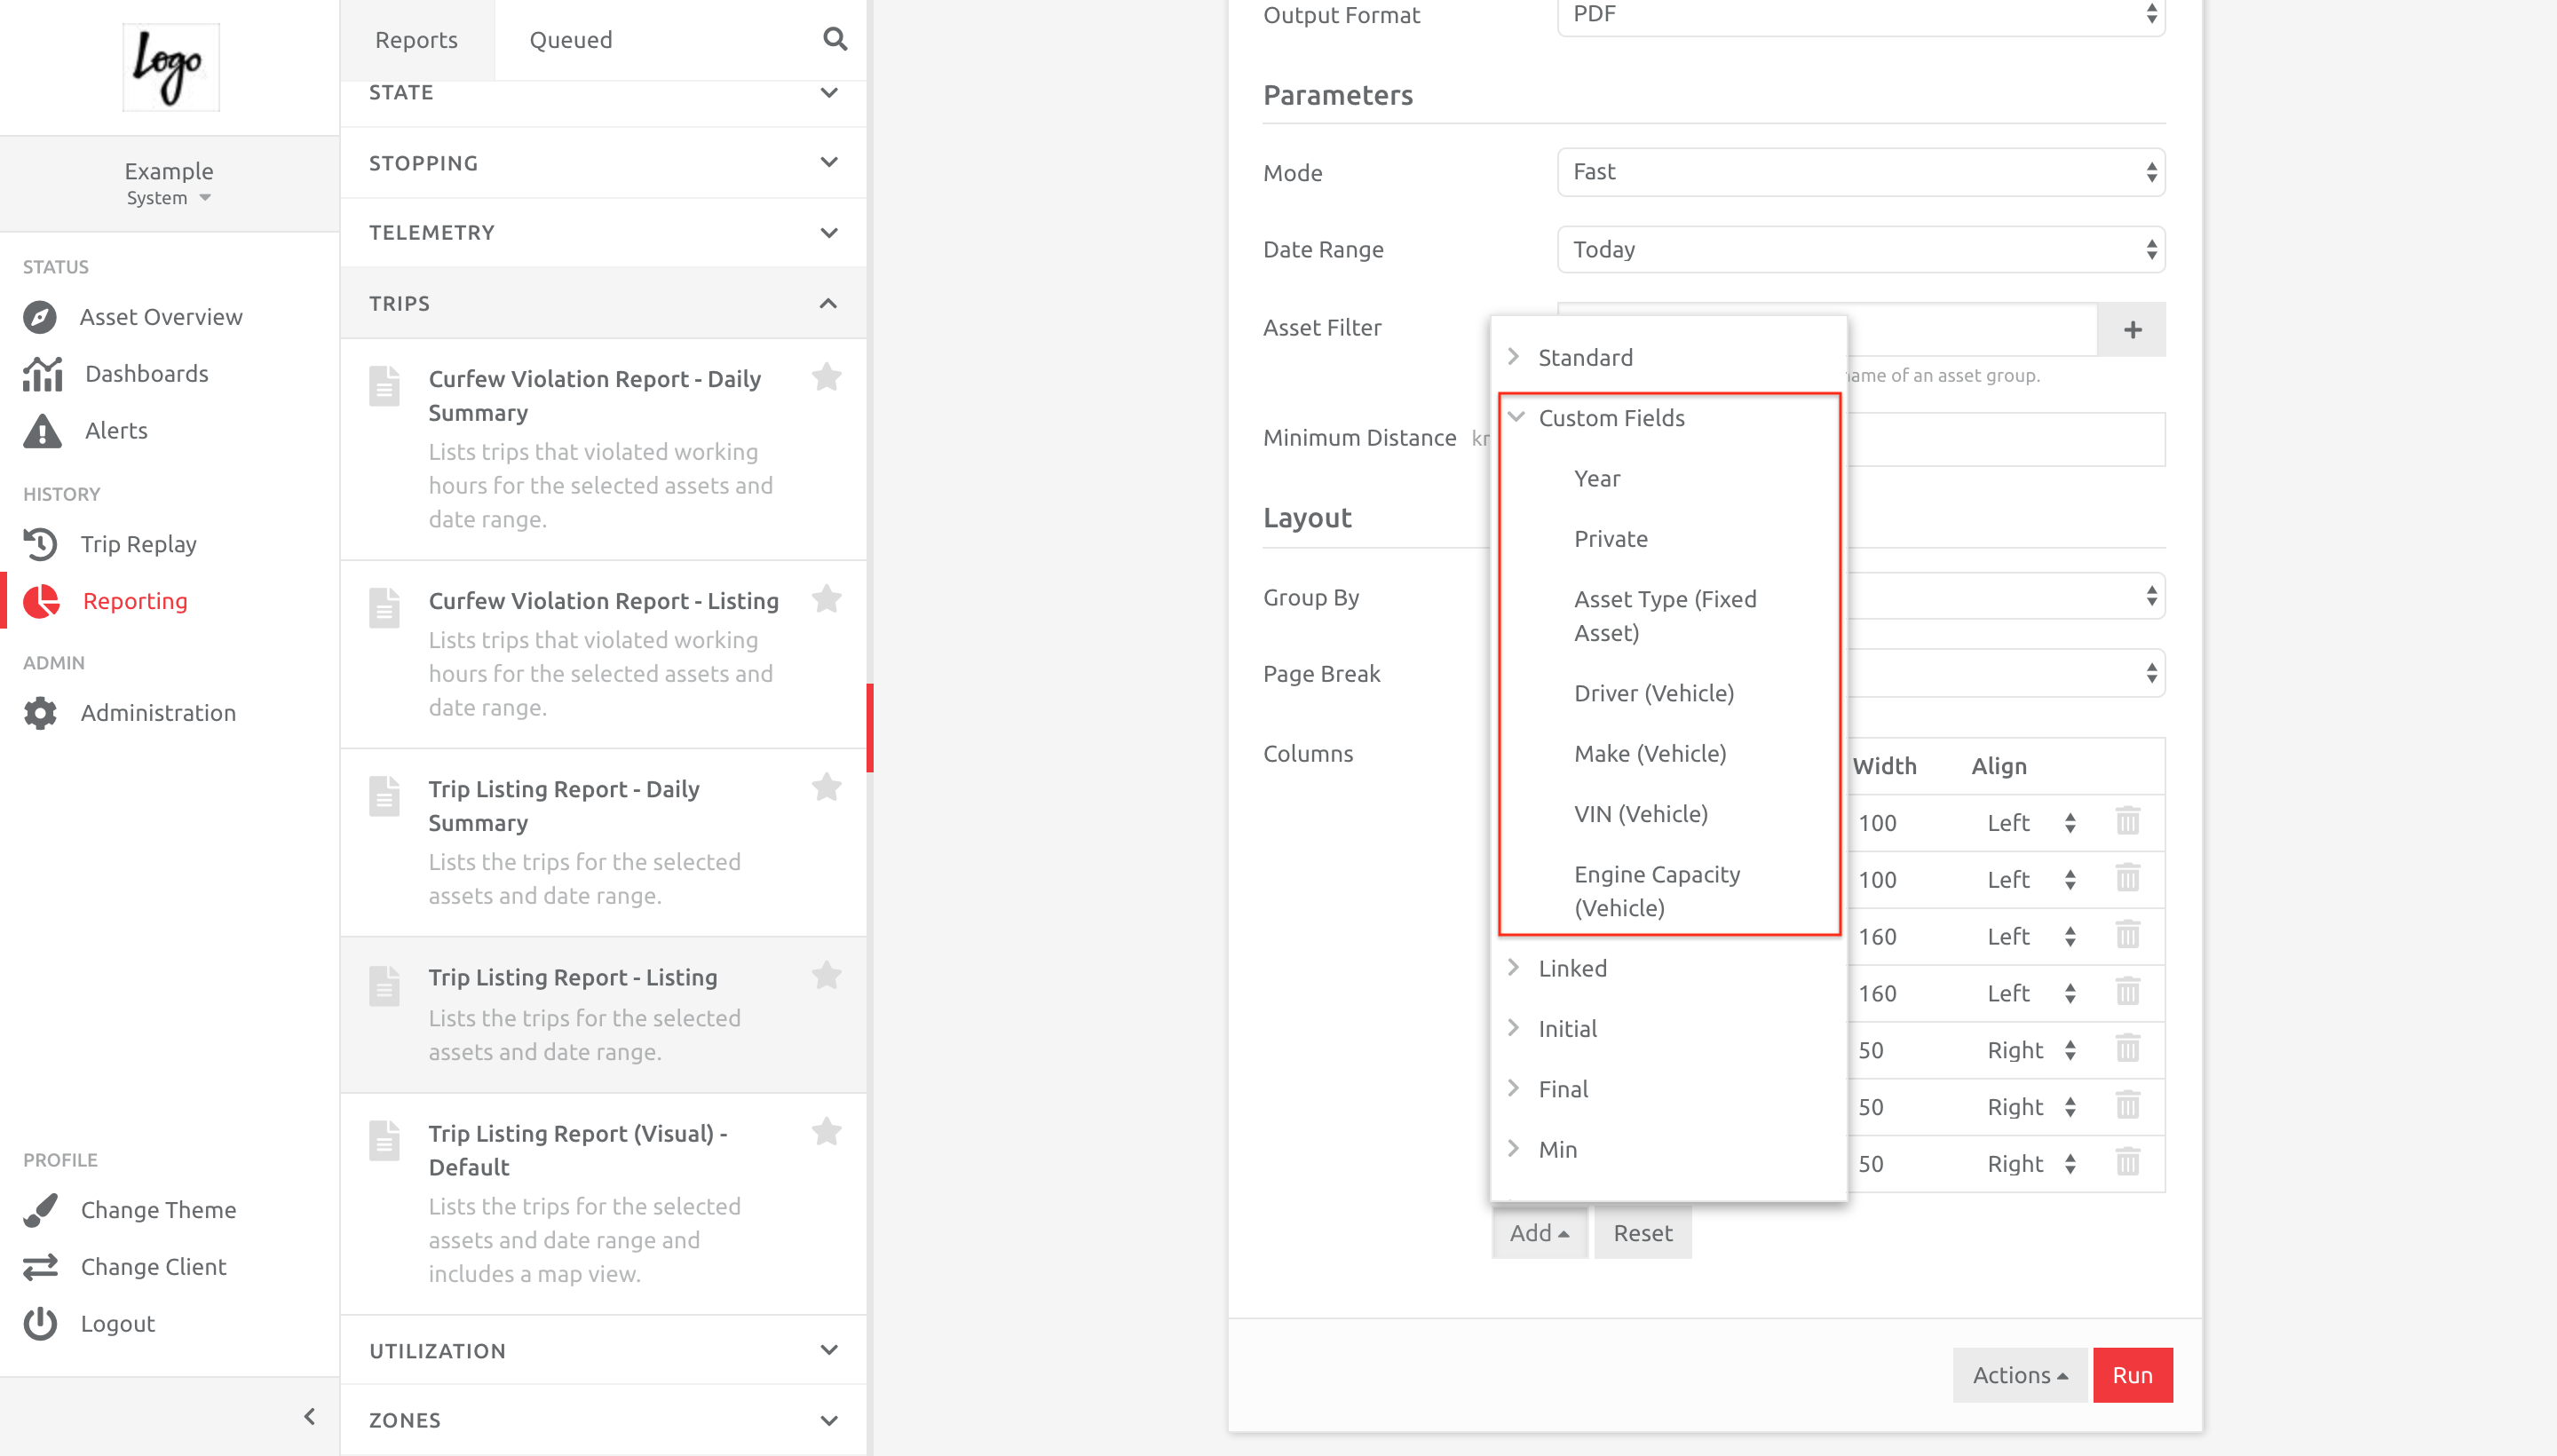
Reporting
Certain reports include the option of including Custom Field information in their layout. Choose the information you would like to add to the report. Below is an example of the Trip Listing Report, and where to find the option:
Filtering Items by Custom Fields Information
You can filter items by the Custom Fields headings. This is useful if you have many items, and the same information across multiple items. To filter items by Custom Fields,
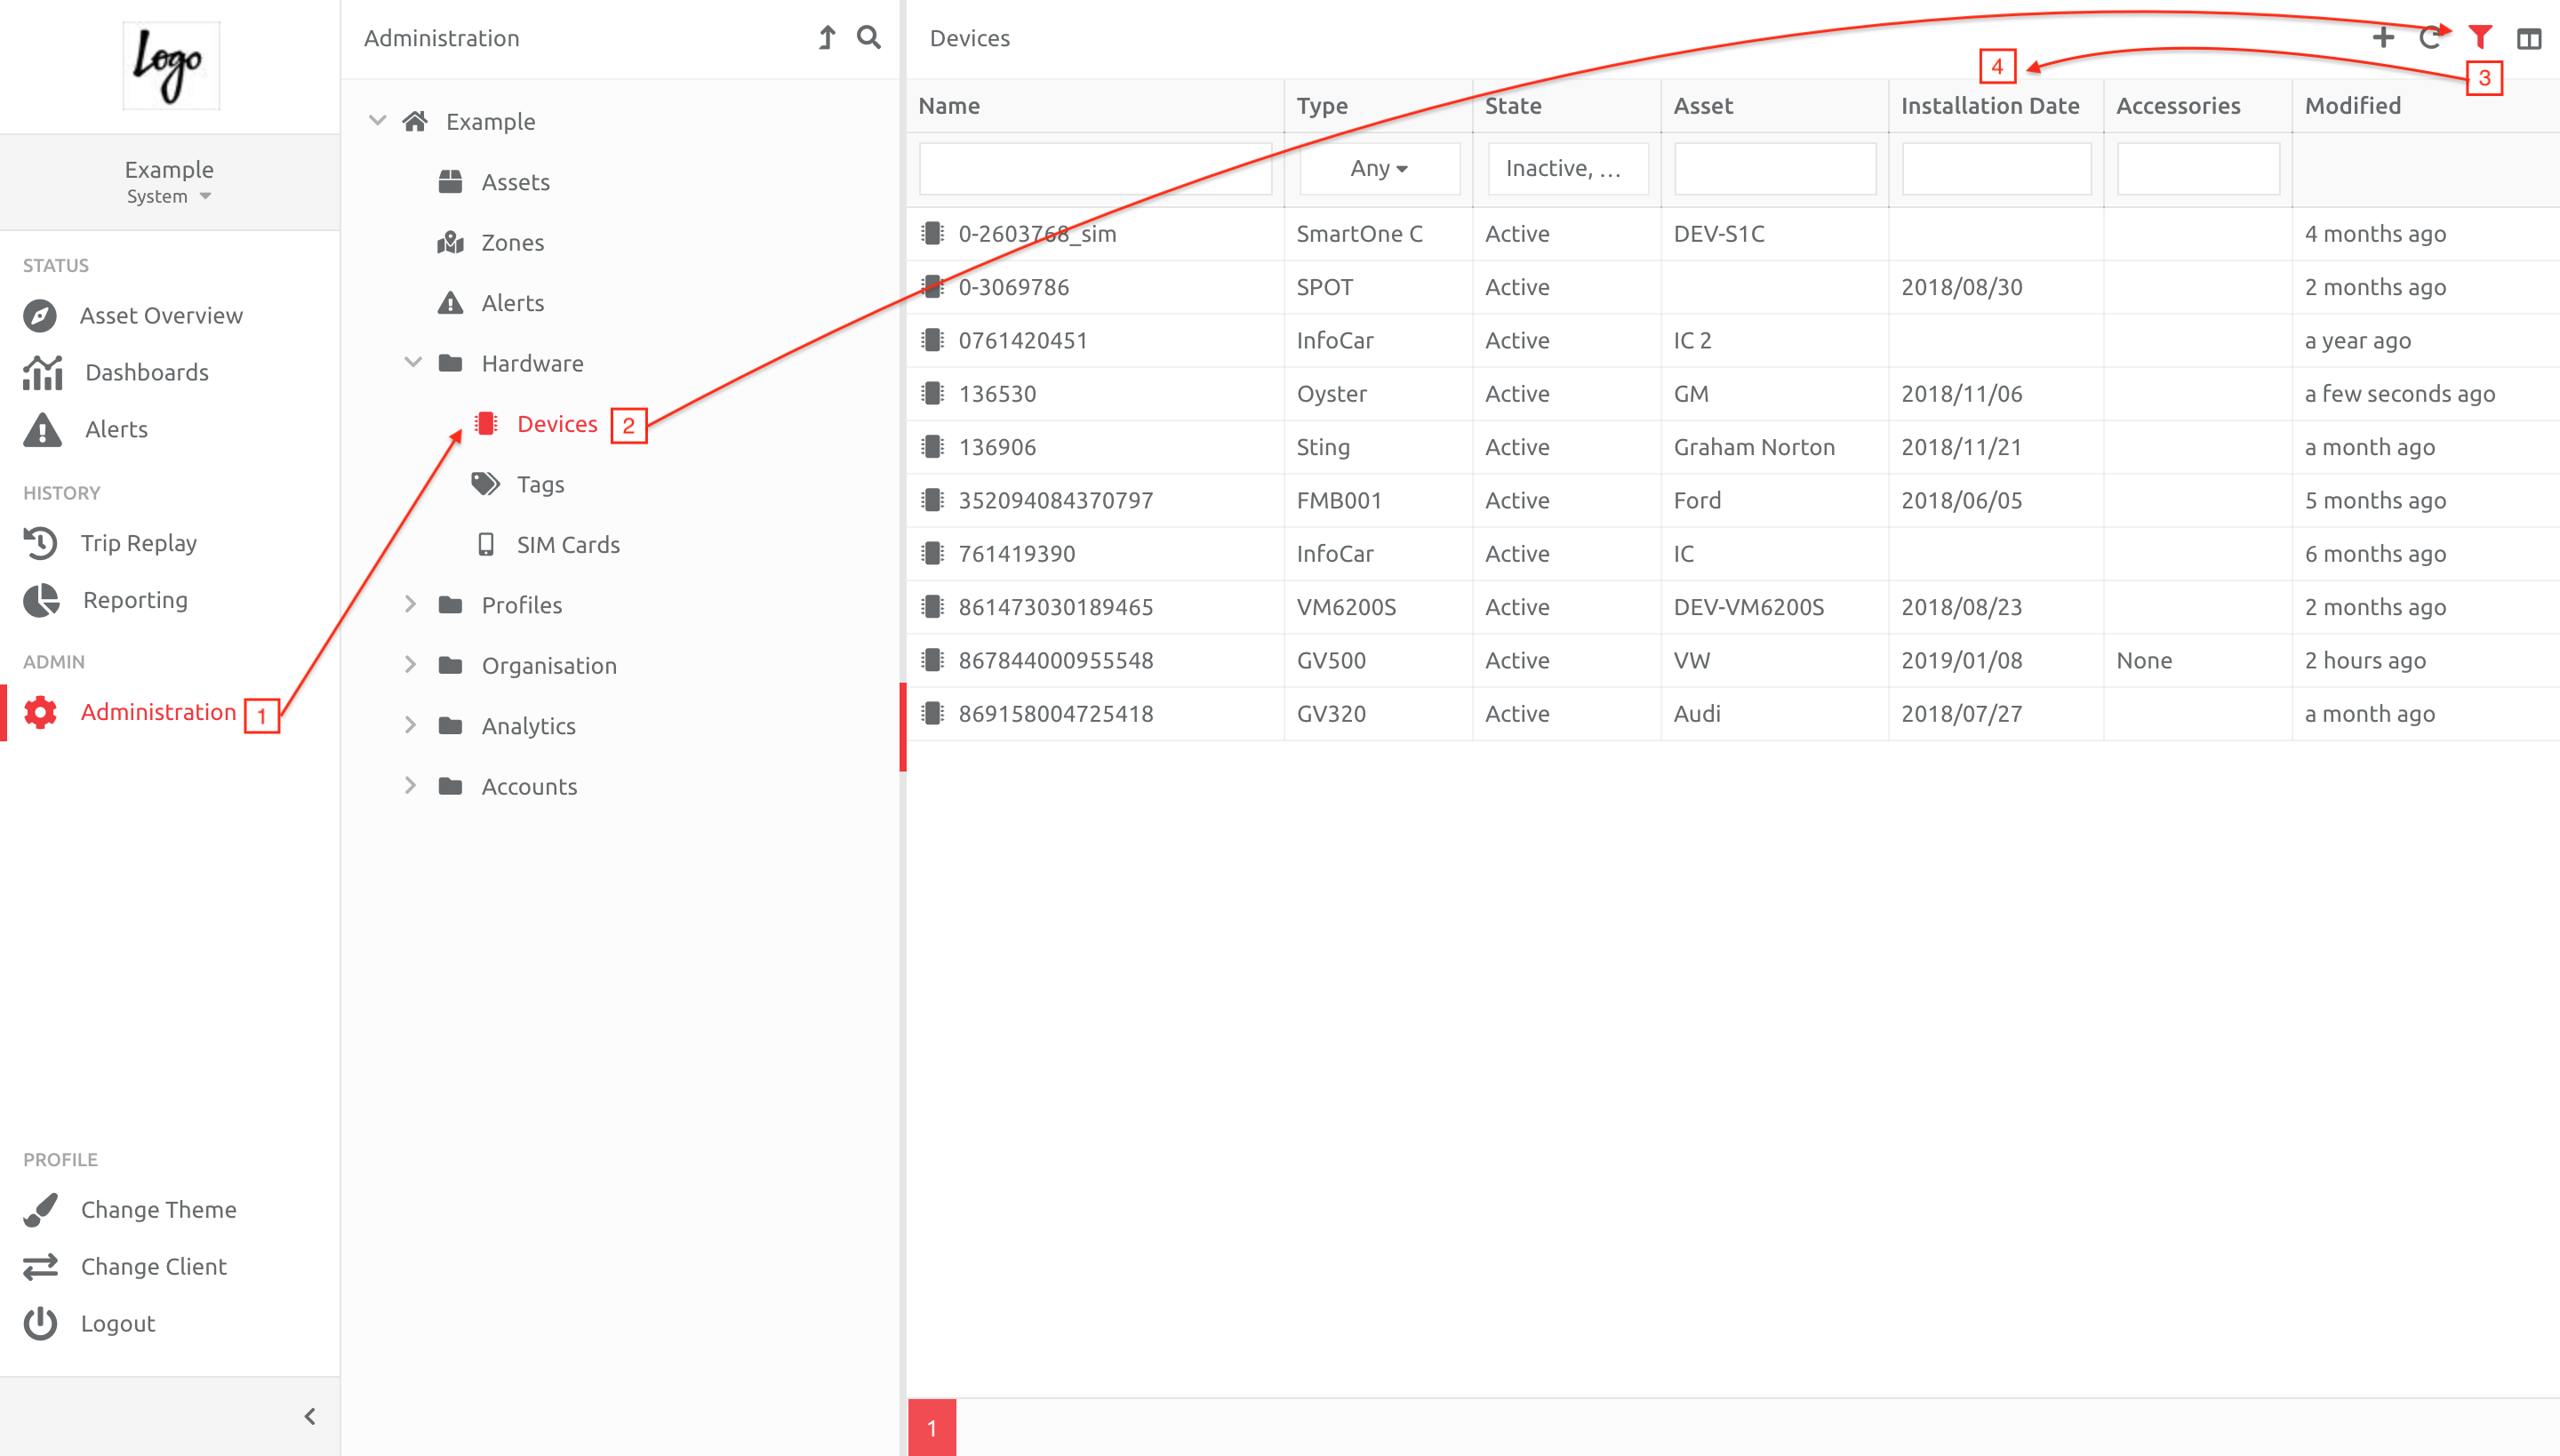
1. Go to Administration,
2. Choose the item you would like to search,
3. Click the Filter button,
4. Enter the information in the text box under the heading. The filter will automatically update the items.
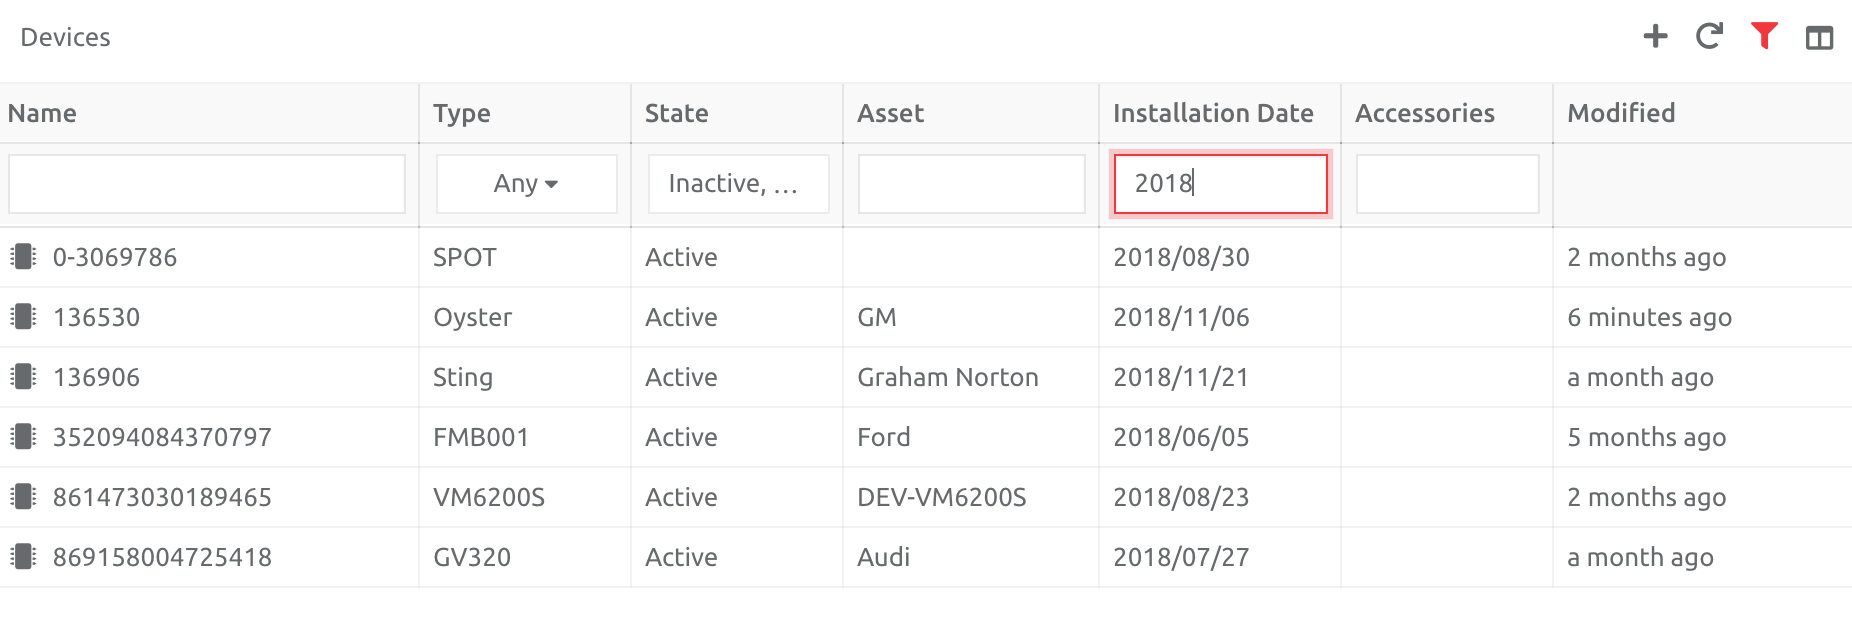
In this example, we have searched for all Devices installed in 2018:
Comments
0 comments
Please sign in to leave a comment.