Introduction
The Administration section of the software is where all items are created and edited. The way to create and edit items is consistent, and follows an intuitive process. Specific icons manage specific functions.
For a full list of the icons in the Administration section, and what they represent, please follow this link.
Creating Items
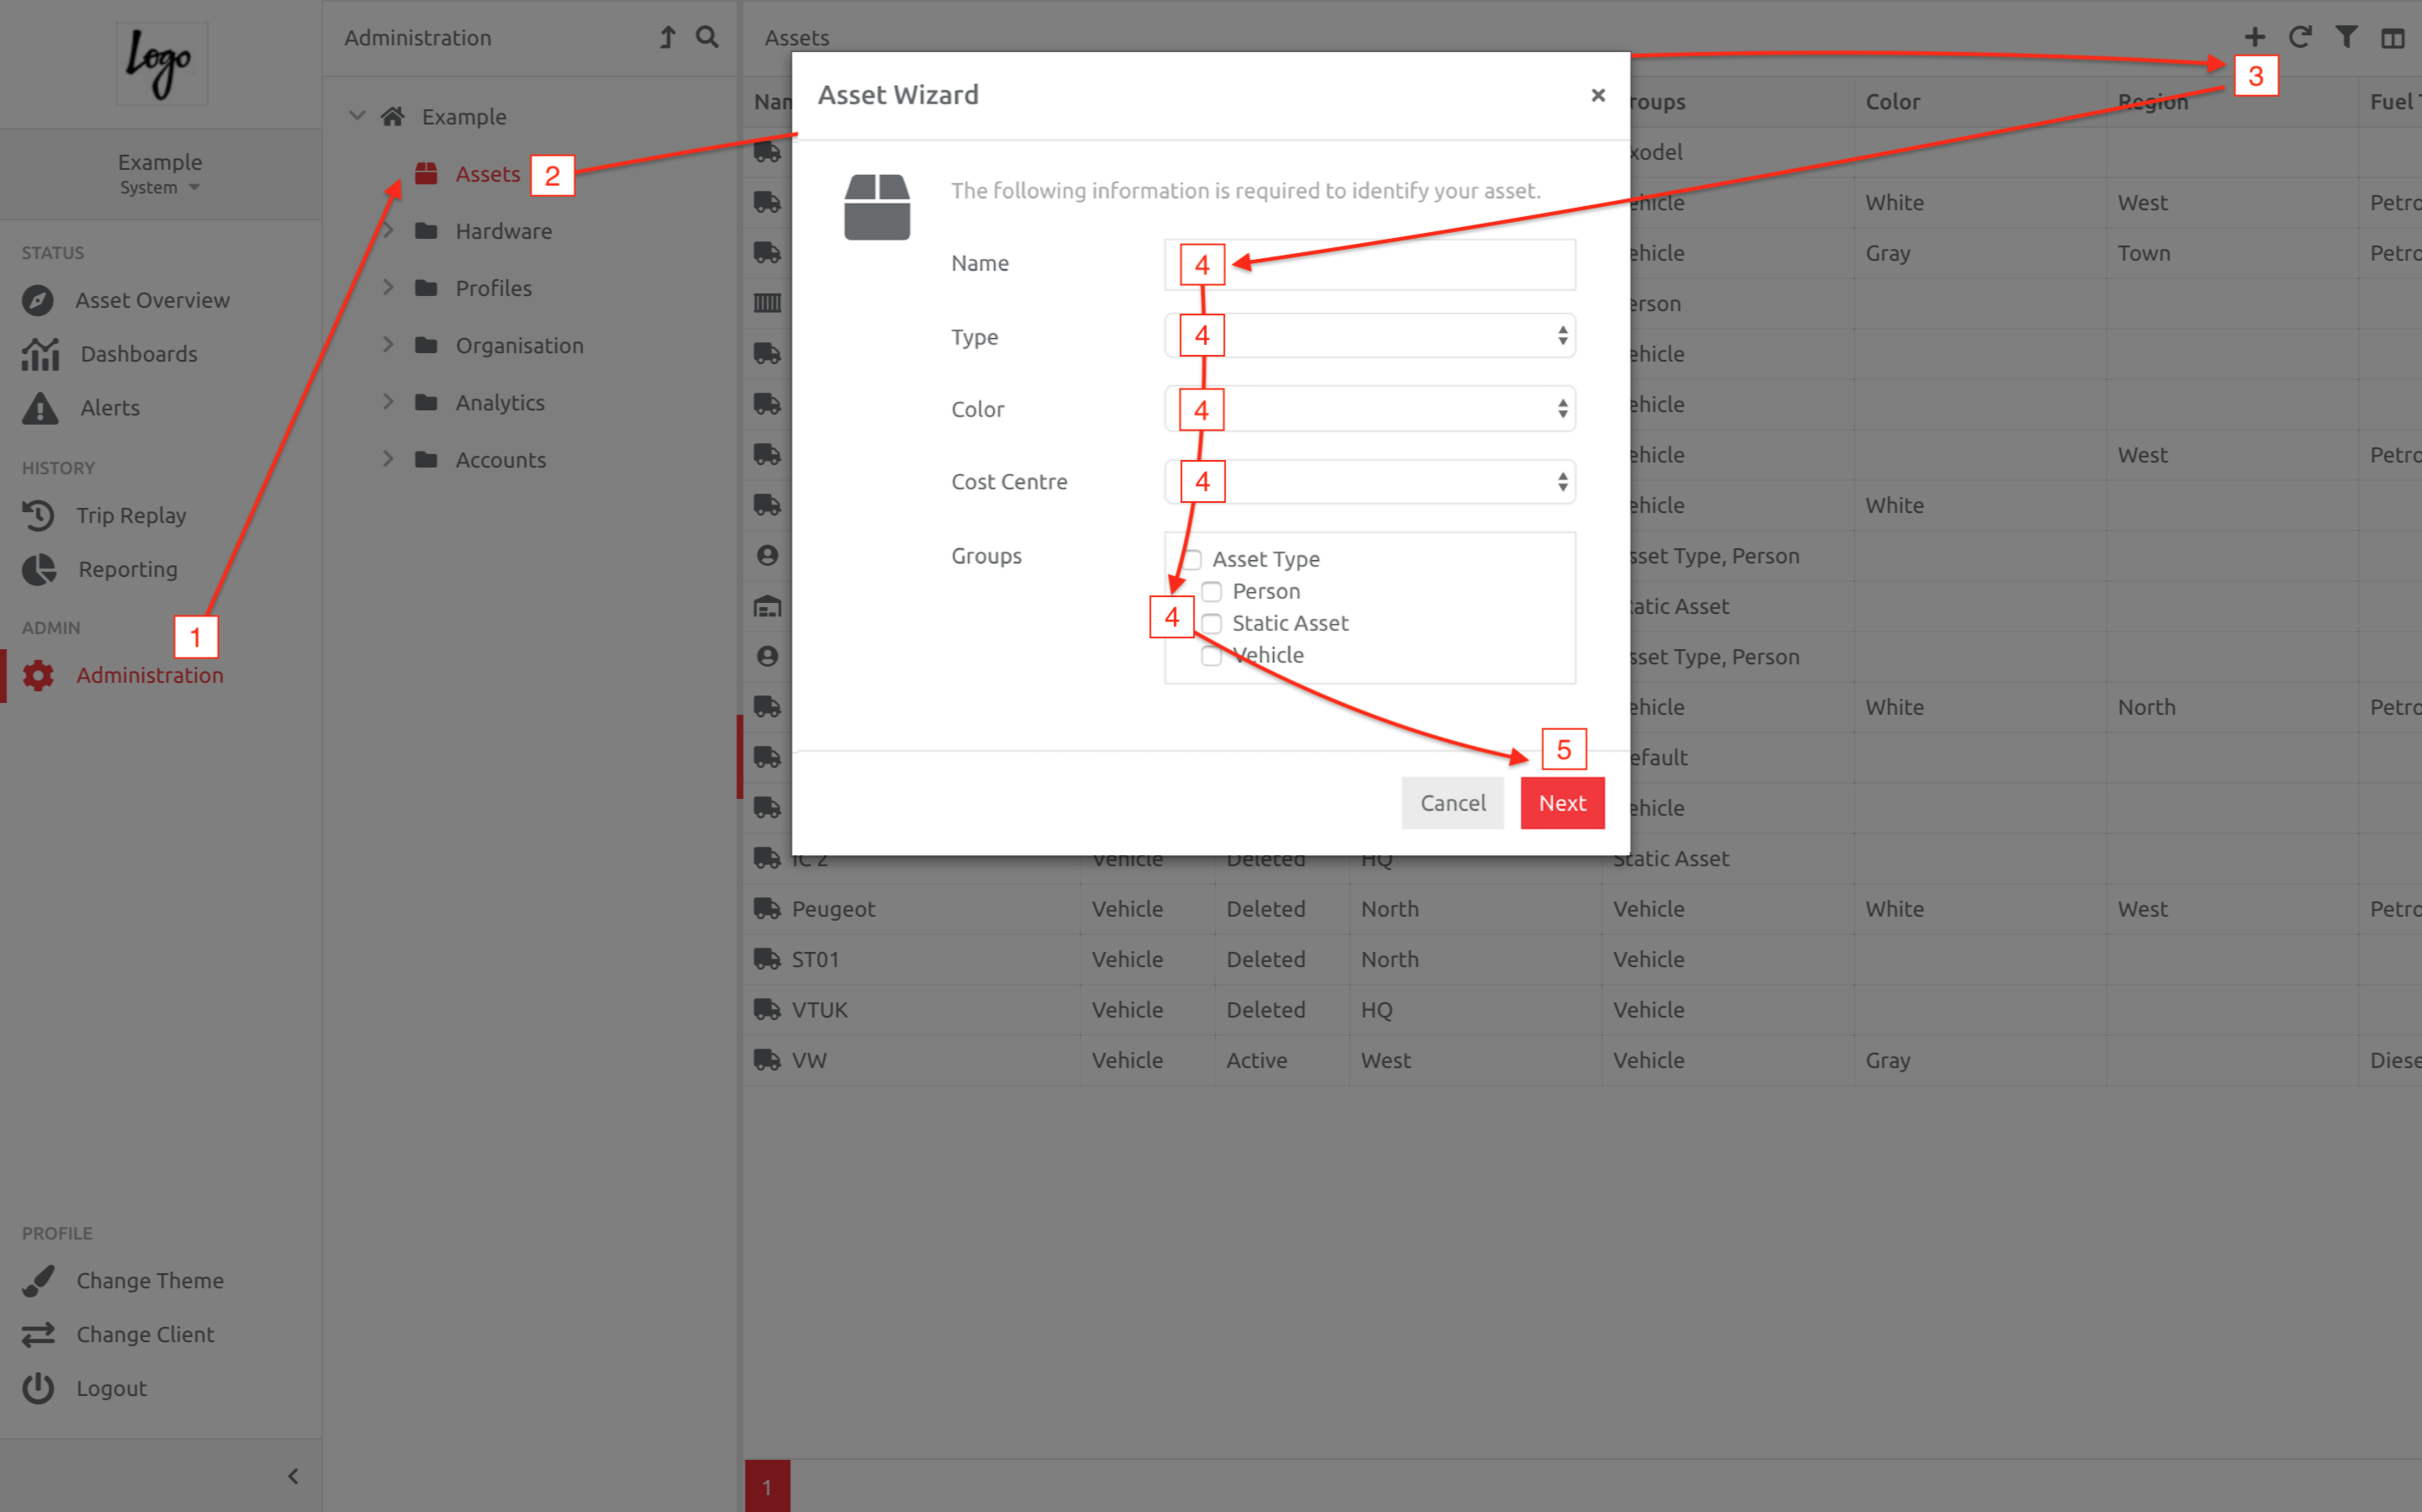
To create items, navigate to Administration, choose the Item you would like to create, click the Plus button, and follow the steps in the Wizard. In the example below, the steps to create an Asset are shown. These steps apply to any items in the platform:
1. Go to Administration,
2. Choose the Item type you would like to create,
3. Click the Plus button,
4. Enter the information in the Wizard,
5. Click Next, enter the information required on the next screens, until you reach the Finish button.
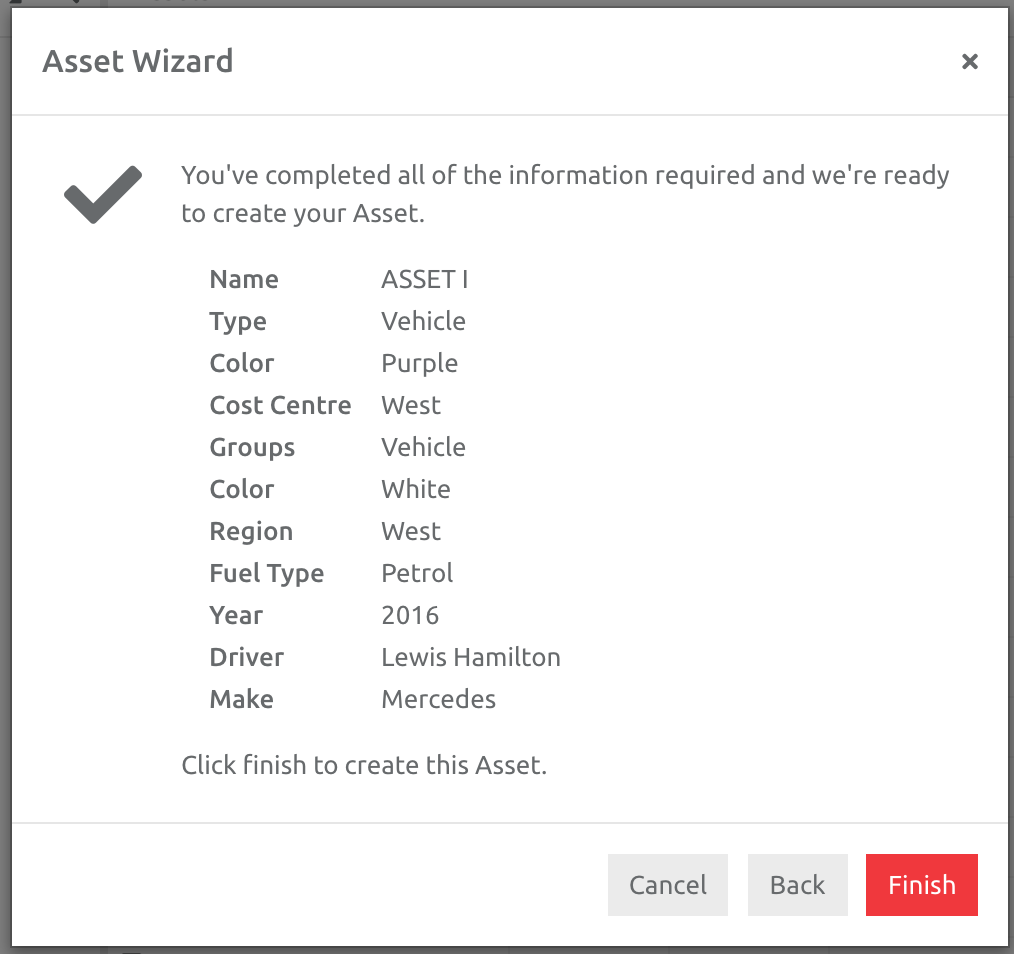
A summary of the information entered will appear on the screen. Make sure it is correct before choosing Finish. Otherwise go Back and edit the information as required.
You can now edit the information on the specific Item created, either as a singular item (see below) or for multiple items (see this article). You can edit multiple items when there is common information, settings, events, inputs etc, applied to all the items.
Editing Items
To edit items, navigate to Administration, choose the Item in the list of items for editing, and a set of menus opens on the right of the screen. These can be edited as needed. These steps apply to any items in the platform:
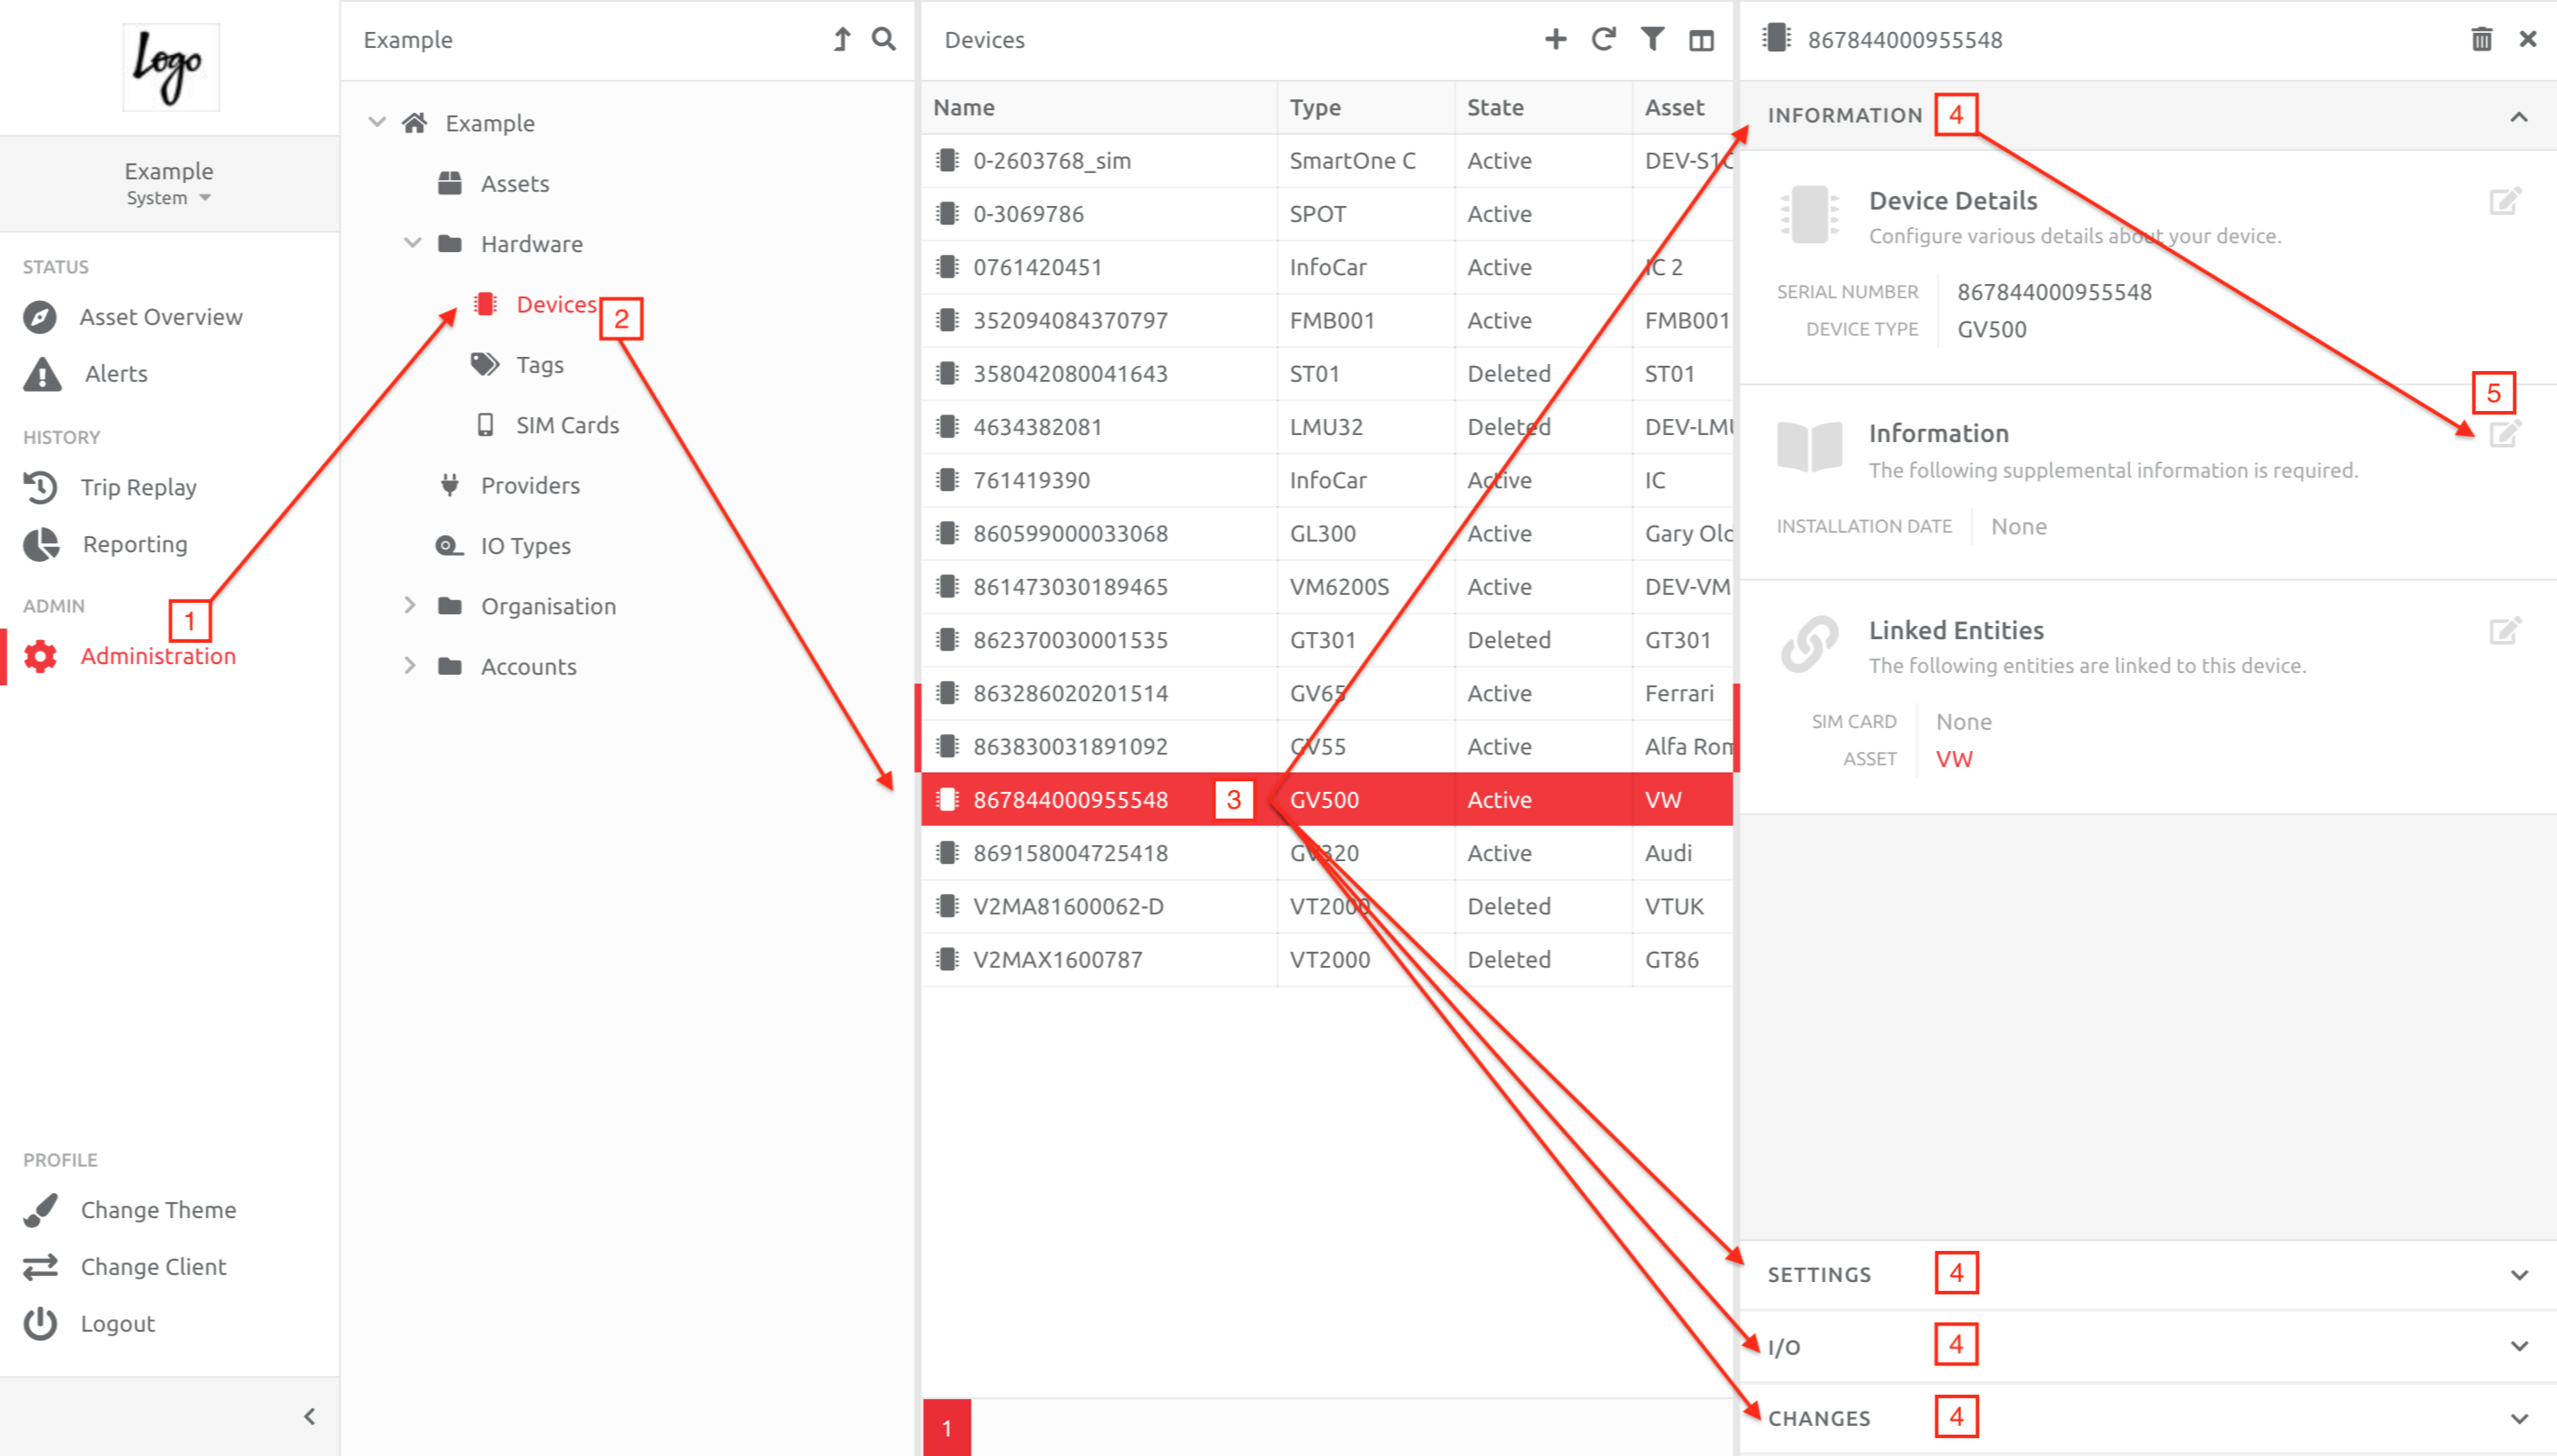
1. Go to Administration,
2. Choose the Item type you would like to edit,
3. Choose the specific item in the list,
4. Choose the menu on the right you would like to edit,
5. Click Edit, enter the information required, then click Save to complete editing, as per below.
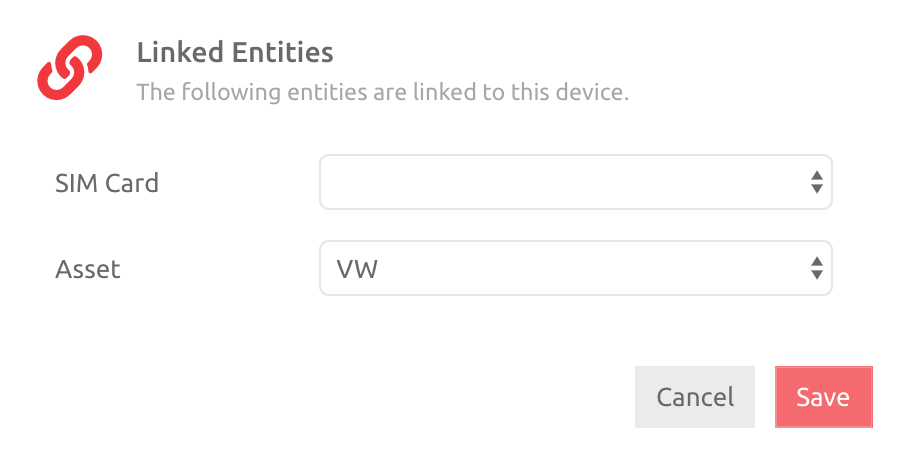
Repeat the above process for the different menus as needed.
Comments
0 comments
Please sign in to leave a comment.